Review of nanoblock Galar Ponyta NBPM_067

Galar Ponyta build with box

This post is a review of the nanoblock Galar Ponyta build. Galar Ponyta is part of the nanoblock Pokemon collection. Wondering what else is part of the Pokemon Collection? Click Here for a list.

Number: NBPM_067

Number of Pieces: 200

Difficulty Rating: 3/5

Galar Ponyta 3/4 front right view

Ponyta is a pokemon that was initially introduced in generation 1. In generation 1, it is a fire-type Pokemon. However, this isn’t the build for the generation 1 Pokemon; this build is for the generation 8 psychic-type Ponyta. The psychic type is a unicorn with fluffy pink and turquoise hair.

The build is slightly different because many smaller chunks need to be built and added on. First, you start with the usual base, and from the second step, you create exterior pieces connected to the base. Then you build the majority of the tail and attach it. Then you build up the rest of the body in regular layers.

Galar Ponyta 3/4 right back view

Next, it’s time to make the head by layering from the bottom of the head to the top. Next, you flip the build over and add details for the mane and tail. Finally, you add the legs, complete with details.

Overall I think that this is an adorable build. I really like the colors they picked and how the mane and tail look soft and changing color. There were a lot of bits where if you don’t get things just so, then the build wouldn’t line up.

Galar Ponyta front left view

Things I liked:

  • The colors that were used for this build

Review of nanoblock Galar Farfetch’d NBPM_066

Galar Farfetch'd build and box

This post is a review of the nanoblock Galar Farfetch’d build. Galar Farfetch’d is part of the nanoblock Pokemon collection. Wondering what else is part of the Pokemon Collection? Click Here for a list.

Names:

  • English: Farfetch’d
  • Japanese: Kamonagi

Number: NBPM_066

Number of Pieces: 190

Difficulty Rating: 2/5

Galar Farfetch'd 3/4 front right view

Farfetch’d is a pokemon that looks like a little brown duck. It is known to always to be carrying a leek and was introduced in generation 1. Farfetch’d is one of the few Pokemon to have multiple forms turned into nanoblock. This review is for the Galar variant of Farfetch’d, a Fighting-type and introduced in generation 8. To read my review of the generation 1, Farfetch’d click here.

Galar Farfetch'd back 3/4 left view

I think that getting between steps 1 and 2 may be the trickiest part of the entire build. You start with a base of 2 bricks and then add 8 bricks in step two. Since you can’t really see how the second layer connects, making sure everything is lined up can be tricky. After completing step 2, the build is very straightforward, building up layers like a nor nanoblocks build. You’ll want to be careful with the wing holding the leek as you create the body because there is more detail on that side. Continue building up layers until you close up the ducks head. Once you have completed the duck, you need to add the detail to the top of the leek. The leek is straightforward and will sit on the table, not hanging.

Overall I enjoyed the Farfetch’d build. The darker brown is too dark for the actual Pokemon, but I do like the color.

Galar Farfetch'd front 3/4 left view

Things I liked:

  • The giant leek

Things I didn’t like:

  • I had some difficulties getting the details of the leek to line up

Link to order:

Review of nanoblock Farfetch’d NBPM_013

Farfetch'd build and package

This post is a review of the nanoblock Farfetch’d build. Farfetch’d is part of the nanoblock Pokemon collection. Wondering what else is part of the Pokemon Collection? Click Here for a list.

Names:

  • English: Farfetch’d
  • Japanese: Kamonegi

Number: NBPM_013

Number of Pieces: 160

Difficulty Rating: 3/5

Farfetch'd front view

Farfetch’d is a pokemon that looks like a little brown duck. It is known to always to be carrying a leek and was introduced in generation 1. Farfetch’d is one of the few pokemon to have multiple forms turned into nanoblock. This review is for the original normal/flying introduced in gen 1, not the fighting type from gen 8.

Farfetch’d like many pokemon builds; there are 2 builds the head and the body.

For the head, it is generally pretty straightforward; however, getting the second layer attached can be a bit tricky. There is a 360-degree overhang between the layers which means there isn’t a place to line up the layer. Other than the top layer, the rest of the head is simple.

Farfetch'd left side

Like the head, the base of the body is also tricky. Again, the bottom layer is much smaller than the second layer. However, the directions are very clear, so it is easy to know things are right. Once you get the bottom couple of layers built, it is a fairly straightforward build.

Overall I really enjoyed the build and think the final model is cute. I agree that it should be a level 3 build even though the final product looks super simple.

Farfetch'd 3/4 back view

Things I liked:

  • I think his leek is cute

Things I didn’t like:

  • The first direction for the head is hard to read and line up

Review of nanoblock Scorbunny NBPM_060

Scorbunny build and box

This post is a review of the nanoblock Scorbunny build. This build is part of the nanoblock Pokemon collection. Wondering what else is part of the Pokemon Collection? Click Here for a list.

Number: NBPM_060

Number of Pieces: 180

Difficulty Rating: 2/5

Scorbunny front view

Scorbunny is the fire-type starter from generation 8. Scorbunny has orange ear tips in the games, which are very different from the maroon in the model.

As to the build, there are the body and head to build. In an unusual style for nanoblock, it is hard to tell the difference between what gets added in the current step and what was there in the step before. I think this is so much of Scorbunny is white. If you can keep the layers apart, it is pretty easy to build both the body and the head. I was worried that the model would have difficulty standing on his feet because his head was so large. I was pleasantly surprised to find that he could stand just fine. The colors don’t look right to me, and I find Scorbunny highly muted.

Scorbunny 3/4 back

Things I liked:

  • He manages to stand on his feet

Things I didn’t like:

  • The coloring is all wrong for Scorbunny

Link to order: Amazon

Review of nanoblock Grookey NBPM_059

Grookey build and box

This post is a review of the nanoblock Grookey build. Grookey is part of the nanoblock Pokemon collection. Wondering what else is part of the Pokemon Collection? Click Here for a list.

Number: NBPM_059

Number of Pieces: 190

Difficulty Rating: 2/5

Grookey front view

Grookey is the grass starter from generation 8. It’s known for poking things which shouldn’t be much of a surprise because its final evolution is a drummer.

The build is broken up into 2 builds the body and the head. It is hard to tell the difference between the brown and golden brown in the directions. The body is a straightforward build that is built up by adding layers of bricks to create a hunched-over body. It can be a bit tippy when it’s done if you don’t attach the base feet quick enough. The head is an average sphere build where you start with a base and build around the outside and eventually close up the sphere. Then you add Grookey’s branch and top fur.
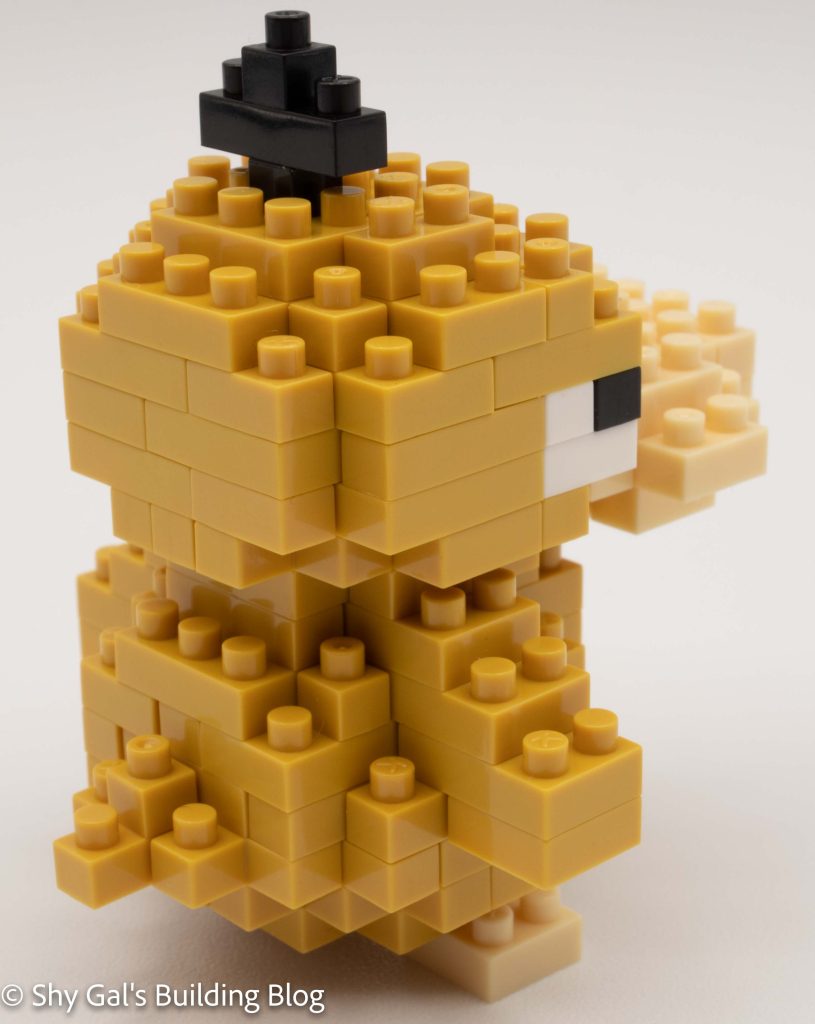
Overall I really like the build, and I feel that Grookey is highly recognizable. I think that the colors match the pokemon overall very well.

Grookey back 3/4

Things I liked:

  • The coloring for the whole build

Things I didn’t like:

  • Fighting to perfectly line up the tail

Review of nanoblock Rayquaza NBPM_064

Rayquaza build and box

This post is a review of the nanoblock Rayquaza build. Rayquaza is part of the nanoblock Pokemon collection. Wondering what else is part of the Pokemon Collection? Click Here for a list.

Number: NBPM_064

Number of Pieces: 240

Difficulty Rating: 3/5

Rayquaza front view

Rayquaza is one of the 3 legendary Pokemon from generation 3. The 3 legendary pokemon from generation 3 are extremely popular and have appeared in most games since gen 3. The three legendary Pokemon, Kyogre, Groudon, and Rayquaza, all remind me a little bit of the traditional art of the Native Americans of the Pacific Northwest with how their lines are drawn and the use of rings.

Rayquaza back view

In my opinion, this build should be a 4/5, not a 3/5, because of how tricky it is to get everything up. Rayquaza is a very long narrow Pokemon, more like a snake than anything else. Things are different from an average Pokemon build from the beginning because the base is in the shape of an L instead of a square or rectangle. As you build up from the bottom, you constantly have one or 2 studs hanging over. Next, you build another chain of brick similar to the base. Then you add the chunk of the body that is straight up and down to hold the head. This includes adding the arms that are chains connected by single studs. The final step is to add the head. The head is a much more straightforward build than getting the body together. You then connect the body to the base and have completed Rayquaza.

Rayquaza is a highly detailed Pokemon; generally, it is green with red and yellow markings. I really like how the build includes those details. The build is more complicated than many of the level 3s I have completed because of the balancing act of creating the build.

Rayquaza side view

Things I liked:

  • The amount of detail in the final build from the use of color

Things I didn’t like:

  • The final build feels flimsy, so I’m always nervous about moving it.

Link to order:

Review of nanoblock Pikachu Deluxe Edition NBPM_036

Pikachu Deluxe Edition build and box

This post is a review of the nanoblock Pikachu Deluxe Edition build. This build is part of the nanoblock Pokemon collection. Wondering what else is part of the Pokemon Collection? Click Here for a list.

Number: NBPM_036

Number of Pieces: 560

Difficulty Rating: 3/5

Pikachu Deluxe Edition front view

Deluxe Pikachu was the first deluxe Pokemon kit. I love my giant Pikachu, and he usually sits ready to stomp on one of my Lego cityscapes.

Pikachu Deluxe Edition side view

Deluxe Pikachu is similar to normal Pikachu (NBPM_001), but it uses much larger bricks. The largest brick is 2 X 8, which is larger than anything in most non-deluxe Pokemon sets. Overall, Deluxe Pikachu starts with a solid base and builds up in layers from the bottom up. Bricks of various colors create the stripes and the cheeks. I find that the most challenging part of Pikachu, and the thing I keep fixing, is his tail. The tail itself stays together without a problem. The problem is that the tail doesn’t want to remain attached to the 2×2 brick it is supposed to stay on.

Overall I really like Deluxe Pikachu. I think he looks super cute, especially for where nanoblocks were at the time. Based on the other Pokemon kits that came out at similar times to when Deluxe Pikachu was released, the slanted blocks didn’t really exist, so Pikachu had no choice but to be blocky. If the kit came out today, I could see Pikachu being more curved.

Pikachu Deluxe Edition back view

Things I liked:

  • I just like the giant Pikachu

Things I didn’t like:

  • I wish it was less blocky overall

Review of nanoblock Venusaur NBPM_018

Venusaur build and package

This post is a review of the nanoblock Venusaur build. Venusaur is part of the nanoblock Pokemon collection. Wondering what else is part of the Pokemon Collection? Click Here for a list.

Number: NBPM_018

Number of Pieces: 160

Difficulty Rating: 2/5

Venusaur 3/4 front view

Venusaur is the 3rd evolution of Bulbasaur. At first glance, the build is more involved than the Bulbasaur build because of the detail in the flower on Venusaur’s back.

Venusaur flower detail

Overall I feel like this should be a 3/5 build since it is more challenging than most of the other 2/5s I have done. Overall there were 2 parts of the build I found difficult. In both of these spots, you build smaller pieces and connect them using a couple of single studs. The first step was difficult because of the size of the base and getting everything lined up. This was before I bought my pad so getting things lined up was a little challenging.

Venusaur back 3/4 view

I liked how Venusaur turned out overall. He is super recognizable, which is excellent, and I liked how it worked and looked once I got it built.

Things I liked:

  • The detail in the flower
  • How the flower appears to float above Venusaur

Link to order: Amazon

Review of nanoblock Sylveon NBPM_073

Sylveon build and package

This post is a review of the nanoblock Sylveon build. Sylveon is part of the nanoblock Pokemon collection. Wondering what else is part of the Pokemon Collection? Click Here for a list.

Names:

  • English: Sylveon
  • Japanese: Nymphia

Number: NBPM_073

Number of Pieces: 170

Difficulty Rating: 3/5

Sylveon front 3/4 view

As of this posting, nanoblock has released kits for all 9 eeveelutions. The builds have gotten more detailed as time has passed, so the first 3 builds are a bit simpler. I find that all the kits are recognizable for the pokemon they are supposed to be. Sylveon is the fairy type of eeveelution from generation 6. Sylveon is a white pokemon with ribbons with pink and blue tips.

After completing all 9 eeveelutions I had the most trouble with Sylveon due to a couple hanging bricks not wanting to stay in place.

This nanoblock build begins with a base of white bricks. You then build up a few layers of white and add the pink details. To finish off the body, you need to add a simple tail.

Next, you build the head. In general, the head is pretty straightforward other than the fact it isn’t symmetrical. The head begins with a white base like the body. You then add layers of bricks that add the details for the nose and eyes. After adding several layers, you add a stack of bricks to form the end of one of Sylveon’s ribbons. There are the bricks I had a hard time keeping attached for the rest of the build. Once you add on the stack of bricks, you continue adding the ears and the ribbons in white, pink, and blue bricks. Once the head is completed, you attach the head to the body.

The final steps are to add the final details. You add feet and the ends of more ribbons.

Overall I got frustrated with the build. While the directions were easy to follow, I had difficulty getting some of the bricks to stay connected. This can be a common problem with nanoblocks if bricks are only held up by a single stud.

Sylveon back 3/4 view

Things I liked:

  • I love the amount of detail in the build

Things I didn’t like:

  • I had a hard time getting the bricks at the end of the head ribbon to hold.

Review of nanoblock Glaceon NBPM_072

Glaceon build and package

This post is a review of the nanoblock Glaceon build. Glaceon is part of the nanoblock Pokemon collection. Wondering what else is part of the Pokemon Collection? Click Here for a list.

Names:

  • English: Glaceon
  • Japanese: Glacia

Number: NBPM_072

Number of Pieces: 160

Difficulty Rating: 2/5

Glaceon front 3/4 view

As of this posting, nanoblock has released kits for all 9 eeveelutions. The builds have gotten more detailed as time has passed, so the first 3 builds are a bit simpler. I find that all the kits are recognizable for the pokemon they are supposed to be. Glaceon is the grass type of eeveelution from generation 4. Glaceon has various shades of blue with triangular ear decorations and tail.

This nanoblock build is made of 3 blues, there is a navy, a pastel, and a cerulean blue. You begin the build by making a base. You build up the body in layers of blue bricks. Once you have built the body, you add the triangular tail.

The next step is to build the head. You begin creating a base of all three blues. Next, you build up the head in layers using the various shades of blue. Framing the main pastel blue of the head you add the details for the rest of the face. I really liked how they used the cerulean to frame and create the top of the head. Once you finish the head you attach it to the body.

The final step is to add the details. First, you attach the triangular ear decorations to the head. Then you attach the feet and you have a completed build.

Overall I really did enjoy the build. I really liked the amount of detail they put into the build.

Glaceon back 3/4 view

Things I liked:

  • The creation of the ear details

Things I didn’t like:

  • It took a long time for the head to be solid and not falling apart