Review of nanoblock Grand Piano NBC_017

Grand Piano build and package

This post is a review of the nanoblock Grand Piano build. Grand Piano is part of the nanoblock Mini Collection series. Wondering what else is part of the Mini Collection? Click here for a list.

Number: NBC_017

Number of Pieces: 150

Difficulty Rating: 2

Grand Piano build front view

The build begins with creating the main body of the piano. It is a simple 3 layers of bricks that can easily be built on the nanoblock pad.

Next, the legs are added. It is a little hard to see where exactly to connect the bricks to the main body. Getting things lined up is important because the main piano can be connected to a 10×10 base that is provided with the kit.
Grand Piano build front 3/4 view

The next part is the trickiest part of the build. It is building the piano cover. It is tricky because it isn’t actually connected to the main body of the piano. The large section can be built on the nanoblock pad. It was straightforward, but getting a clean line at the edge of the top section was a bit tricky. The top section lays at angles on the top of the piano. It creates the image that the Grand Piano is open.
Grand Piano bench detail

The final step is to build the stool for the piano. It is very straightforward.

Grand Piano build back 3/4 view

Things I liked:

  • I like how the piano appears to be open even though it is created by just laying a section on top of another section
Things I didn’t like:

  • I don’t like how there is a base for the piano but not the stool, so the matching set is at different heights

Review of nanoblock Cockatiel NBC_009

Cockatiel build and package

This post is a review of the nanoblock Moltres build. Moltres is part of the nanoblock Pokemon collection. Wondering what else is part of the Pokemon collection? Click here for a list.

Number: NBC_009

Number of Pieces: 90

Difficulty Rating: 1

Cockatiel build front view

This was a kit that I bought used, knowing I would get the bricks and instructions. However, due to their age and used nature, the white bricks are a bit discolored. The slight yellowing of the white bricks can be seen in some of the photos.
Cockatiel build side view
This kit is unusual for an NBC kit compared to the other kits I have purchased. The instructions are completely in Japanese. For most other kits I have bought, the colors are at least in English. I think that this could be one of the original kits from one of the early production runs.

I know some Japanese from school, and there is a photo on the package, so I worked to build the kit and was able to match the colors to be able to build the Cockatiel.

The build begins with a base layer of white bricks. I built the layers using my nanoblock pad. The main body of the bird is white.

The body narrows to create a head. At this point, the head changes to yellow with additional colors to create details.

At this point, the build is flipped upside down, and the legs and feet are added to finish the build. The Cockatiel came with a 10×10 display stand that holds the finished bird.

Cockatiel build back view

Things I liked:

  • It was a nice, simple build, and a cute little bird model was created. There is also a nice amount of detail, considering how low of an NBC number it has.

Things I didn’t like:

  • Reading the Japanese was a bit hard, but again, I think it’s because I got such an early production run kit

Review of nanoblock Blue Parakeet or Budgerigar NBC_016

Blue Parakeet build and package

This post is a review of the nanoblock Blue Parakeet build. Blue Parakeet is part of the nanoblock Mini Collection series. Wondering what else is part of the Mini Collection? Click here for a list.

Number: NBC_016 

Number of Pieces: 80

Difficulty Rating: 2/5

Blue Parakeet build front view

I’m not sure which name to identify this kit as. This is because I have 2 kits that both have the number NBC_016; however, each kit has a different name. I think the name may depend on where the kits were sold. I’m not sure where in the world these kits came from. I’ve chosen to identify this kit more as Blue Parakeet since I’m pretty sure there are multiple kits named Budgerigar.

Blue Parakeet build side view

The kit begins with bricks in two shades of blue. The parakeet goes up in layers, shifting between blues and brown to build the body.

Blue Parakeet build back view

After building the body, the head is built in white. Details like the beak and eyes are added while the head is being built.

The final step is to add the legs and feet. The parakeet comes with a base to place the finished bird on.

Blue Parakeet build 3/4 view

Things I liked:

  • I like the number of colors that go into the build between the shades of blue, brown, and white.

Things I didn’t like:

  • The fact that the kit has multiple names is confusing

Review of nanoblock Geoffrey NBC_165

Geoffrey build and package

This post is a review of the nanoblock Geoffrey build. Geoffrey is part of the nanoblock Mini Collection. Wondering what else is part of the Mini Collection? Click here for a list.

Geoffrey is a very famous Giraffe. He is the mascot for Toys R Us.

Number: NBC_165 

Number of Pieces: 160

Difficulty Rating: 2/5

Geoffrey build front view

Geoffrey was a kit that I bought totally opened; I did make sure there were bricks and instructions. Before starting the build, I pulled the kit that arrived apart and split all the bricks by size and color. I then started the build.

The nanoblock set has several different sections. There is the head, neck, arms, legs, and body.

Geoffrey build side view

A common technique in this build is to put round 1×1 into the non-ball section of the ball joint. I generally don’t care for this technique because it makes the builds much harder to put away later.

The head I was able to start building on my nanoblock pad. It went up in simple straightforward layers. The hardest part was getting the ears lined up because there was only one stud on top. After building the top of the head, it’s flipped over, and the bottom jaw and mouth are attached.

The neck is a very straightforward 2 layer chain of bricks.

The legs are very straightforward. Attention to detail is required to make sure that the legs line up straight.

Geoffrey build back view

The body I once again built on my pad. I enjoyed all the ways that the layers were arranged differently to create gaps in the yellow for the orange spots. After building to the top of the body, you flip the body over and add the hips and tail.

The arms are straightforward. It creates elbows in the layers of bricks.

The last step is to connect all the sections at the ball joints.

I was surprised that the final build was able to stand on its own. I’ve had a hard time posing Geoffrey to make him look like the photo on the package.

Geoffrey build 3/4 view

Things I liked:

  • That the final build is able to stand

Things I didn’t like:

  • I think his arms look really funny and are hard to pose well.

Review of nanoblock 2022 Snowman NBC_368

2022 Snowman pacakage and build

This post is a review of the nanoblock Snowman build. Snowman is part of the nanoblock Mini Collection. Wondering what else is part of the Mini Collection? Click here for a list.

Number: NBC_368 

Number of Pieces: 160

Difficulty Rating: 2/5

2022 Snowman front view

There are been several snowman builds that have been released over the years. The snowman released in 2022 is different because the snowman is made up of clear white bricks and glitter bricks. These are newer and uncommon bricks used in a few nanoblock kits. The clear white bricks create a translucent effect on the snowman, which is nice.

The build begins by laying out a base layer of clear white bricks. I started the build on my nanoblock pad. The body goes up in layers. In general, each step works on two layers at once. The final step of the beginning of the body is a ring outlining the top of the body.

2022 Snowman front 3/4 view

The next section of the body is adding the scarf and creating curves to close up the body. Several slanted pieces are clearly marked as to which ones to use. However, I had difficulty telling where to add a 1×1 brick to get the layer lined up. I was able to figure it out after moving bricks around.

The final step of the body is to add the mittens.

2022 Snowman back 3/4 view

The head begins with a base layer that I once again laid out on my nanoblock pad. The head goes up in layers. Again there are slanted bricks that I needed to make sure I used the right slope to build the head correctly. The head adds details such as eyes, nose, and hat.

The last step is to connect the head to the body.

2022 Snowman front 3/4 view

Things I liked:

  • The use of translucent and glitter blocks in the build because they are uncommon types of bricks

Things I didn’t like:

  • I’m not sure I like the solid white bricks edging on the hat. Since the rest of the build is clear the solids stand out

Review of nanoblock 2022 Christmas Tree NBC_369

2022 Christmas Tree package and build

This post is a review of the nanoblock Christmas Tree build. Christmas Tree is part of the nanoblock Pokemon Mini Collection. Wondering what else is part of the Mini Collection? Click here for a list.

Number: NBC_369

Number of Pieces: 200

Difficulty Rating: 2/5

2022 Christmas Tree build front view

This kit was much trickier to put together than I expected. This was because so many bricks were hanging from a single brick. There are also a lot of places where things are at angles which is unusual for nanoblock.

The first step is to build the tree stand. The stand is a simple 3 layers in brown and tan.

The tree builds up in a pattern. First, some branches shoot out of the tree. The branches can take 1 or more steps in the directions. Then there are a few layers of bricks that create a trunk.

Adding the branches was a bit tricky. There are 2 reasons for this. First, the branch is added to a single stud and hangs off. This can be tricky because the instructions don’t want any of the branches to be square. Second, a lot of branches also have the white ribbon that goes around the tree. The ribbon is tricky because you need to ensure it is on the correct side so it can flow properly.

The tree repeats the pattern repeats 4 times, with the branches getting smaller with each repeat.

The opening at the top of the tree is closed up. The tree is topped with a clear yellow glitter star. The star is super straightforward.

Wreath detail

In addition to the Christmas tree, there is also a little wreath. When I built the wreath, I curled it backward, so I had to flip all the green bricks so it was properly round. The final step is to add decorative details to the wreath.

2022 Christmas Tree build

Things I liked:

  • It was a nice challenge to build and get things to flow properly

Things I didn’t like:

  • The wreath. I don’t feel like it added much to the build, and I feel the directions for how to make it aren’t super clear

Review of nanoblock Squirrel NBC_178

Squirrel build and package

This post is a review of the nanoblock Squirrel build. Squirrel is part of the nanoblock Mini Collection series. Wondering what else is part of the Mini Collection series? Click here for a list.

Number: NBC_178

Number of Pieces: 130

Difficulty Rating: 2/5

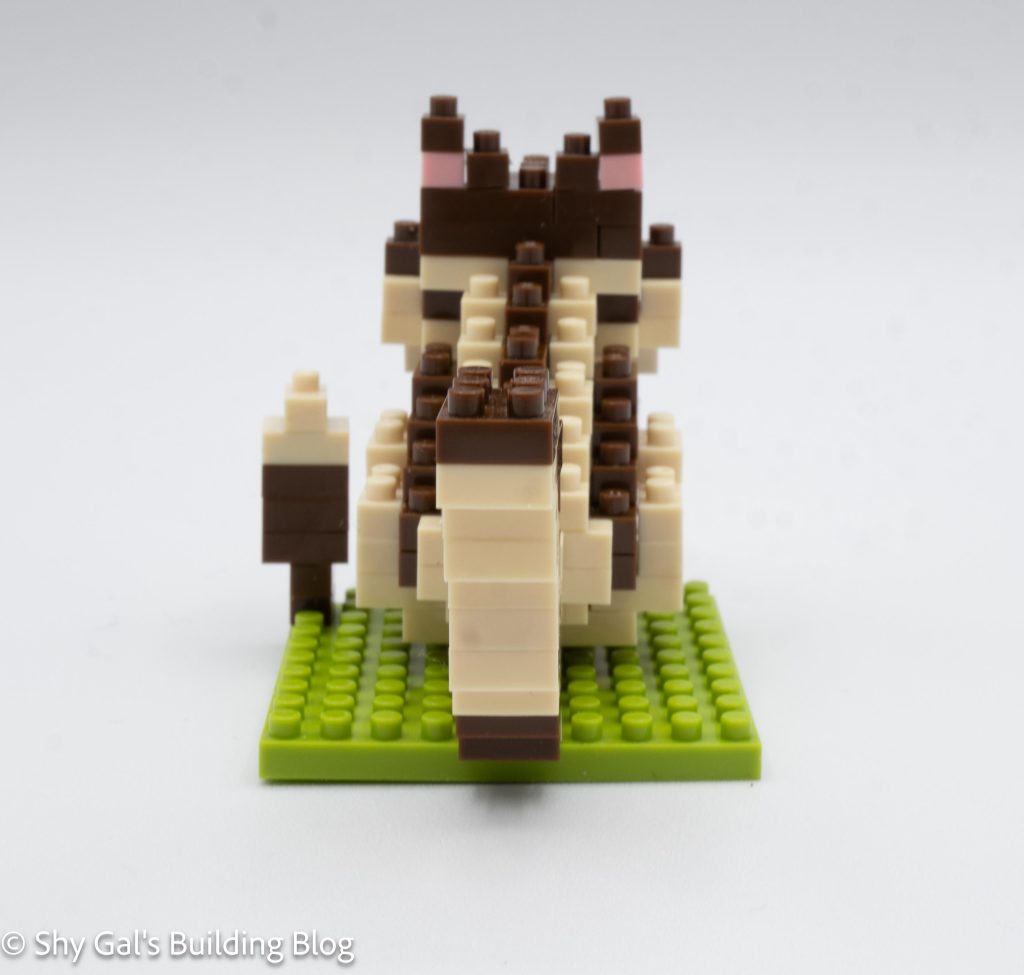
Squirrel front view

The Squirrel build starts as a basic build, starting with a base and building the height of the Squirrel. After step 5, you turn the build upside down and add the feet, the acorn it holds, and the base of the tail. Once you flip it back right-side-up, you build and attach the tail and head. 2 extra acorns sit near the Squirrel.

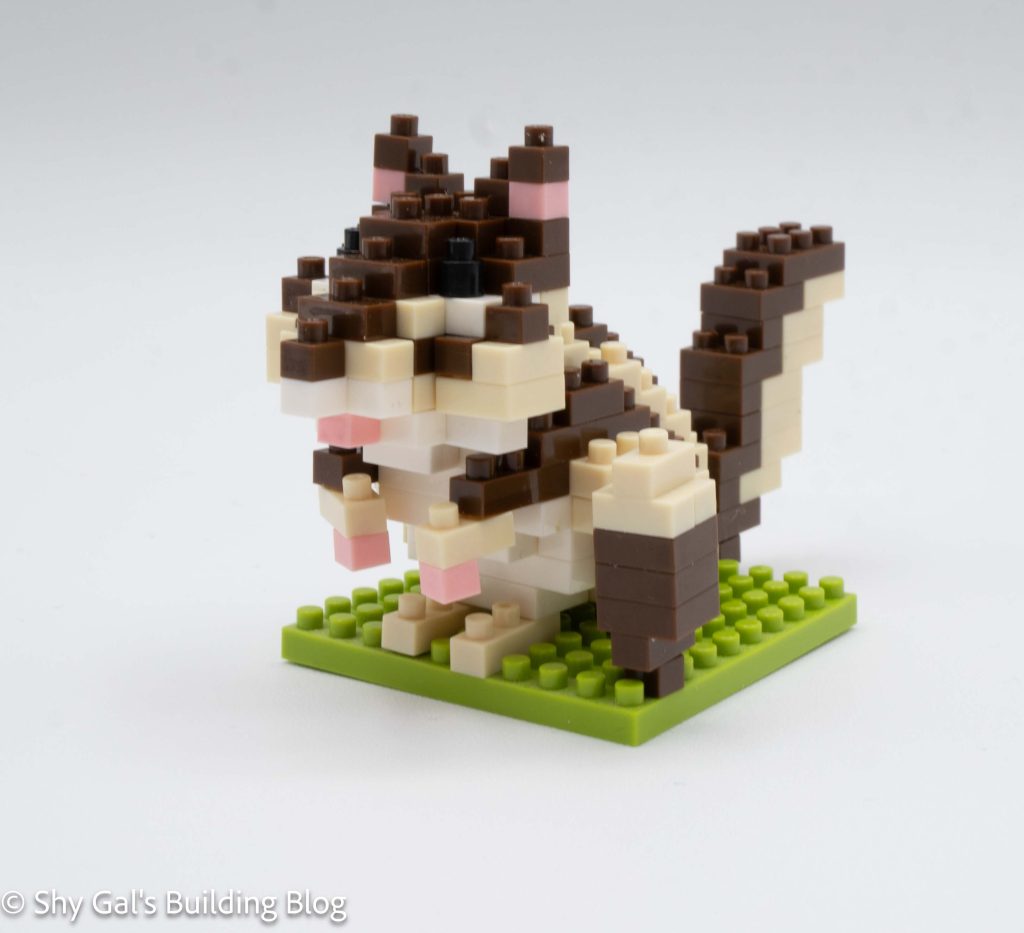
Squirrel side view

Overall I think the Squirrel is adorable. I like that it looks like its cheeks are full and puffed up.

Squirrel back view

Things I liked:

  • The extra acorns

Review of nanoblock Red Panda NBC_194

Red Panda build and package

This post is a review of the nanoblock Red Panda build. The Red Panda is part of the nanoblock Mini Collection series. Wondering what else is part of the Mini Collection series? Click here for a list.

Number: NBC_194

Number of Pieces: 130

Difficulty Rating: 2/5

Red Panda front view

Red Pandas are smaller furry animals that live in China and Nepal. Their habitat is getting cut down significantly due to human activity. They look a little like super fluffy raccoons. They are also prevalent in zoos worldwide.

This build is building chunks of the nanoblock and connecting them together to create the Red Panda.

Since the animal is on a slant, you start with the back of the animal and work forward. The first 5 steps are building the body and preparing the base for the head to attach onto.

In step 6, you make the head with reasonable detail, including round eyes and an additional shade of brown to create the cheeks. Once you attach the head, you build the tail with striped detail.

The final step is to connect the paws so that the build sits flat.

Red Panda 3/4 front view

Overall I enjoyed this build. I liked building the individual chunks and seeing the red panda come together in larger pieces. In most of my builds, things come together in layers, so the chunks were a nice change. I really like the detail in the face and tail, which are vital to making this build recognizable.

Red Panda back 3/4 view

Things I liked:

  • The amount of detail in the head
  • The stripes in the tail

Review of nanoblock Sushi NBC_220

Sushi build and package

This post is a review of the nanoblock Sushi build. The Sushi is part of the nanoblock Mini Collection series. Wondering what else is part of the Mini Collection series? Click here for a list.

Number: NBC_220

Number of Pieces: 120

Difficulty Rating: 2/5

Sushi build front

I bought the sushi kit as a gift for my husband. I’m not really a fan of Sushi, but my husband loves the stuff.

There are 3 pieces of Sushi (tuna, egg, and roe) and a base. The base is a very simple and straightforward build.

I really liked building the tuna; it has colors hanging off-center, creating details that make it look like the tuna is hanging off the rice.

Sushi build side view

The egg is also a nice build, but it is more symmetrical than the tuna, so it was more straightforward.

The easiest to build was the sushi roe. It is basically creating a basket to hold loose nanoblocks. I don’t like the fact there are loose nanoblocks in the build because it is easier to lose the bricks even moving things carefully.

Sushi 3/4 view

Things I liked:

  • The different kinds of Sushi are recognizable

Things I didn’t like:

  • The loose bricks that make up the roe

Link to order: Amazon

Review of nanoblock Fantasy Collection(Phoenix, Unicorn, and Dragon)

Fantasy Collection(Phoenix, Unicorn, and Dragon) builds and box

This review is for a collection of nanoblock builds in a box called Fantasy Collection. These builds are called Phoenix, Unicon, and Dragon. All of these builds are part of the nanoblock Mini Collection series. These were the first builds I made that used the ball joints to make moveable parts. Each set is available separately, so I will try to provide links to the individual builds if I can find them.

Phoenix

Phoenix build

Phoenix was by far my favorite of these three builds. It looks like the classic phoenix rising from the ashes. It uses the ball joints to create the outstretched wings and the tail. It is made of almost all transparent blocks and appears to float while sitting on a stand as a build. I found working with so many transparent tricky because they seem to stretch more than the standard solid nanoblocks. The hardest part of the build was to get the Phoenix to stand on its base. If things aren’t just layered just right or the tail isn’t centered, the build will just tip over.

Link to order: Amazon

Unicorn

Unicorn build

The Unicorn is probably the most straightforward of all the builds. It doesn’t have any ball joints, and it mostly layers up the body of the Unicorn. It is almost all white with a transparent mane and horn. The Unicorn has narrow legs that are stacked 1 stud thick going up. I was worried that the build would have a hard time standing up but was pleasantly surprised when I tried to stand it up. The main thing I don’t like about the Unicorn is I think the horn is too long and wide for the head of the Unicorn.

Link to order: Amazon

Dragon

Dragon build

The dragon build is relatively straightforward. First, you build the body. The hardest part of making the body is getting the arms lined up because it’s a chain held together by one brick. Second, you build the head, which is again relatively simple. The mouth is held together with a ball joint, allowing it to move. The last step is to build and attach wings that contain ball joints so that the wings can move. Overall, I enjoyed the build, and I really like the color of the dragon, which is a reasonably unique color.

Link to order: Amazon

Phoenix, Unicorn, and Dragon and builds