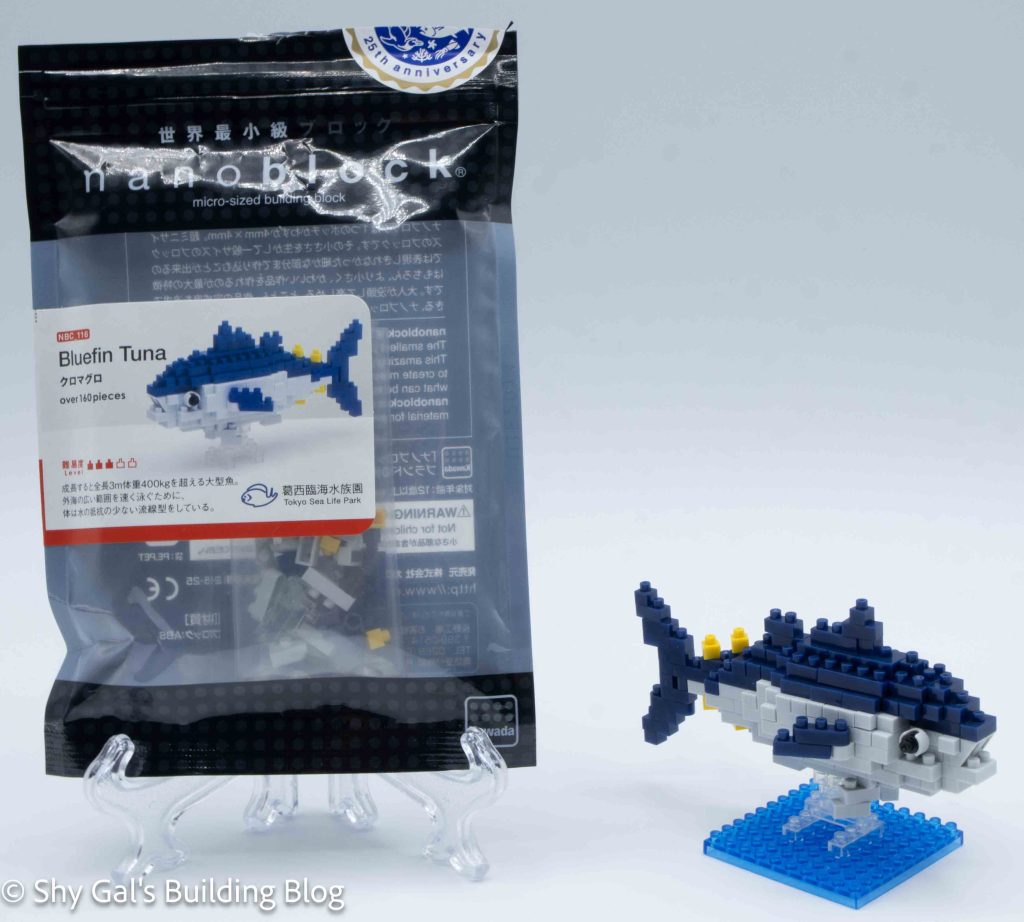
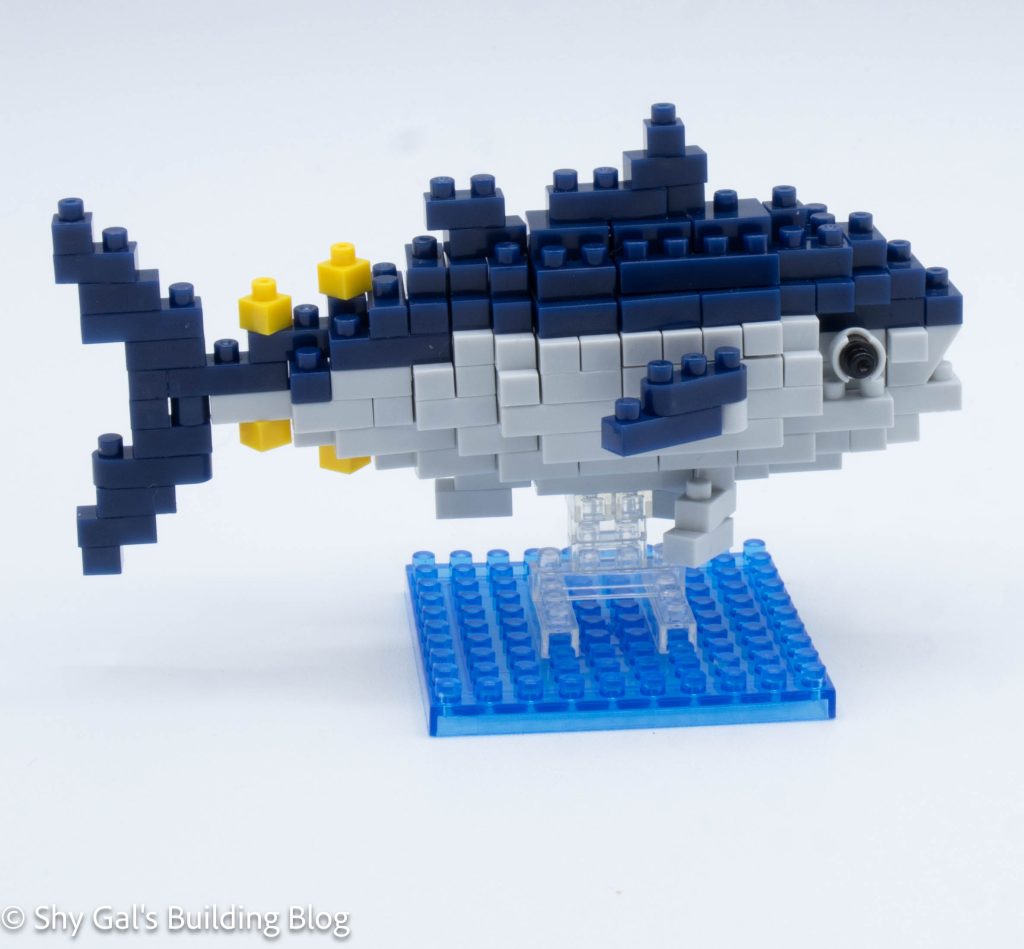
This post is a review of the nanoblock Bluefin Tuna build. Bluefin Tuna is part of the nanoblock Mini Collection series. Wondering what else is part of the Mini Collection? Click here for a list.
Number: NBC_116
Number of Pieces: 160
Difficulty Rating: 3/5
I believe this is a limited release and is only available at Tokyo Sea Life Park. The sticker on my package came with a sticker that said 25th anniversary, but I’m not sure which one.
The first step is building 2 base layer sections and connecting them. I tried, but I couldn’t use my nanoblock pad as a base because some squares were not lined up.
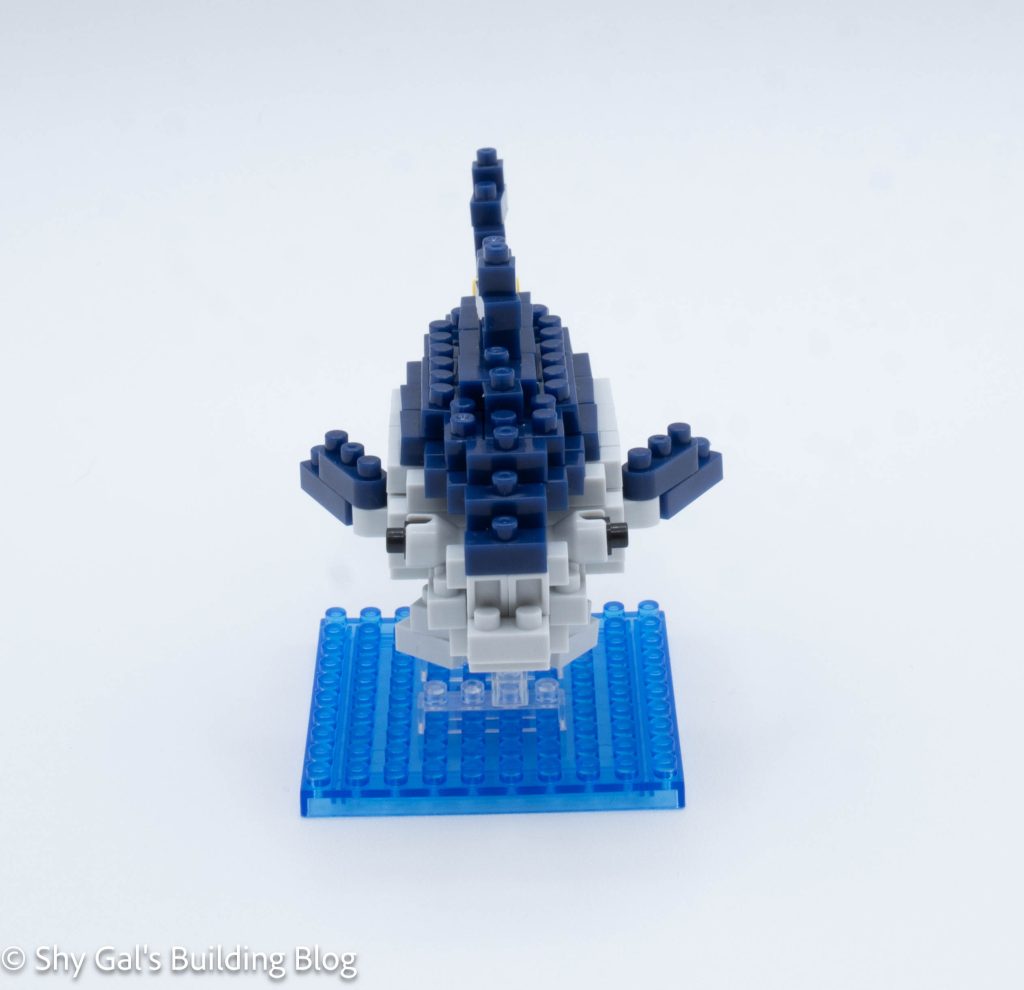
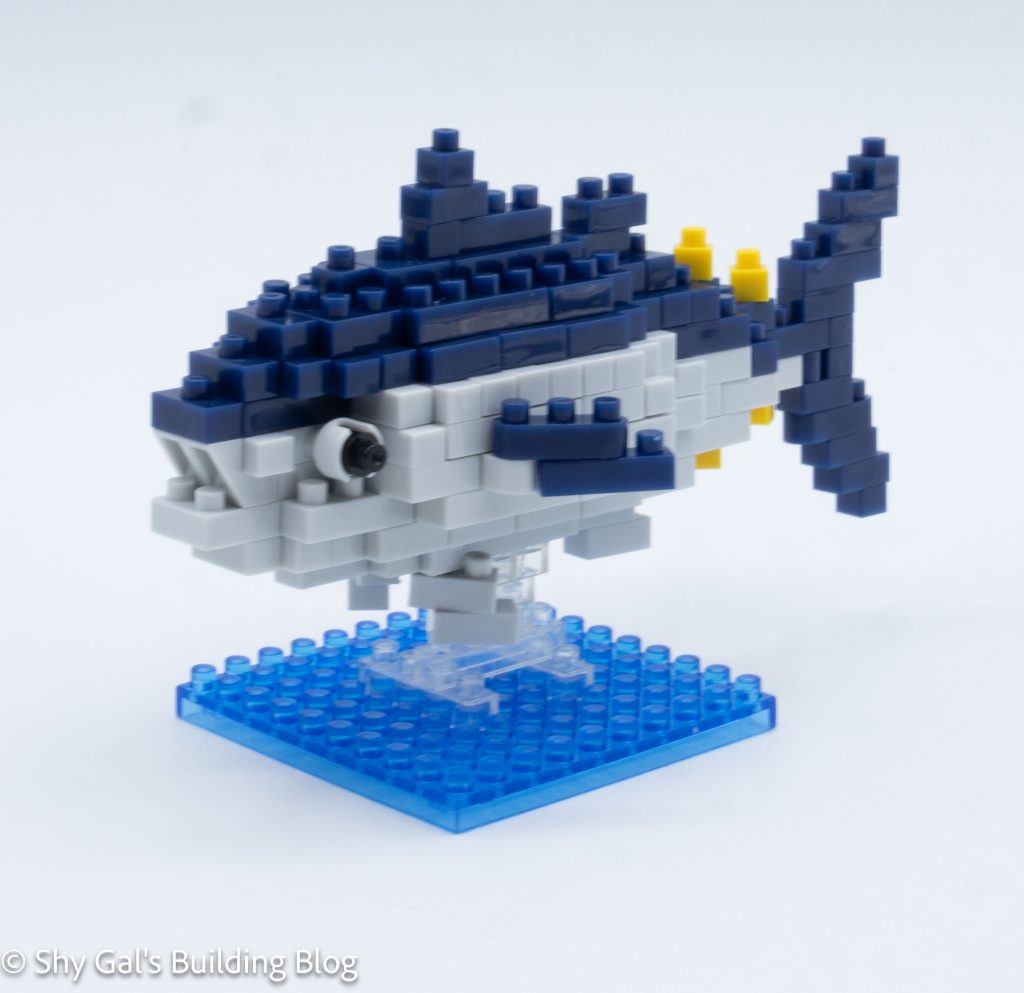
The rest of the tuna’s body goes up in layers, rounding out the body and closing it up.
Then, the fins and tail are added.
The last step is to connect the tuna to the base.
Things I liked:
I like that there are a number of limited releases including this one, I feel that it would make a special souvenir while traveling. It does make it harder to collect the kits.
Things I didn’t like:
I don’t like when bricks are stuck in ball socket joints to create eyes
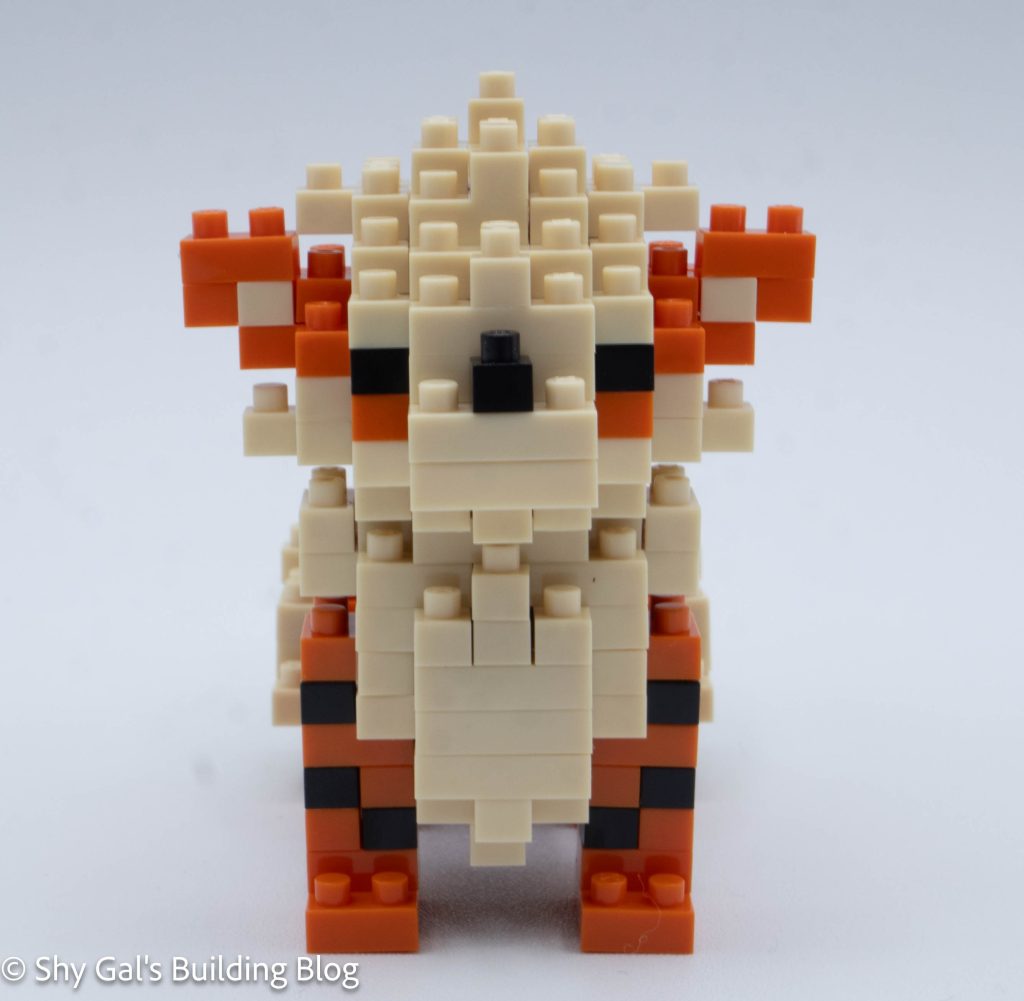
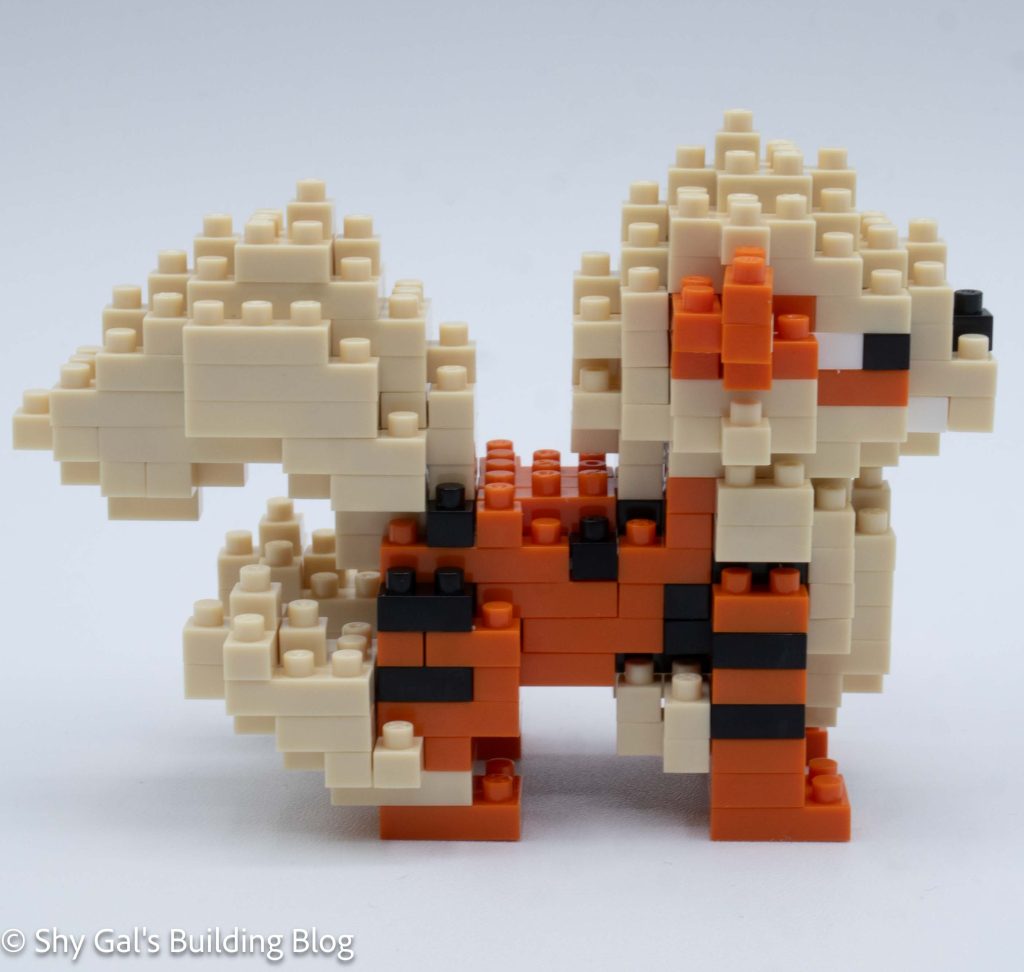
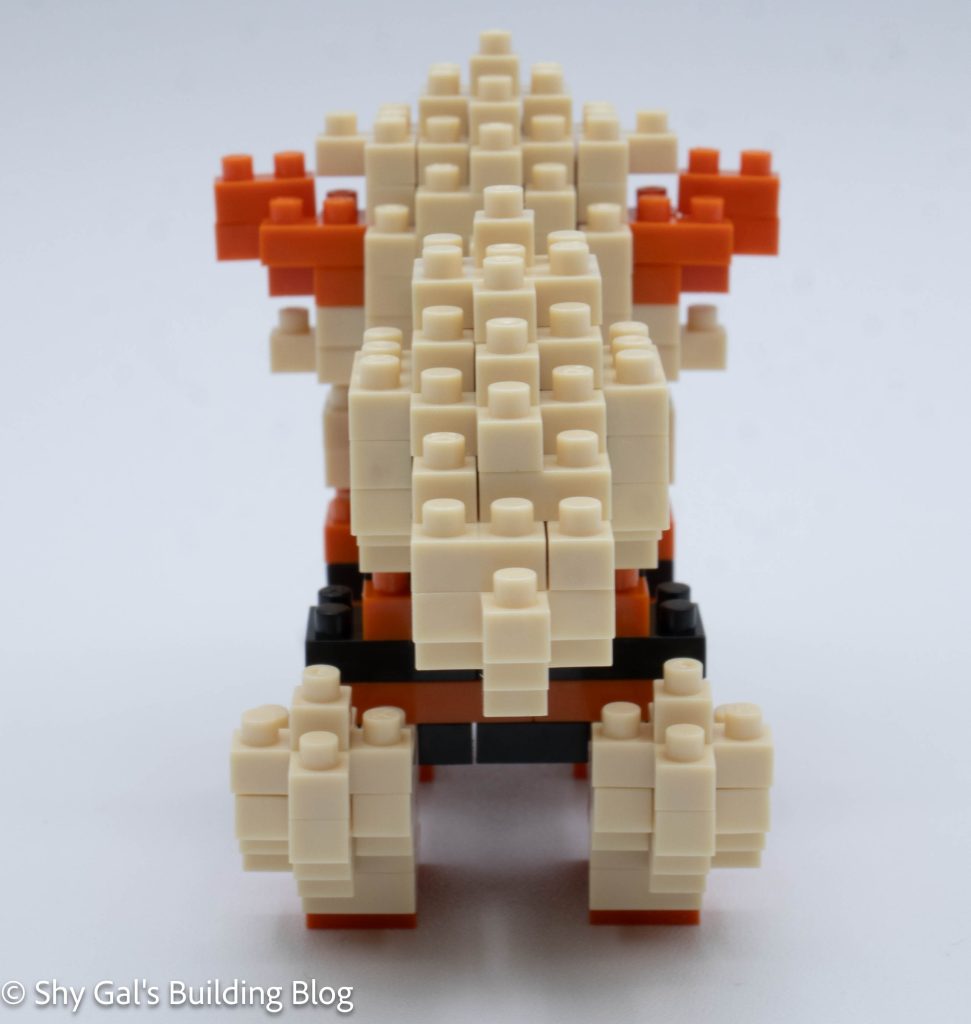
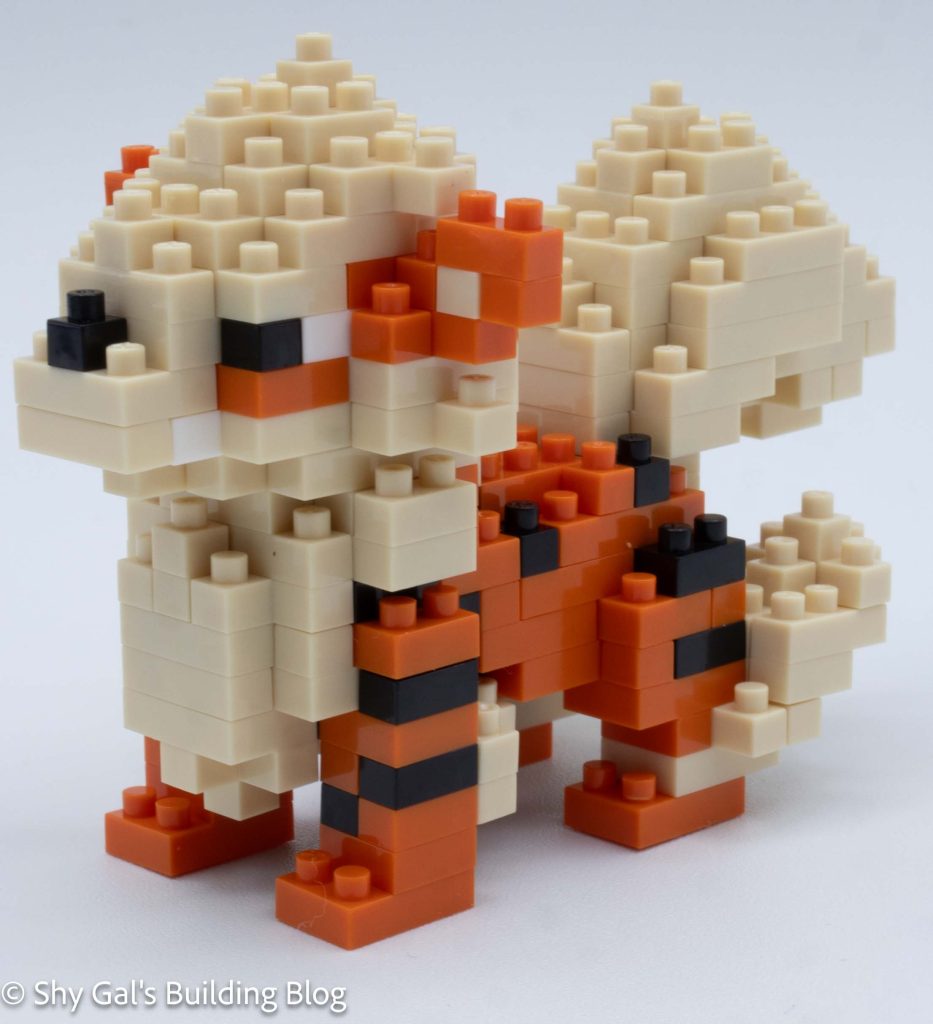
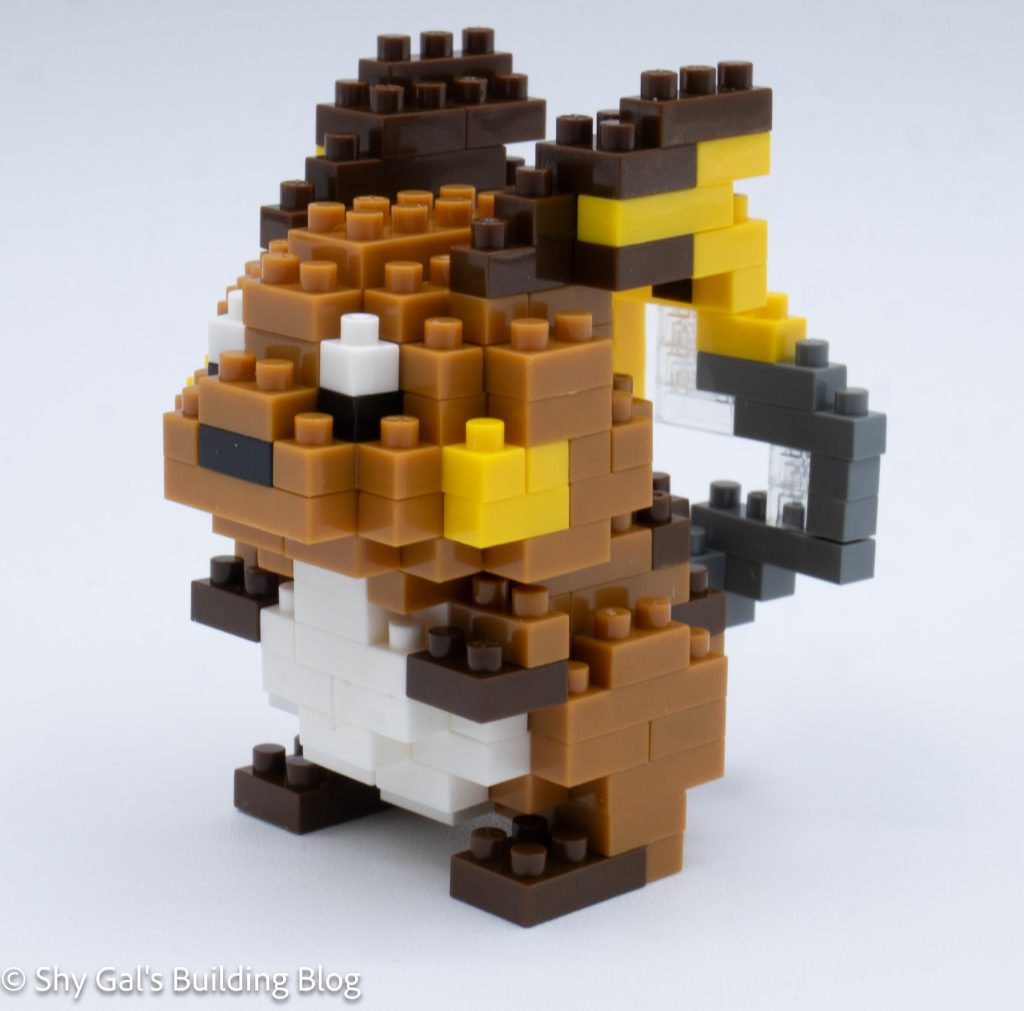
This post is a review of the nanoblock Arcanine build. Arcanine is part of the nanoblock Pokemon collection. Wondering what else is part of the Pokemon collection? Click here for a list.
Number: NBPM_106
Number of Pieces: 150
Difficulty Rating: 3/5
The first 3 steps of this build create the base of the Arcanine. I was able to build them on my nanoblock pad so everything lined up nicely.
After creating the base, Arcanine is built by adding layers of bricks. These create the fur in front, the fur that will act as a connector for the tail, the stripes, and the main body. Each step was clear and straightforward.
Then I began to focus on the head. In layers, I added fangs, eyes, nose, and ears, all in the fur that engulfs Arcanine’s head.
After finishing the head, it was time to add details to complete the build.
First, I built the tail on my nanoblock pad. I needed to be careful that I connected the sections in correctly so that there was proper flow to the tail.
Then I built the legs on the left and right. Building the legs was easy, but I had a hard time figuring out where exactly on Arcanine the legs connected to keep the stripes correct.
Things I liked:
I like his fluffy fur that captures the fur on the pokemon
Things I didn’t like:
It wasn’t clear where to connect the legs to the body
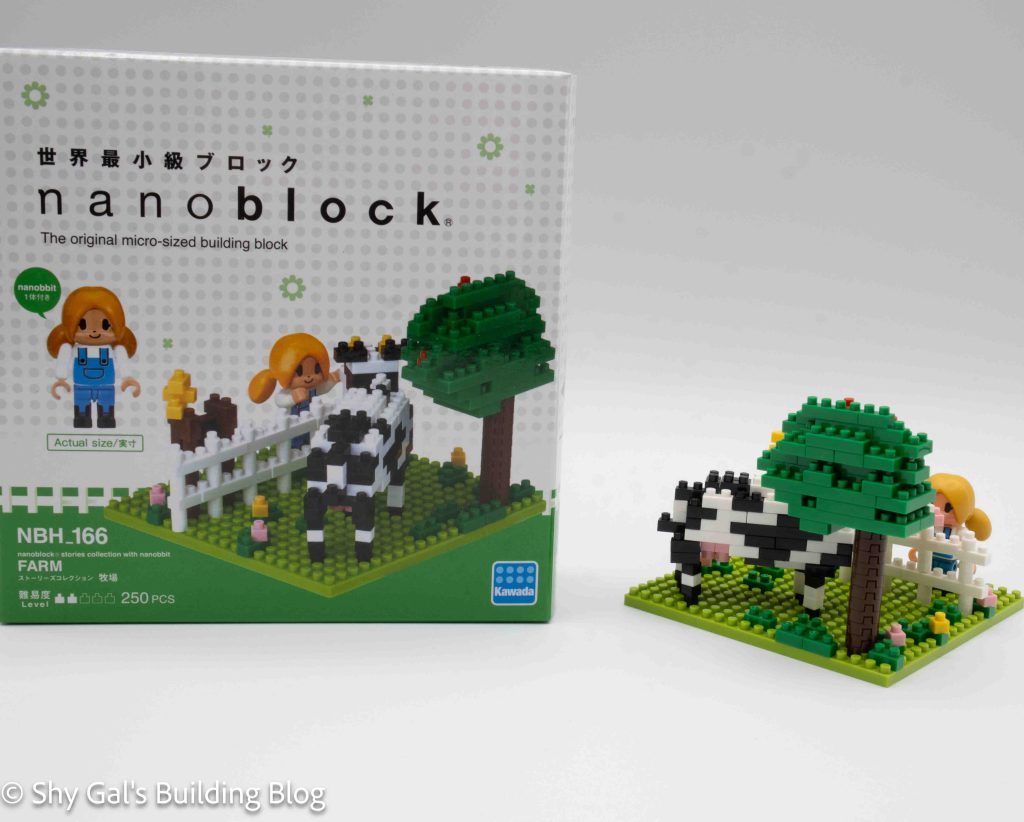
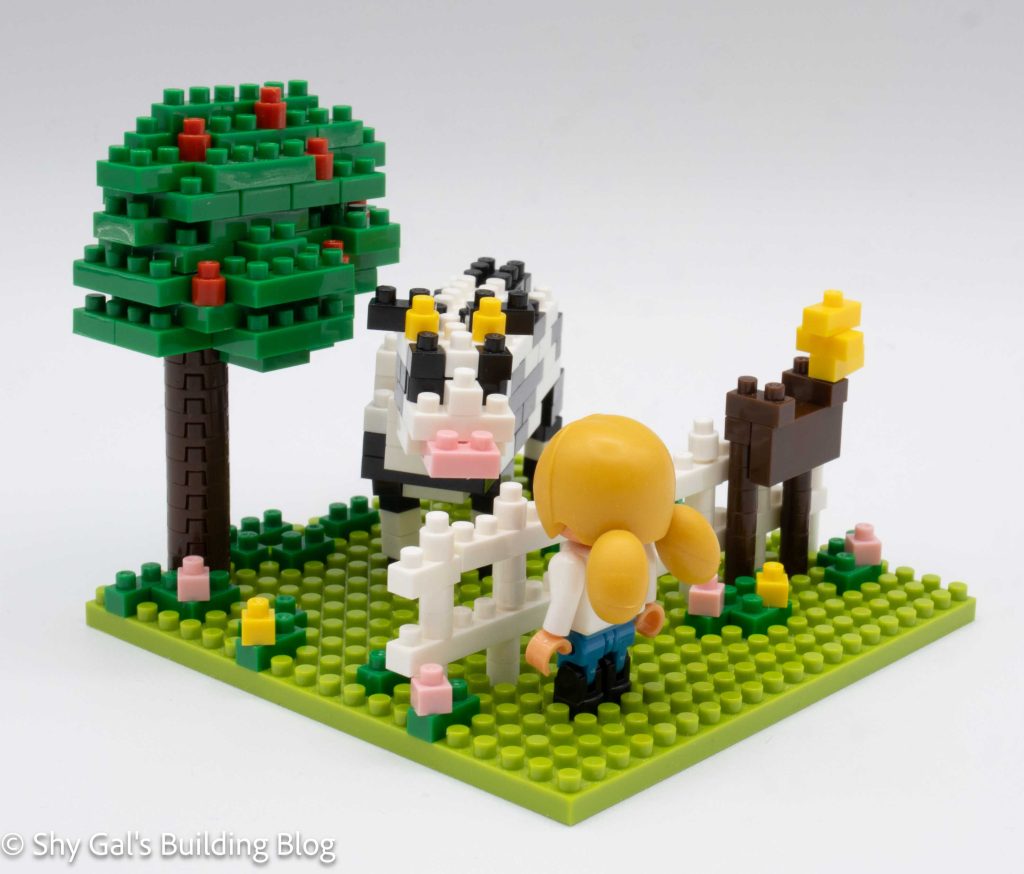
This post is a review of the nanoblock Farm build. Farm is part of the nanoblock Sights to See collection. Wondering what else is part of the Sights to See collection? Click here for a list.
Number: NBH_166
Number of Pieces: 250
Difficulty Rating: 2/5
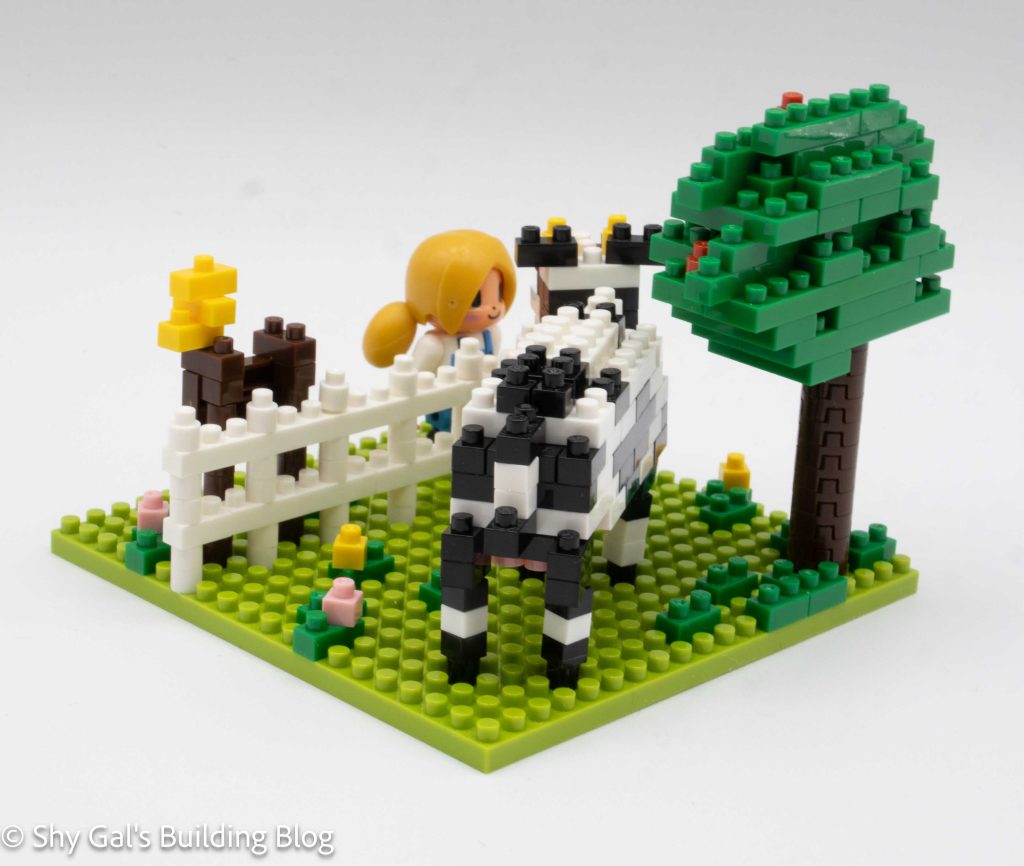
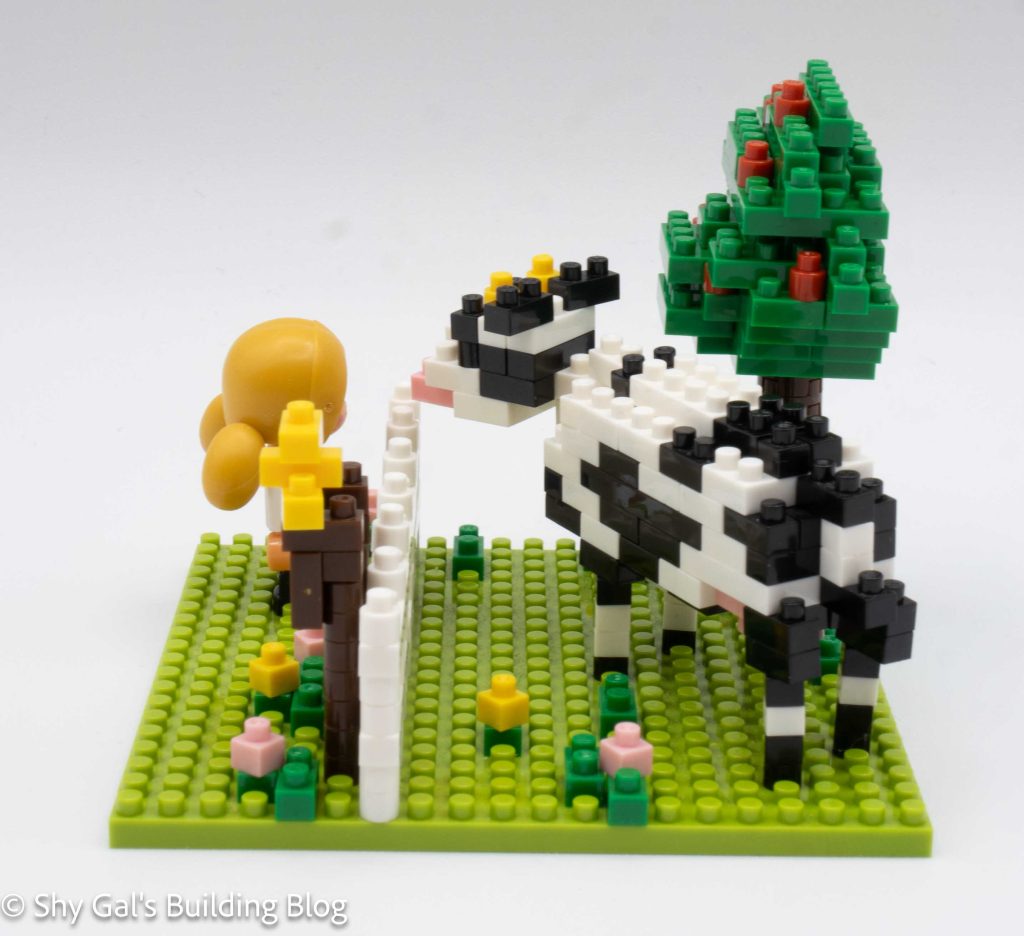
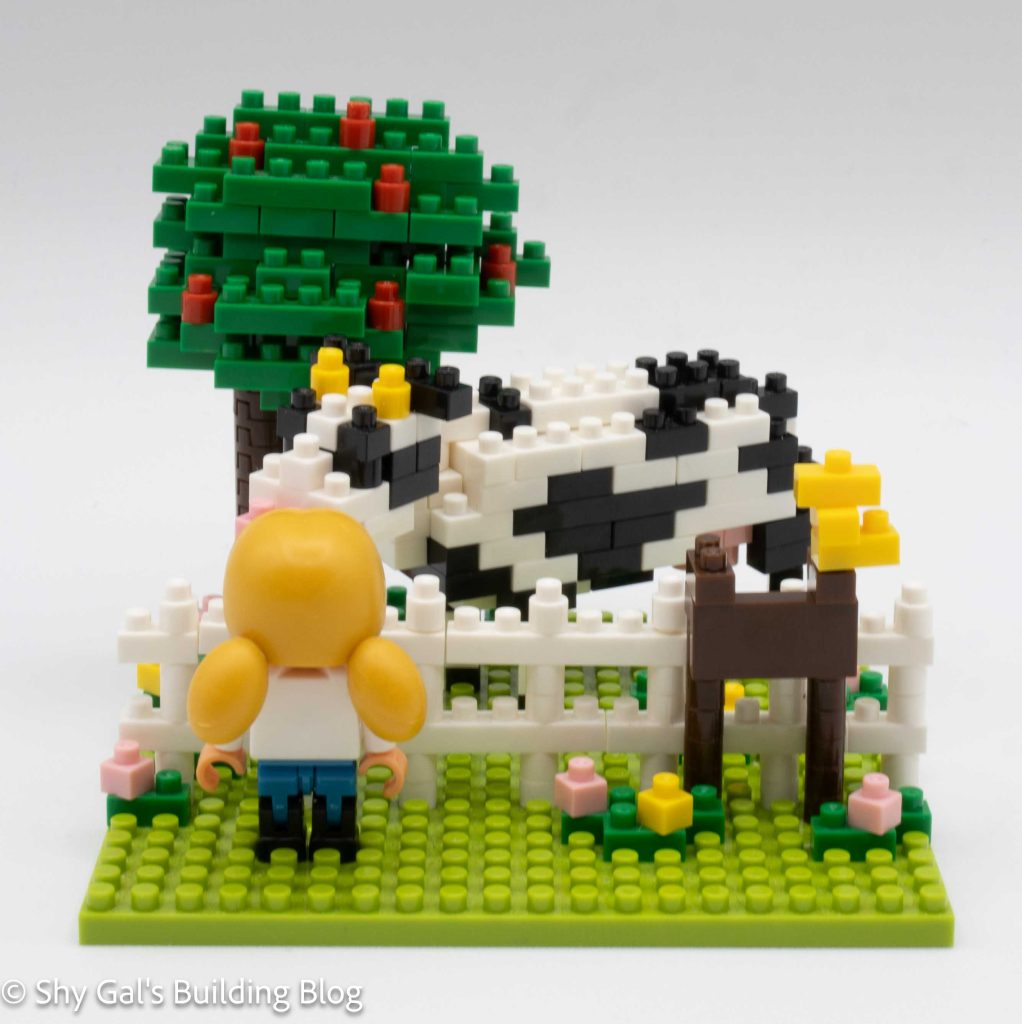
This set is made up of 4 major sections. There is the base, the cow, the tree, and the nanobbit.
I began by building the base. I needed to be super careful with placing the first layer of brick on the 20×20 base plate. There are flowers, the base of the cow and tree and the fence. After the first couple of layers, the only thing added to the base is the fence, farm sign, and cow legs.
The next section of the build was the cow. Building the cow was very straightforward. I like how the udders are created while building the cow. I had a hard time attaching the cow’s body to the legs that were on the base. After attaching the body to the base, I built and attached the head.
The next section is to build the tree. The tree greenery was a bit tricky because there were so many overhangs and so much staggering in the build. The directions are straightforward and clear where the previous layers are. Once the tree is built, it is added to the base, where a trunk section is added when building the base.
The final step is to build the nanobbit. The instructions are very clear.
Things I liked:
I like the nanobbit. They are fairly uncommon in nanoblock builds
I liked how the udders of the cow were created
Things I didn’t like:
I never like building base plates where everything is sprinkled around the base. If one brick is out of place, the entire build might not work properly, and it’s hard to find
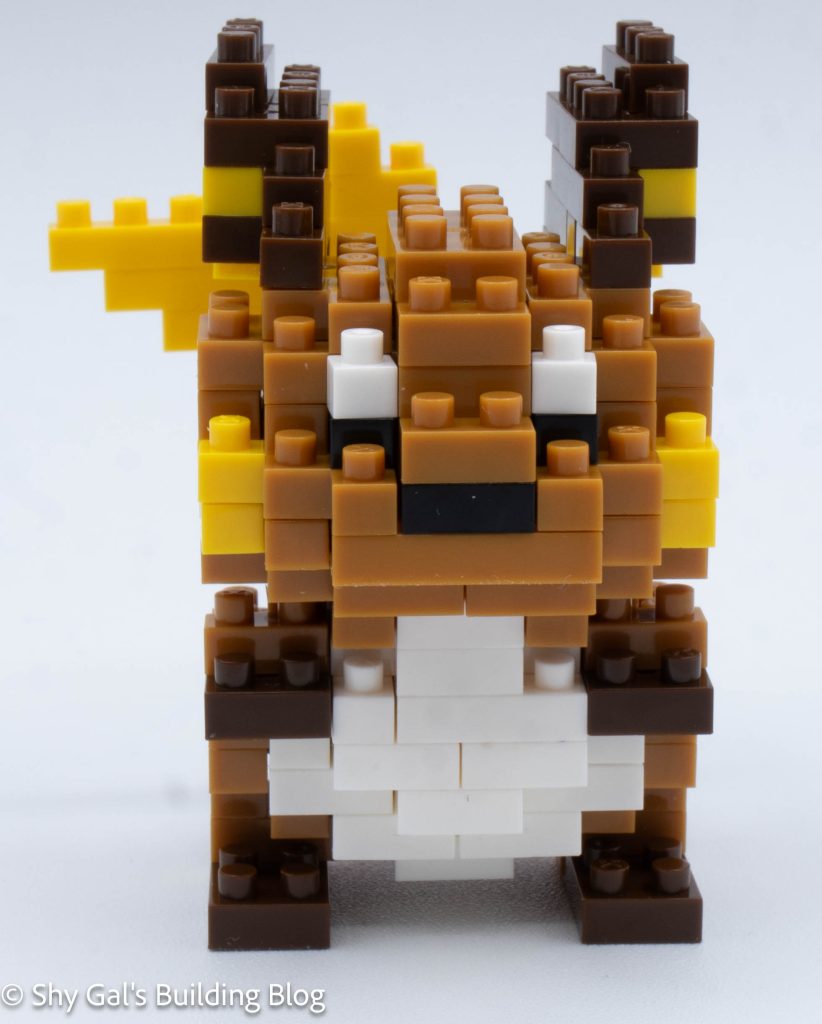
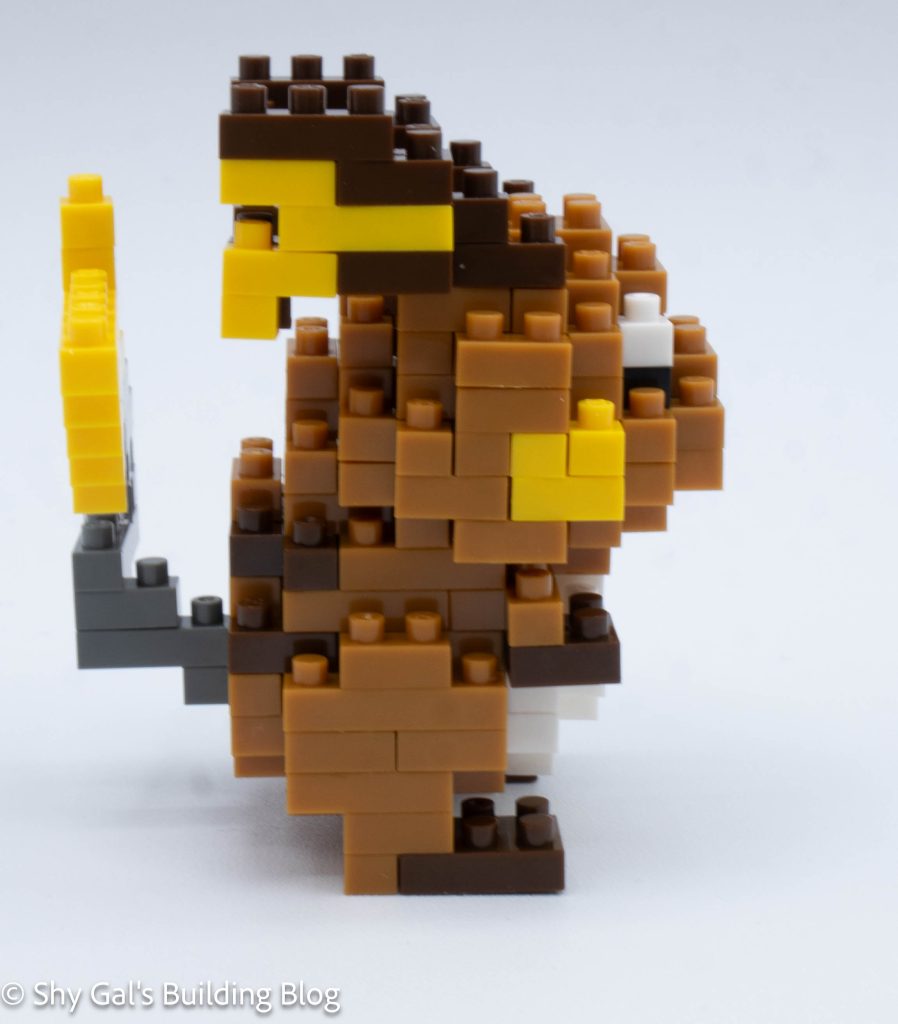
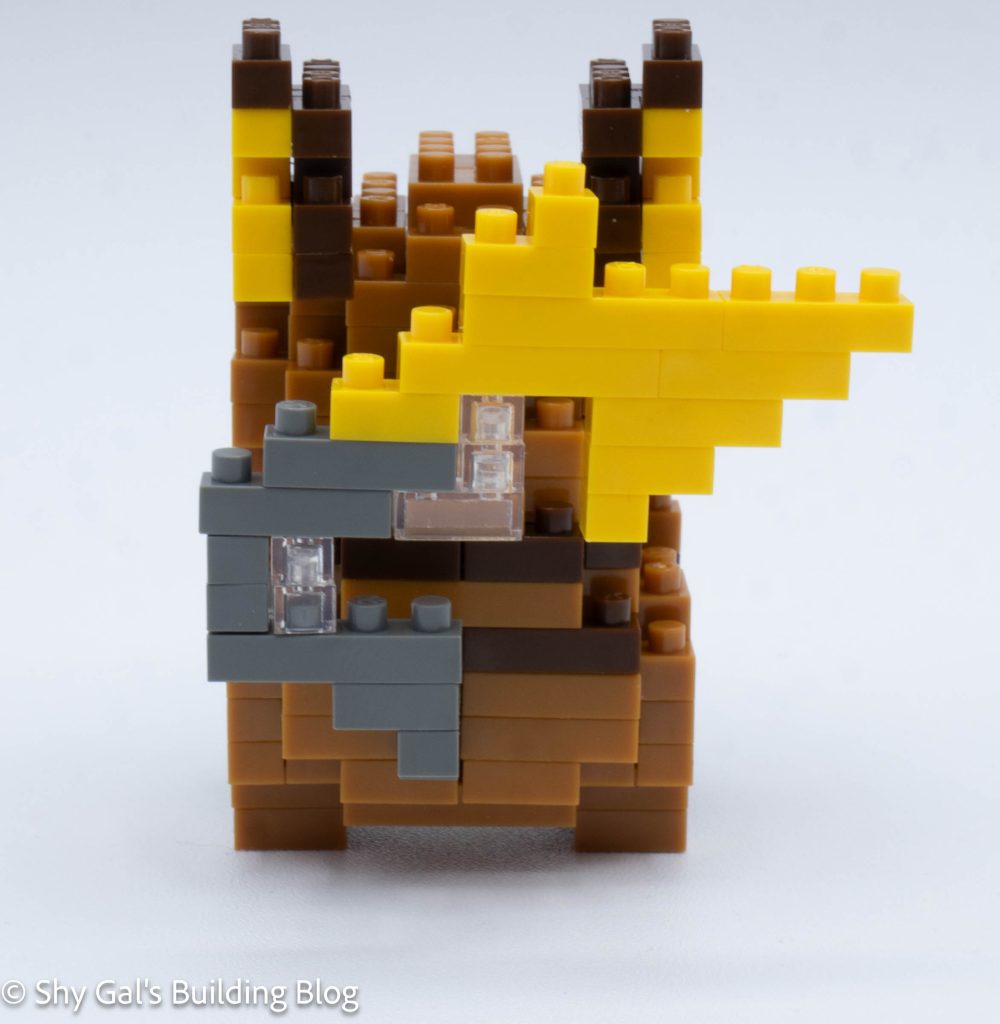
This post is a review of the nanoblock Raichu build. Raichu is part of the nanoblock Pokemon collection. Wondering what else is part of the Pokemon collection? Click here for a list.
Number: NBPM_105
Number of Pieces: 170
Difficulty Rating: 2/5
This build begins by laying out a layer of bricks to create the base of the body. I used my nanoblock pad.
The body goes up in layers. In adding the layers, I added the stomach, back stripes, and the foundation where the tail will attach. I also added Raichu’s front paws. Each layer is fairly straightforward. Eventually, the body is closed up.
The next section is to build the head. The head is built directly on the body.
Like the body, the head goes up in straightforward layers. These layers add the nose, cheeks, and eyes to the build. After a few steps, the head is completed.
The next step is to add the feet to the base of the build.
The next step is to build and attach the ears. Reading the directions for the ears was a bit tricky because the black outlines on the dark brown bricks were hard to see. I wish the brown bricks were outlined in white like they are for black bricks.
The final step is to add the tail. I like how clear bricks are used for support, so the tail can be more angled and look like Raichu’s tail.
Things I liked:
I like how the tail is built and how the final product looks like the correct tail
Things I didn’t like:
I didn’t like how dark the instructions for the ears are
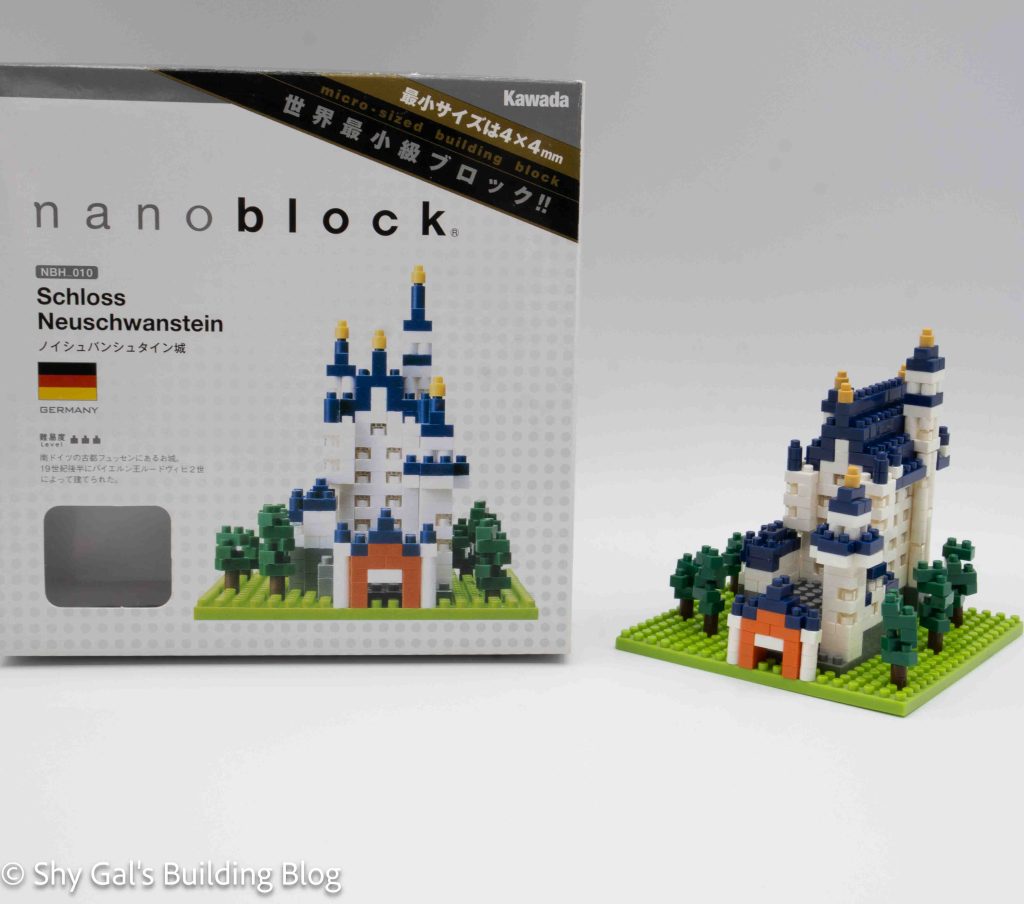
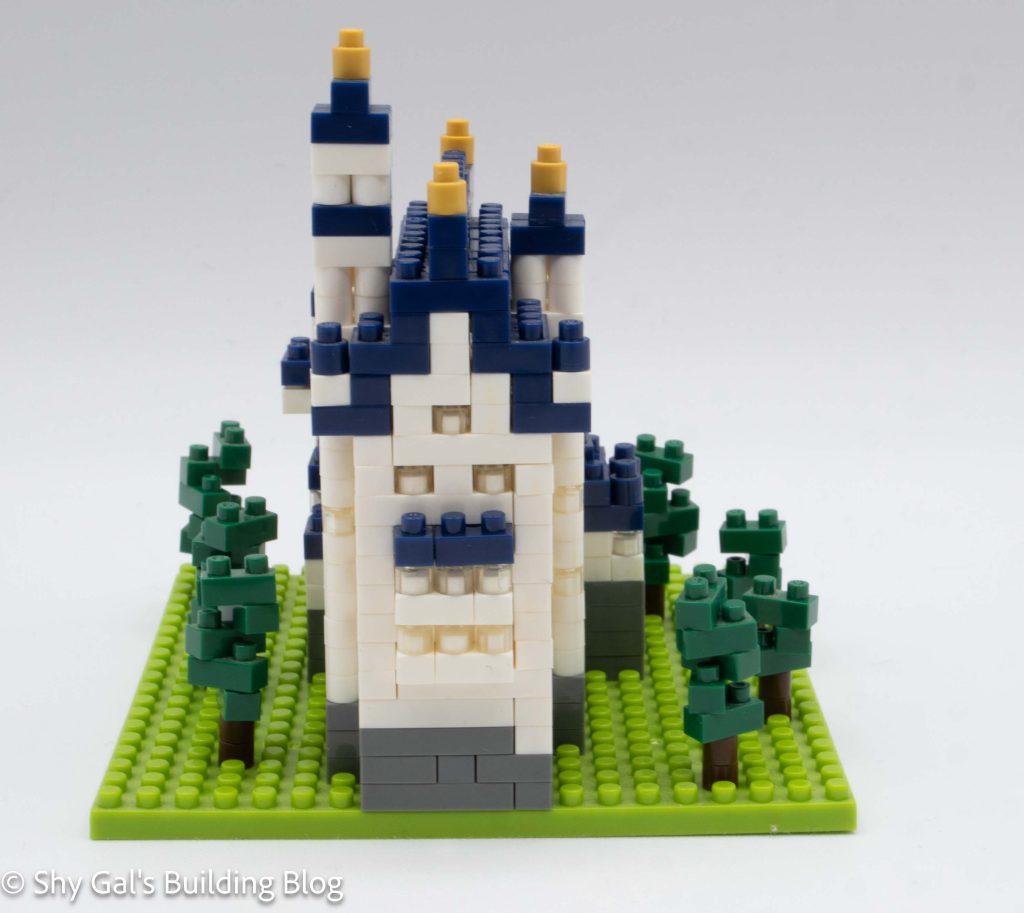
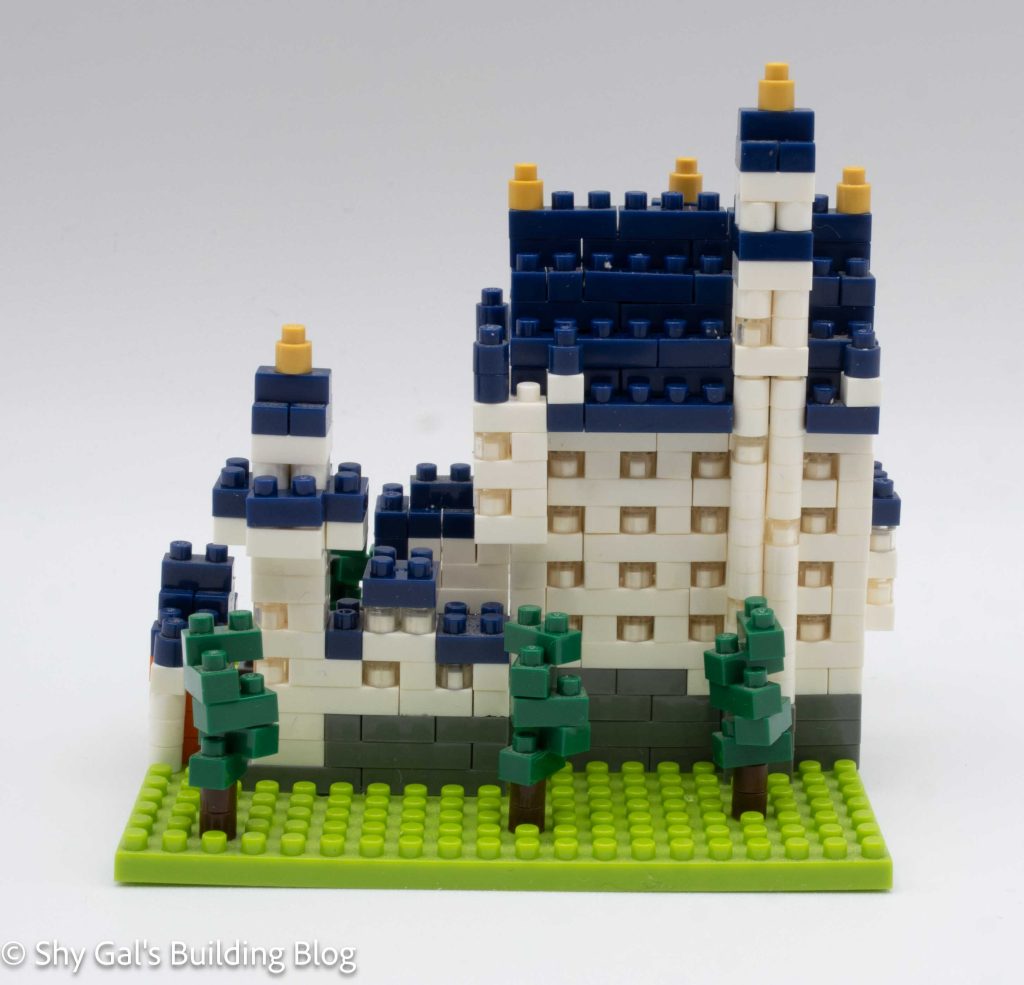
This post is a review of the nanoblock Schloss Neuschwanstein build. Schloss Neuschwanstein is part of the nanoblock Sights to See collection. Wondering what else is part of the Sights to See collection? Click here for a list.
Number: NBH_010
Country: Germany
Difficulty Rating: 3
Schloss Neuschwanstein is a castle in southern Germany. It served as an inspiration for the Disney castles.
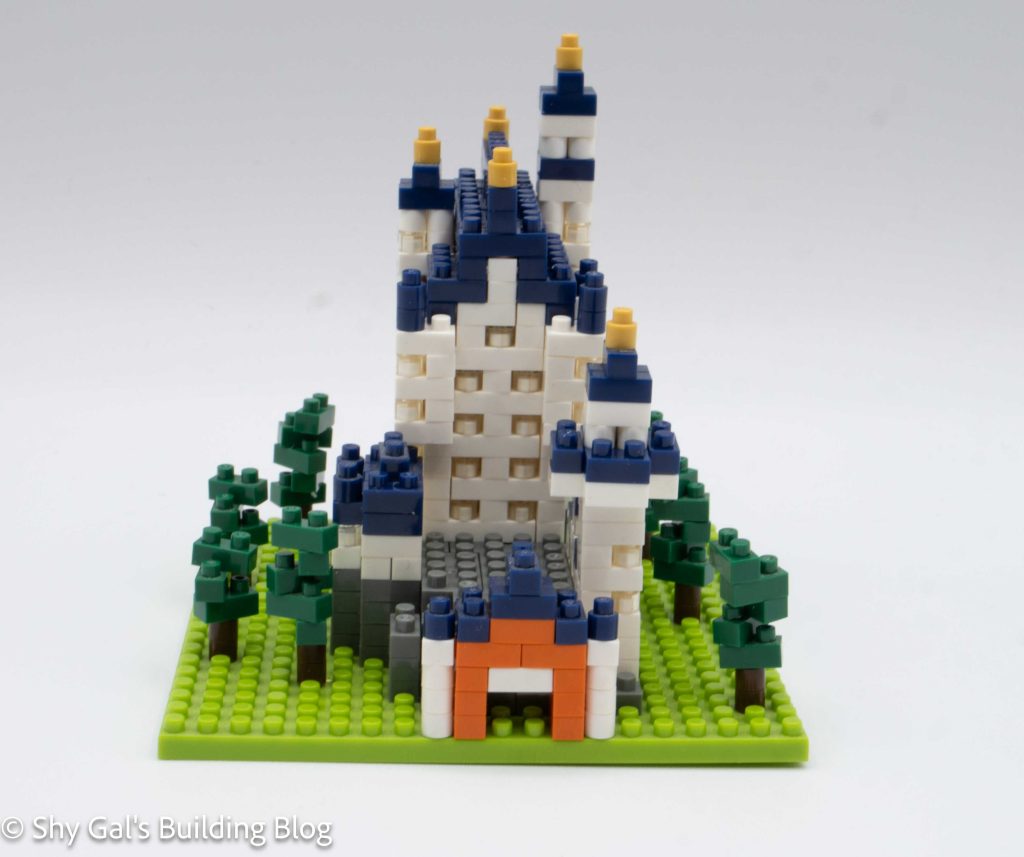
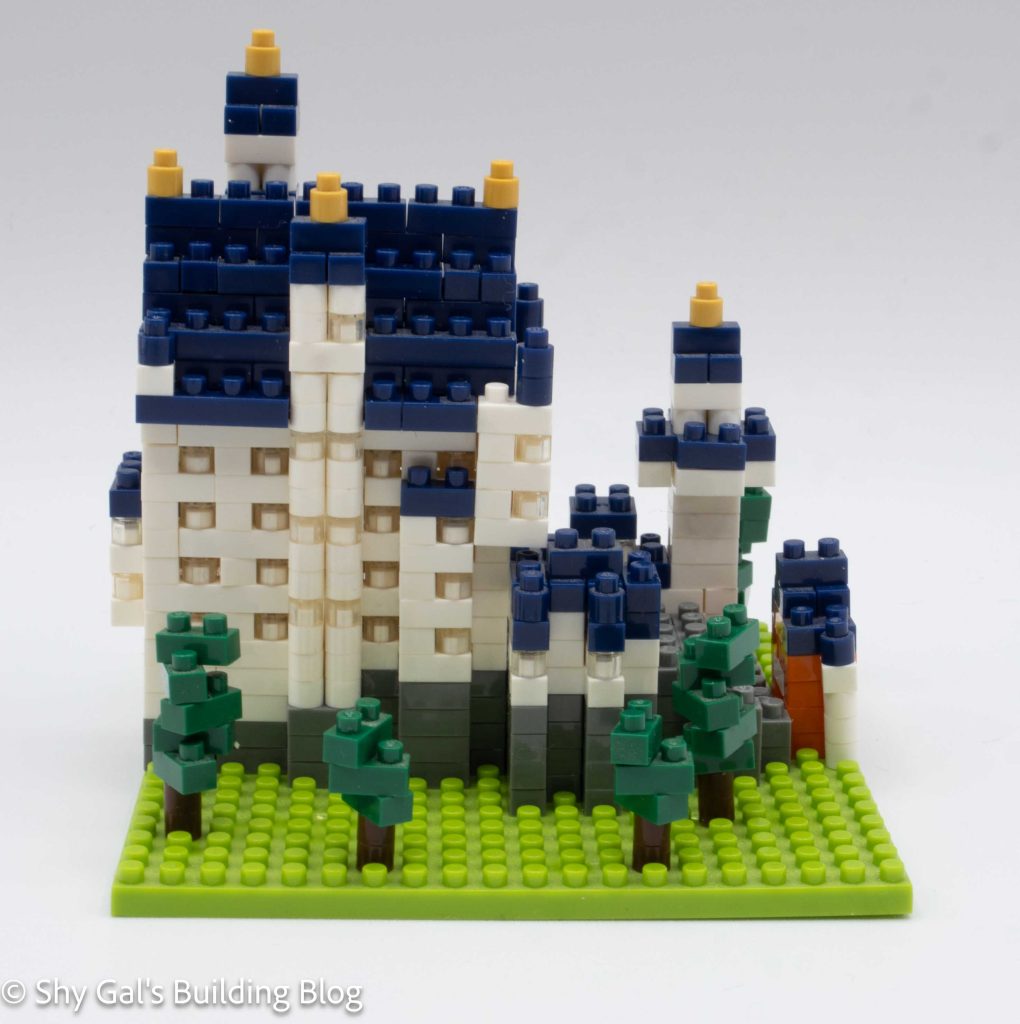
The build begins by laying dark grey bricks on the green 20×20 base. Since everything is connected, it was fairly easy to lay out the initial layer.
There are several layers of dark grey bricks. These bricks create the foundation and the entryway of the castle.
Then, I started to build the main body of the castle. The layers alternate between plain white and white with clear windows. There are several layers of white. In addition to the main section of the castle, there are towers of bricks that grow along the side of the castle. These towers are tricky because they can easily pop off.
The next step is to add the navy blue roof. Over 5 steps, the entire roof goes from being open to being closed. The roof is mostly flat.
The final step is to add the details. There are 3 towers of differing heights. Each tower has different instructions so they all look slightly different. There is also a center peak added to the roof. There are also a bunch of trees to add around the base of the castle.
Things I liked:
I feel that the building does look quite a bit like the actual castle
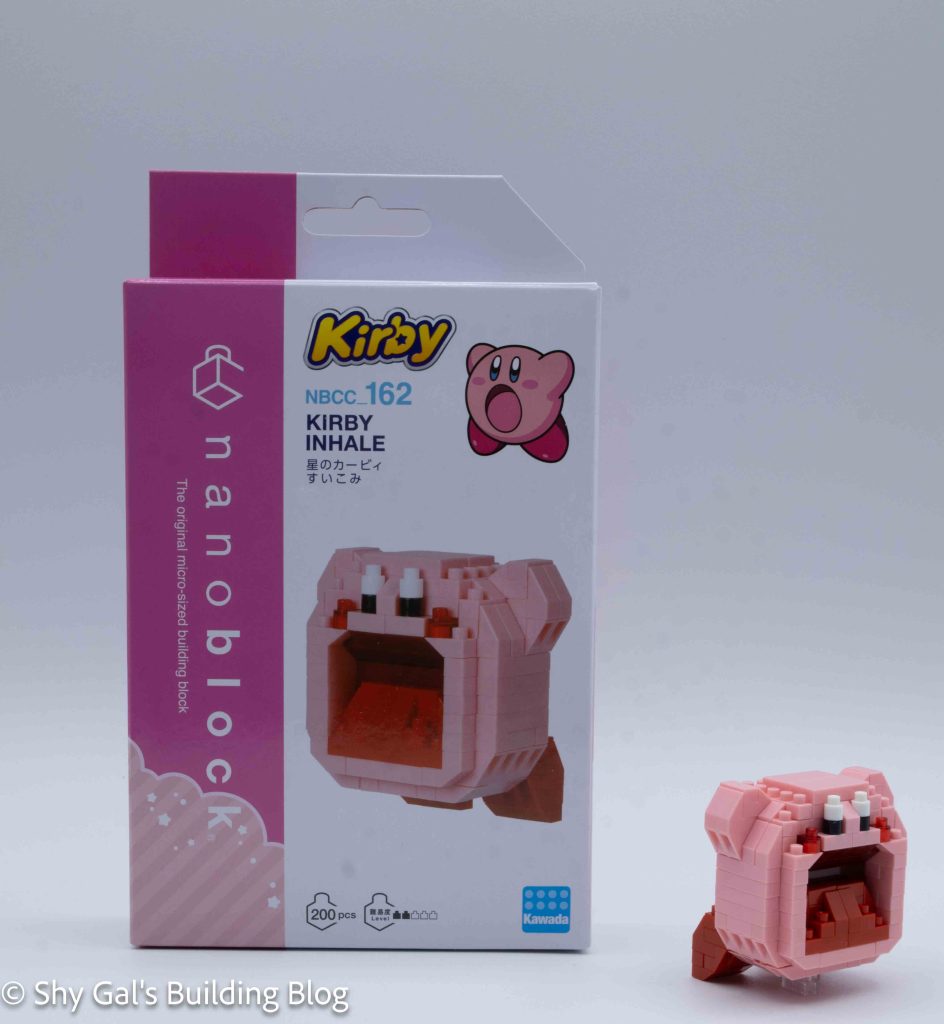
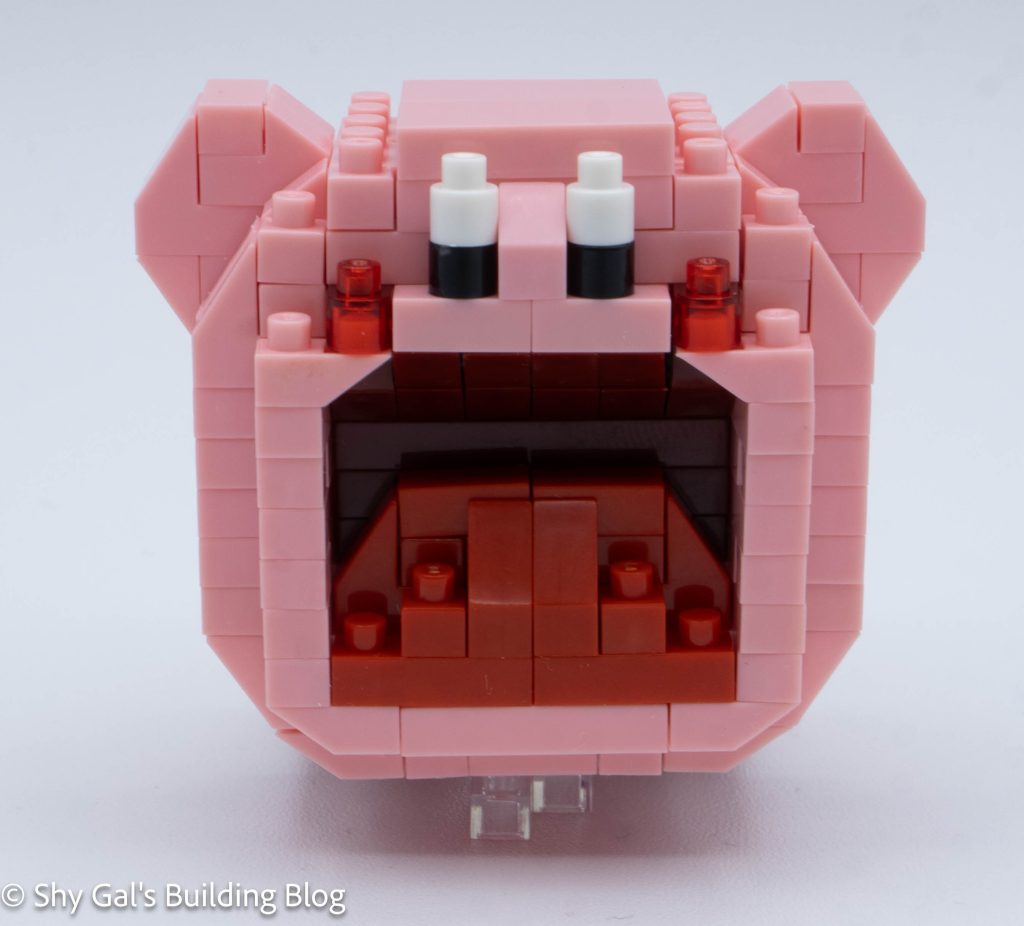
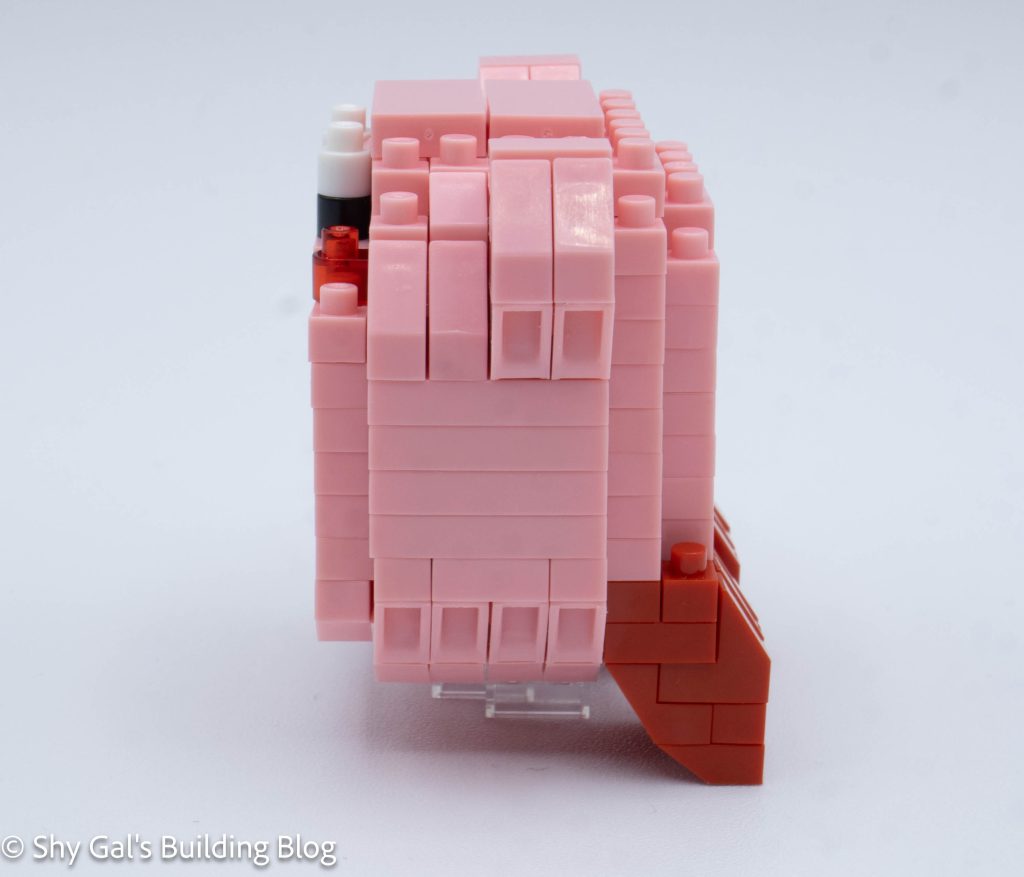
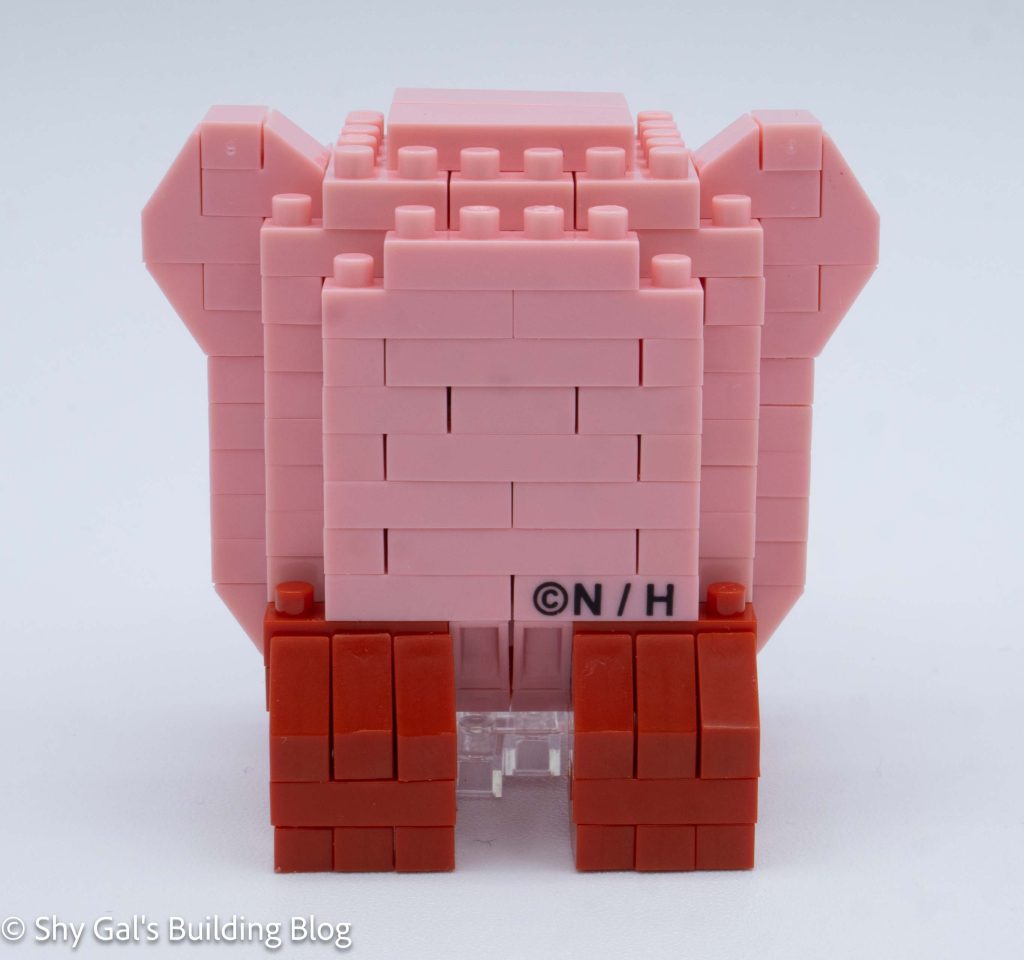
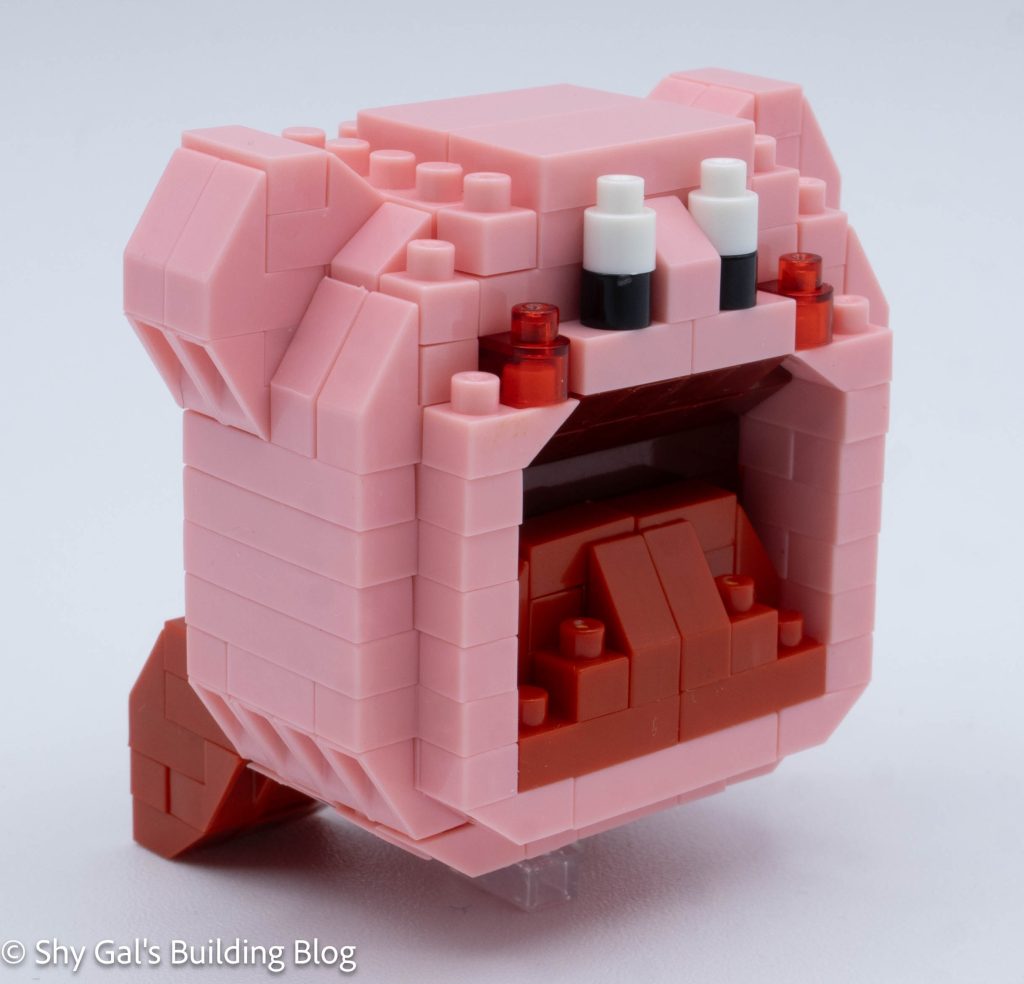
This post is a review of the nanoblock Kirby Inhale build. Kirby Inhale is part of the nanoblock Character collection. Wondering what else is part of the Character collection? Click here for a list.
Number: NBCC_162
Number of Pieces: 200
Difficulty Rating: 2/5
The build begins with building out the base layer of Kirby over 4 steps. This includes the bottom of the mouth and the top of Kirby’s shoes.
Kirby goes up in layers around the outside and builds the back of Kirby’s mouth.
After several layers, Kirby is closed up.
Next, Kirby’s top is built. This includes the arms, cheeks, and eyes.
The next step is to build Kirby’s shoes. Then Kirby is rounded out on the bottom.
The final step is to build it to build the stand so that Kirby doesn’t fall over.
Things I liked:
I really like the use of the multiple shades of red to create the inside of Kirby’s mouth
Things I didn’t like:
I don’t have any real complaints about this build. It was very simple
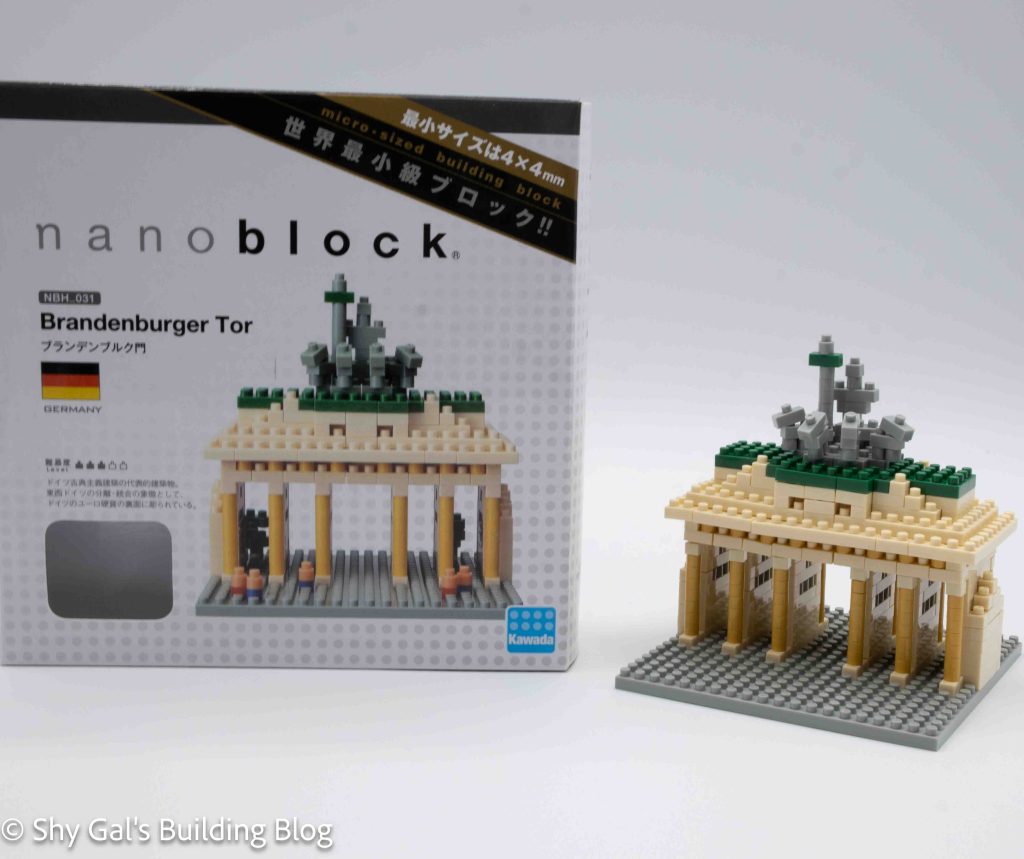
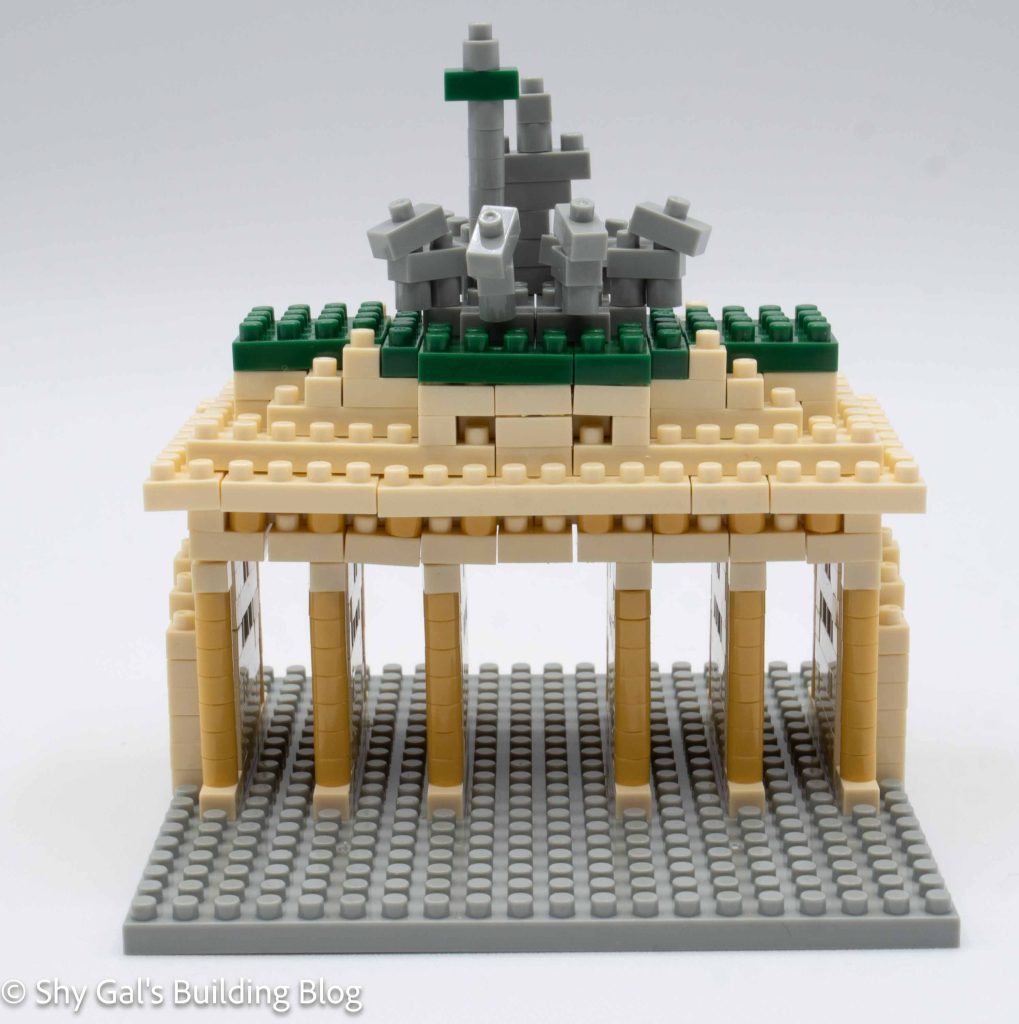
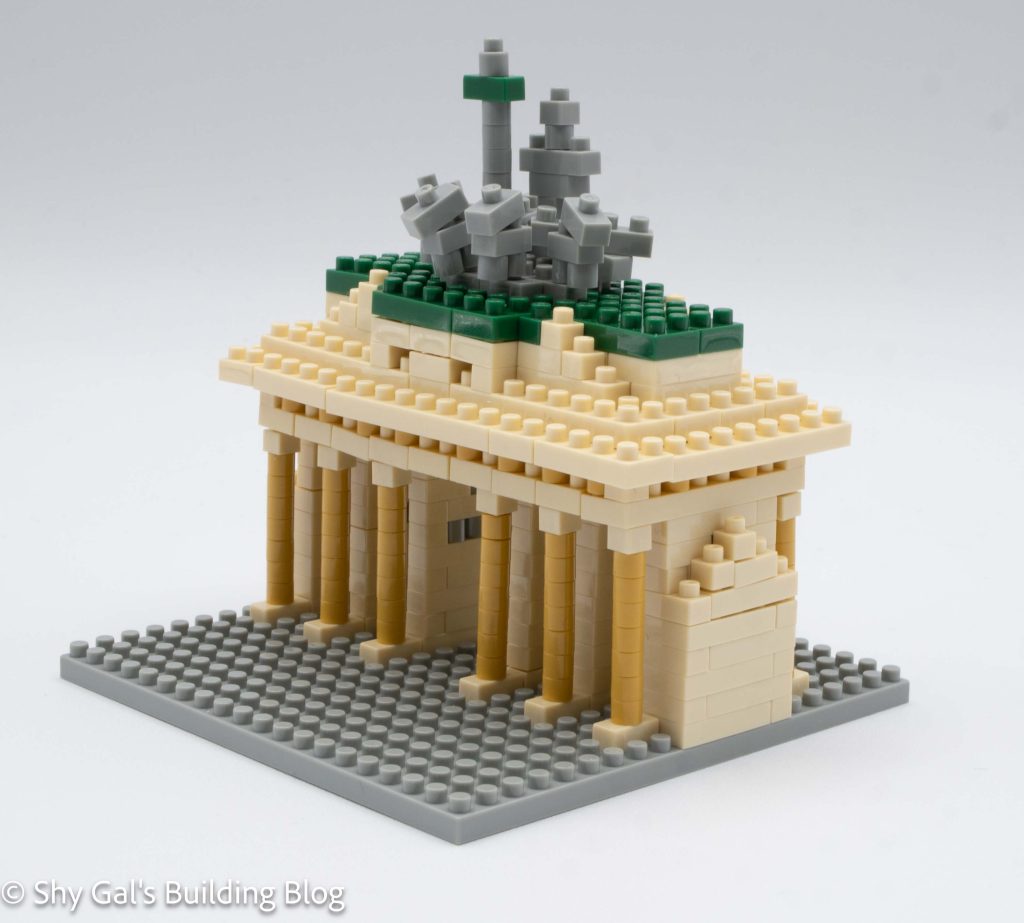
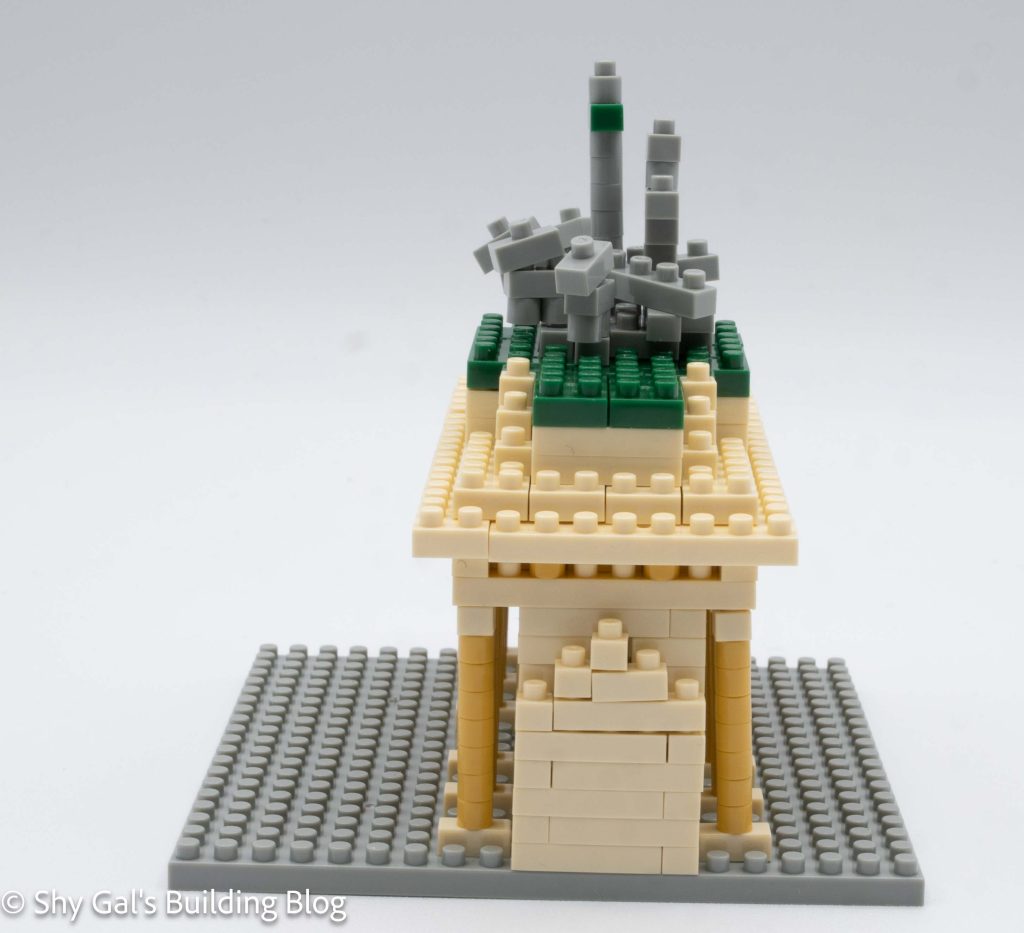
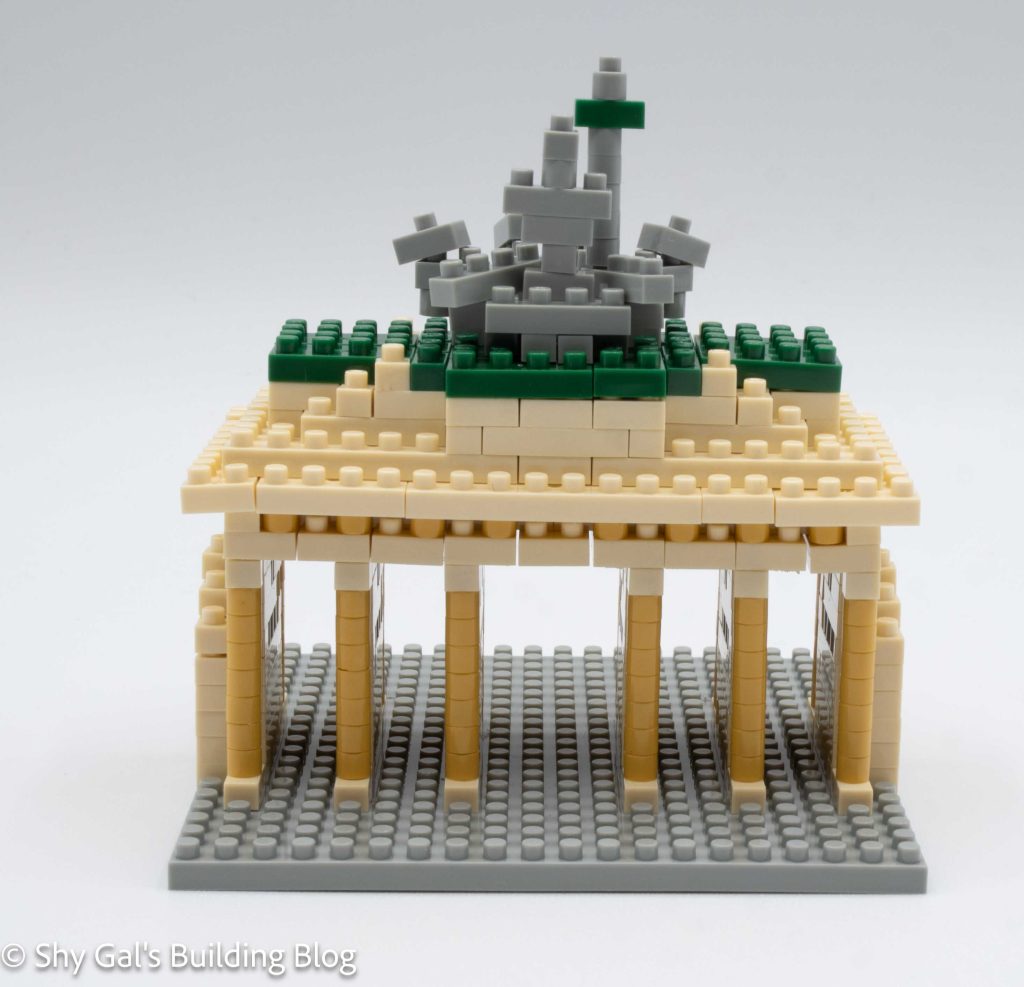
This post is a review of the nanoblock Brandenburger Tor build. Brandenburger Tor is part of the nanoblock Sights to See collection. Wondering what else is part of the Sights to See collection? Click here for a list.
Number: NBH_031
Country: Germany
Difficulty Rating: 3
The Brandenburger Tor is also known as the Brandenburg Gate. It’s in Berlin, Germany.
This kit is split into 3 sections. There is the main body, roof, and details.
The main body is the structure holding up the gate’s roof. It begins with laying bricks out on a 20×20 plate.
The structure goes up in very straightforward layers. Due to the size of each step I placed a counter on the step I was on to make sure I didn’t try to add in extra steps. As I neared the end of the structure, keeping everything straight was a bit of a challenge because the columns had gotten so tall.
After building the main structure, set it aside to begin working on the roof. The roof began with 9 long pieces all lined up next to each other. I wanted to make sure things were lined up properly, so I used my nanoblock pad.
After getting the first step tied together in the second step, the rest of the roof is fairly straightforward. There is a direction that is a bit hard to follow because it is creating an overhang but once I got the first piece lined up, the rest fell into place fairly quickly.
Next, attach the roof to the main structure.
The final set of steps is to add all the details.
The first set of details is the statue at the top of the gate. I found these directions to be very cramped and hard to read. I even missed some bricks that I was supposed to place and needed to go back and reread the directions. I was eventually able to figure it out.
The kit also comes with bricks to add nanoids and trees to the build. I didn’t add the nanoids because I don’t think they would fit properly to scale. I didn’t add the trees because I looked online, and the Brandenburg Gate doesn’t have any visible trees nearby. There are some gardens, which may be what nanoblock was going for. I feel that neither the nanoids nor trees added to the build in any meaningful way and were not to scale.
Things I liked:
Although it isn’t accurate to the actual gate, I really like how the different colors used in this build look in combination
Things I didn’t like:
I felt the directions for the roof details were difficult to read
I don’t like when extra stuff is added to the build just because especially when it isn’t to scale
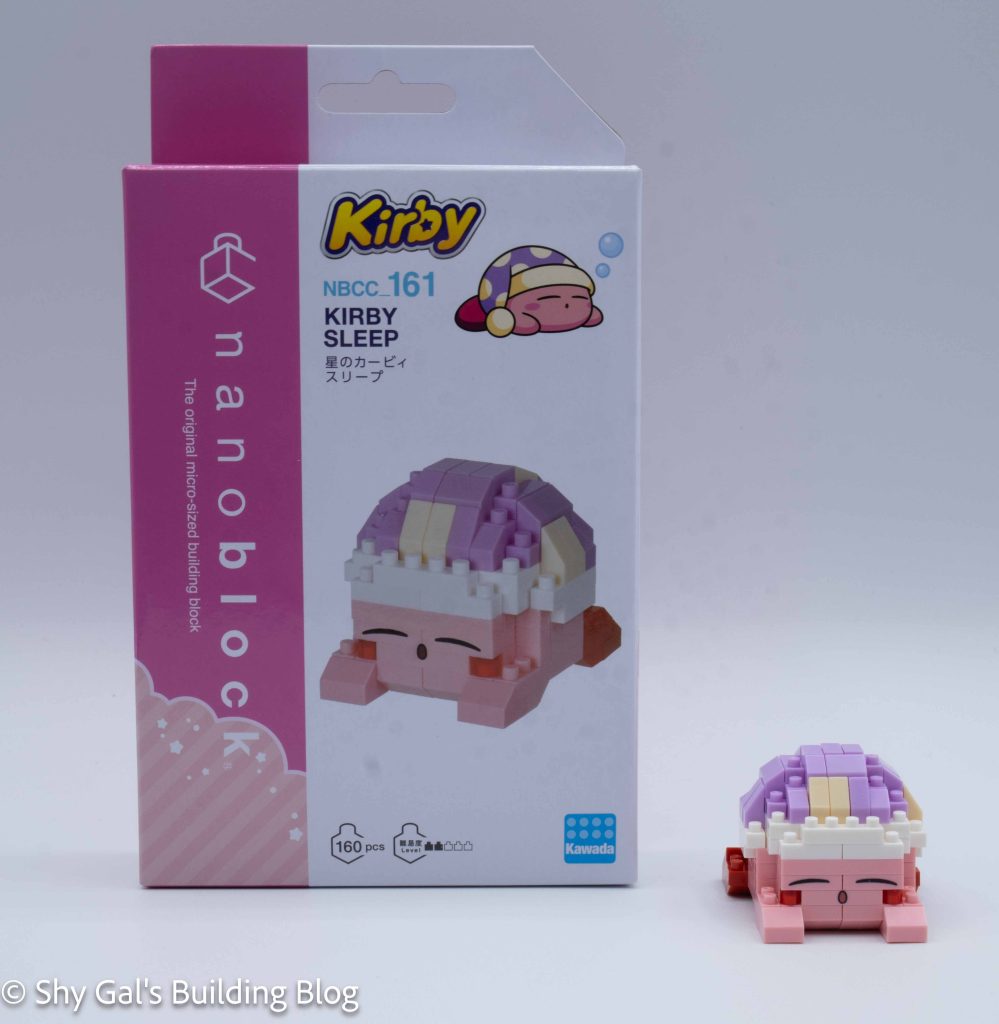
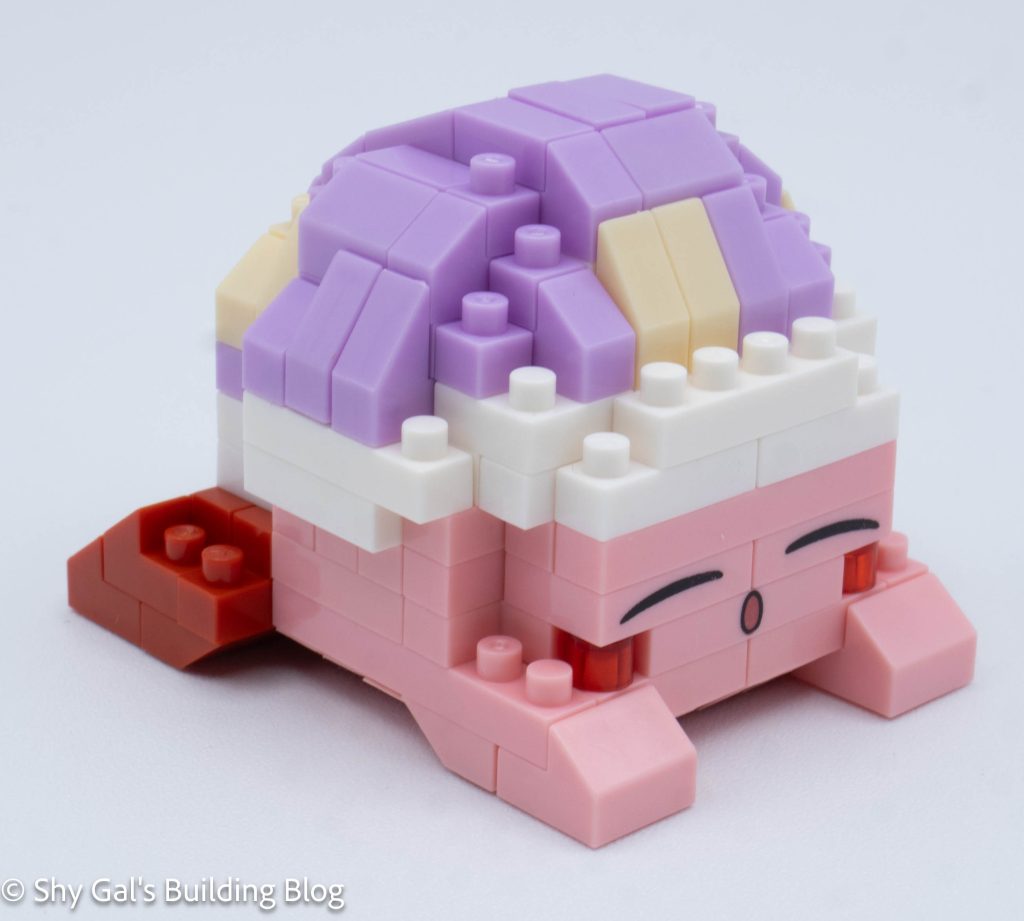
This post is a review of the nanoblock Kirby Sleep build. Kirby Sleep is part of the nanoblock Character collection. Wondering what else is part of the Character collection? Click here for a list.
Number: NBCC_161
Number of Pieces: 160
Difficulty Rating: 2/5
This kit begins with creating Kirby’s base. Over the first three steps, the entire base is created.
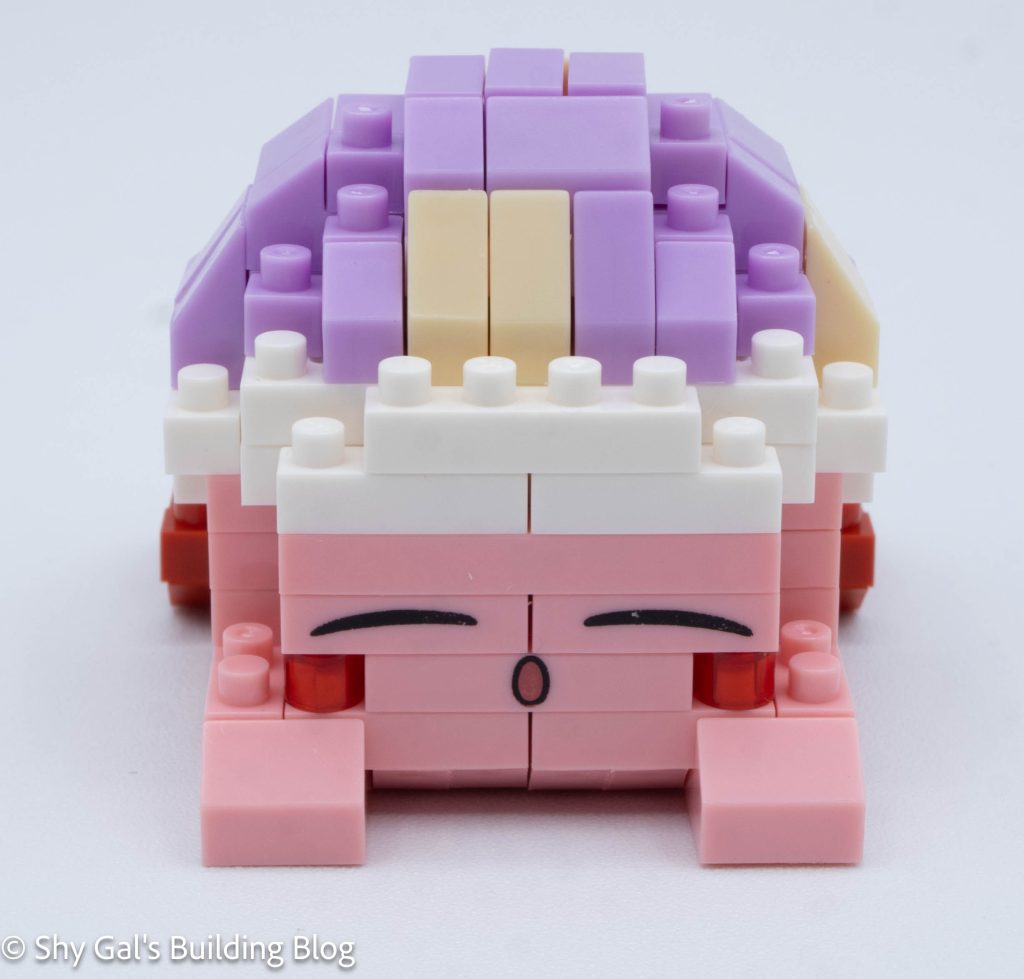
Step 4 adds the custom-printed face when the next layer is added.
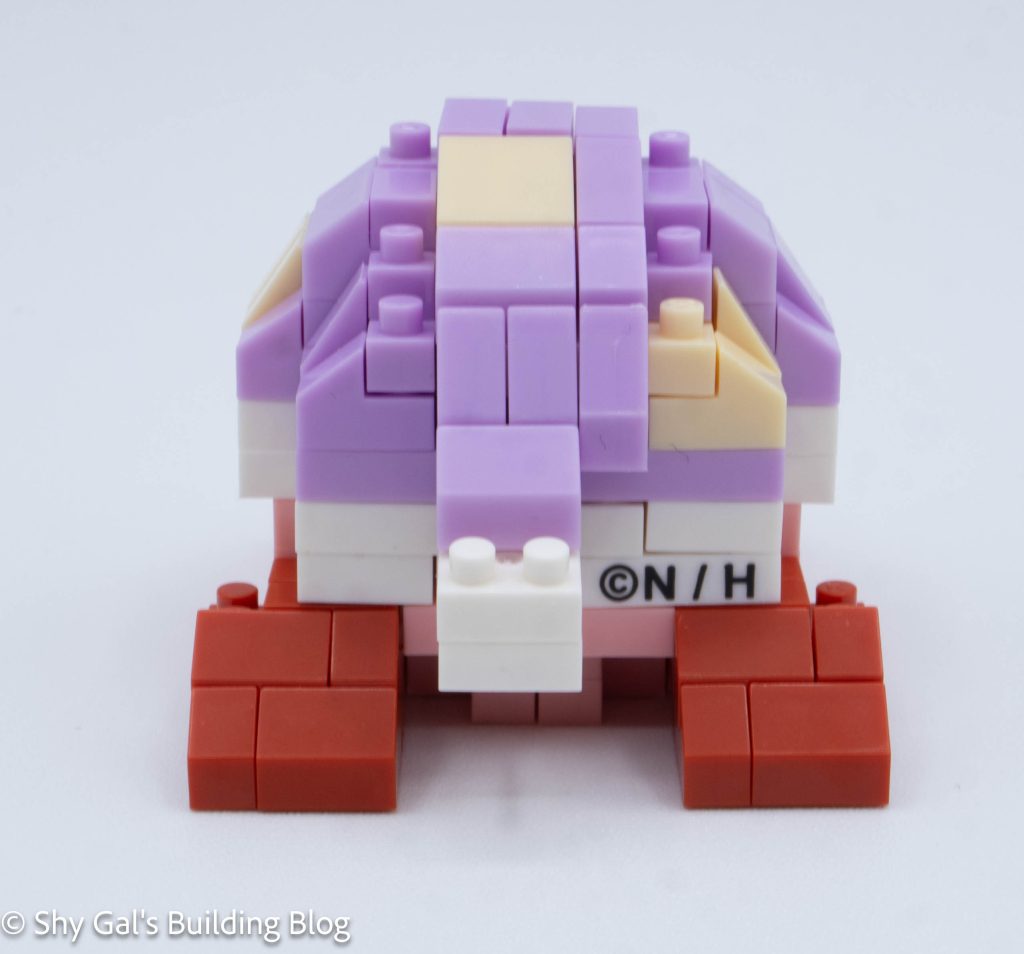
Then, I began to build the hat from the back. Starting at that point, Kirby ends and the hat begins.
The hat was a little tricky because of all the slanty pieces. I needed to be careful to use the correct slanty pieces, which changed every brick. Other than the slanty pieces, the hat was pretty straightforward.
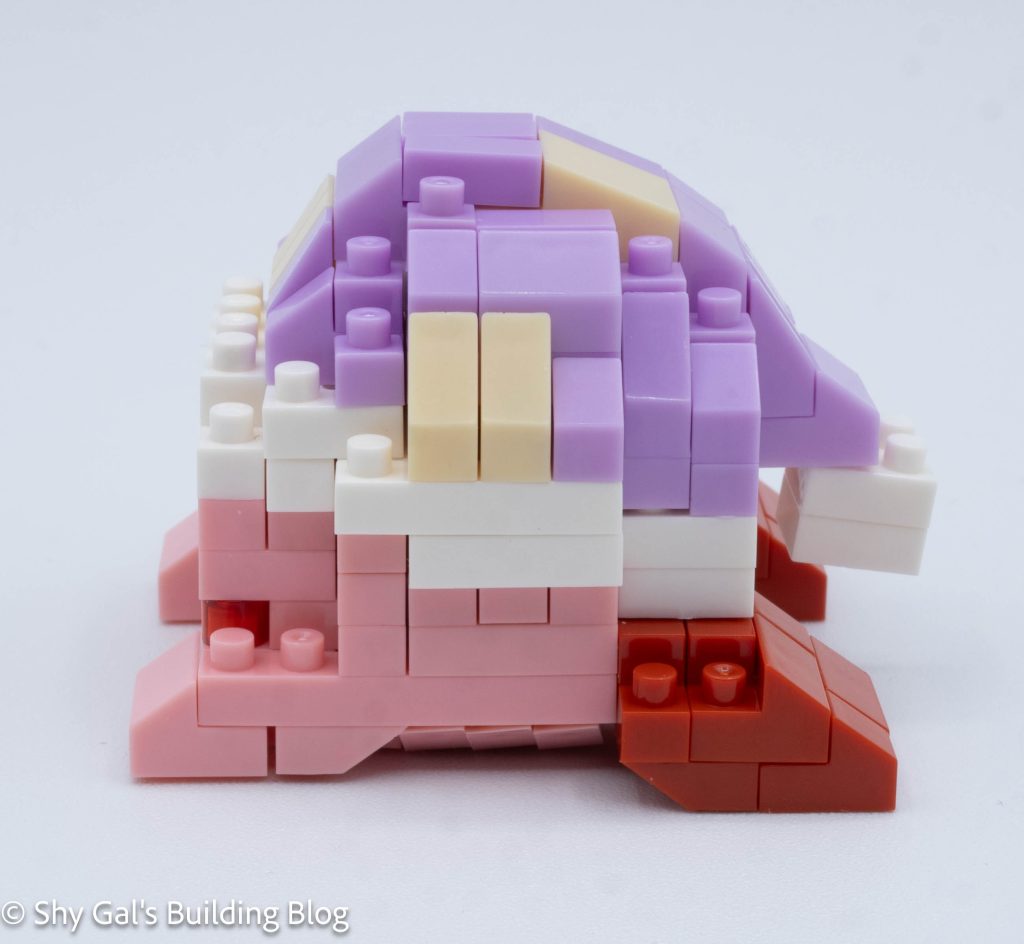
Then I flipped Kirby upside down to add the details to round out his bottom.
Next the tassel to the hat was added.
The final step is to build and add Kirby’s feet.
Things I liked:
I like the hat I feel that it looks like fabric
Things I didn’t like:
I didn’t find the instructions for adding the feet very clear
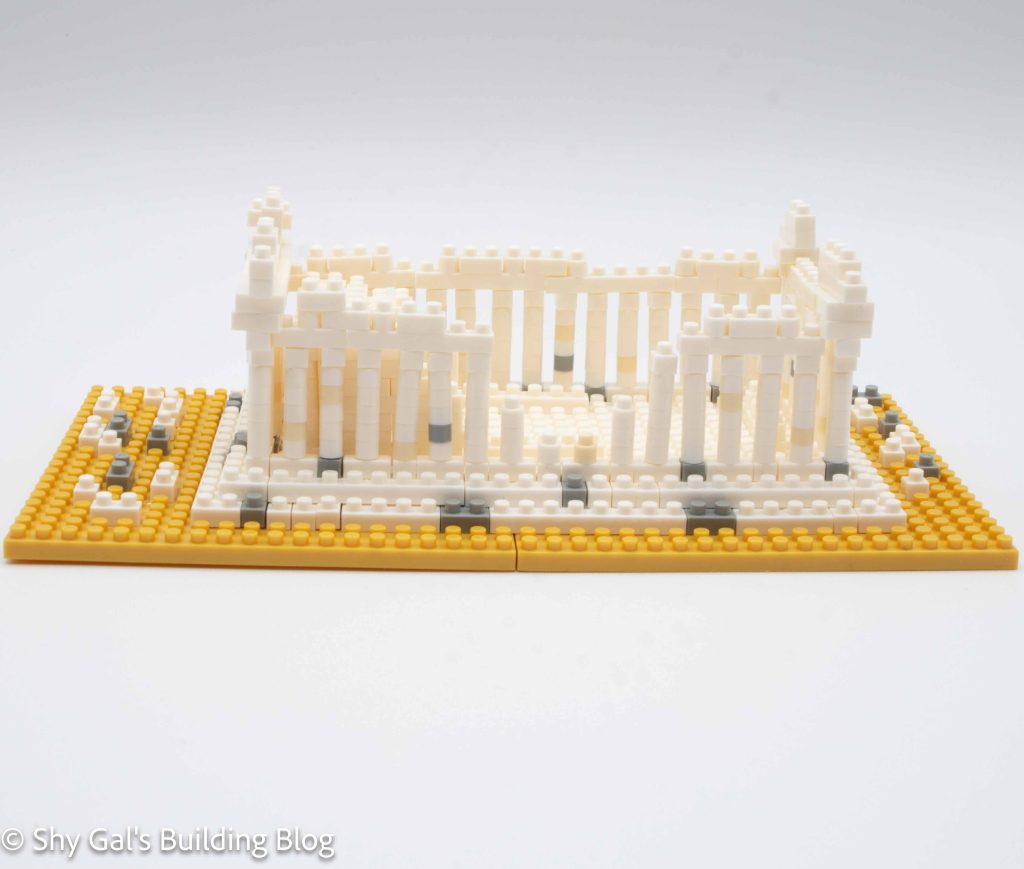
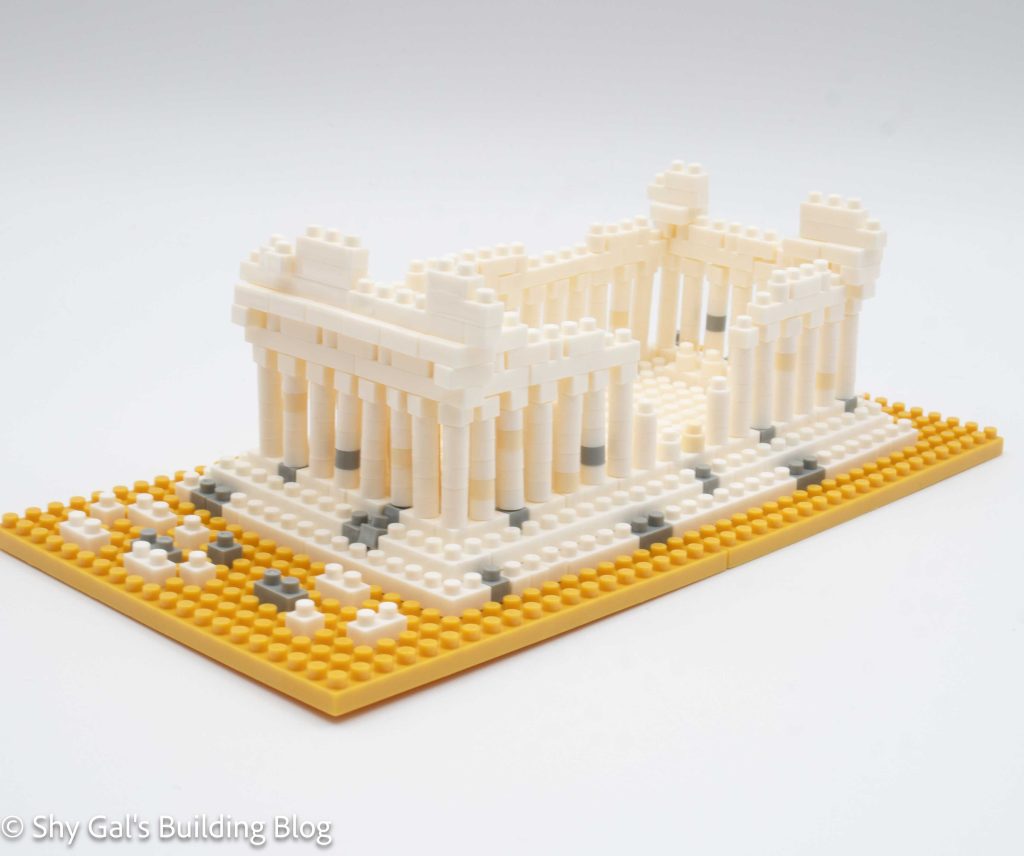
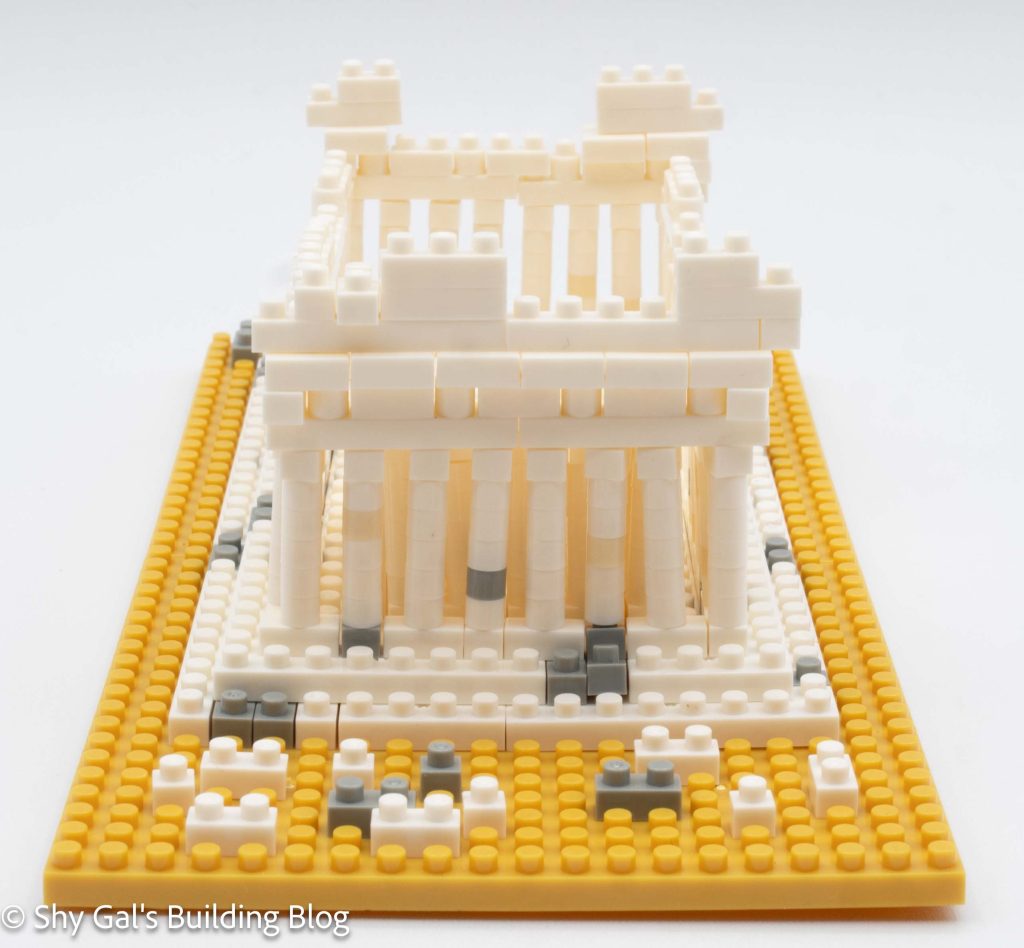
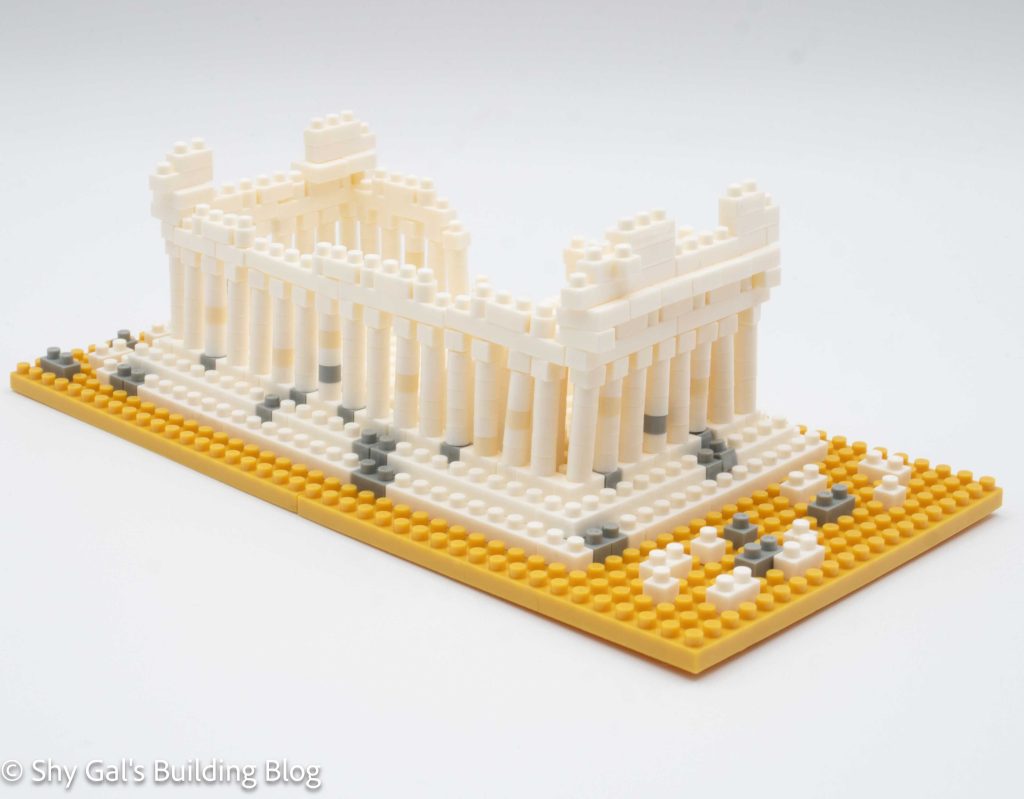
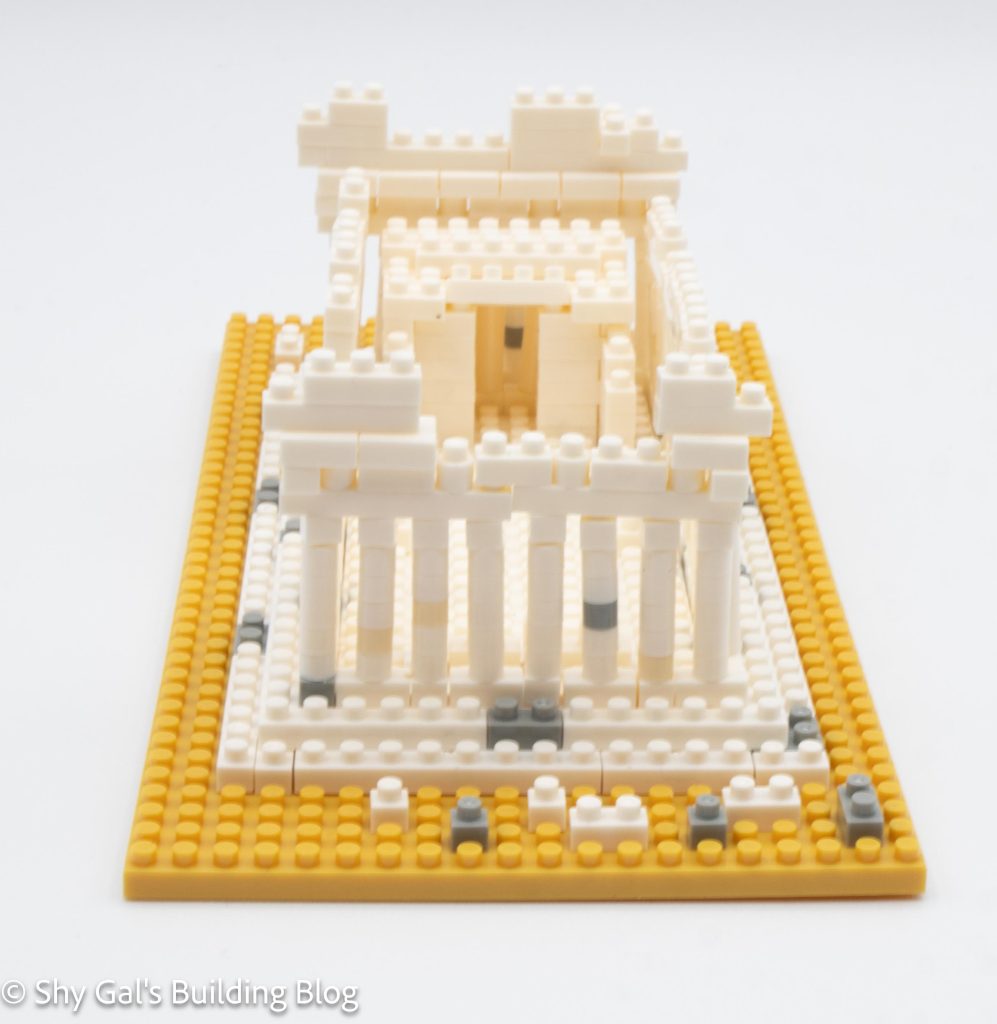
This post is a review of the nanoblock The Parthenon build. The Parthenon is part of the nanoblock Sights to See collection. Wondering what else is part of the Sights to See collection? Click here for a list.
Number: NBH_066
Country: Greece
Difficulty Rating: 3/5
The instructions for this kit include several nanoids all around the base. I didn’t include them in my build because they don’t really fit the scales of the rest of the build.
For me, the trickiest part was keeping track of all the pieces. I normally build on a tray balanced on my lap. This kit had a ton of round pieces, so every time I sifted, the round bricks would roll all over the tray.
This is a large NBH build because it is built on 2 20×20 plates, whereas most kits have only one plate.
The build begins by outlining the base of The Parthenon. This step also connects the 2 base plates. There is some rubble scattered around the build as well.
The next couple of steps is to build the actual base of The Parthenon. There appear to be steps going all around the building. Two 10×10 plates are used to create the base at the top of the platform.
The next couple of steps are to create the ruin of a building that used to stand on top of the base. I’m not sure how accurate the building is because the only photos I can find appear to be only walls, while the nanoblock build appears to have a roof.
The next step is to create all the columns around the outside of the building. There are columns on all four sides. I like that there is some slight variation of the columns by adding cream and gray bricks to the columns instead of having them just be white. After all the columns are all, each section has a bit where the column connects to the roof.
Overall, I feel that the build has a feeling of the Greek ruins, but I’m not sure that it’s accurate enough I would recognize it as The Parthenon.
Things I liked:
I like how the additional colors break up the white in the columns. I wish there had been more of this in the build
Things I didn’t like:
I’m not sure how recognizable it is as The Parthenon, but it looks more like a generic ruin to me
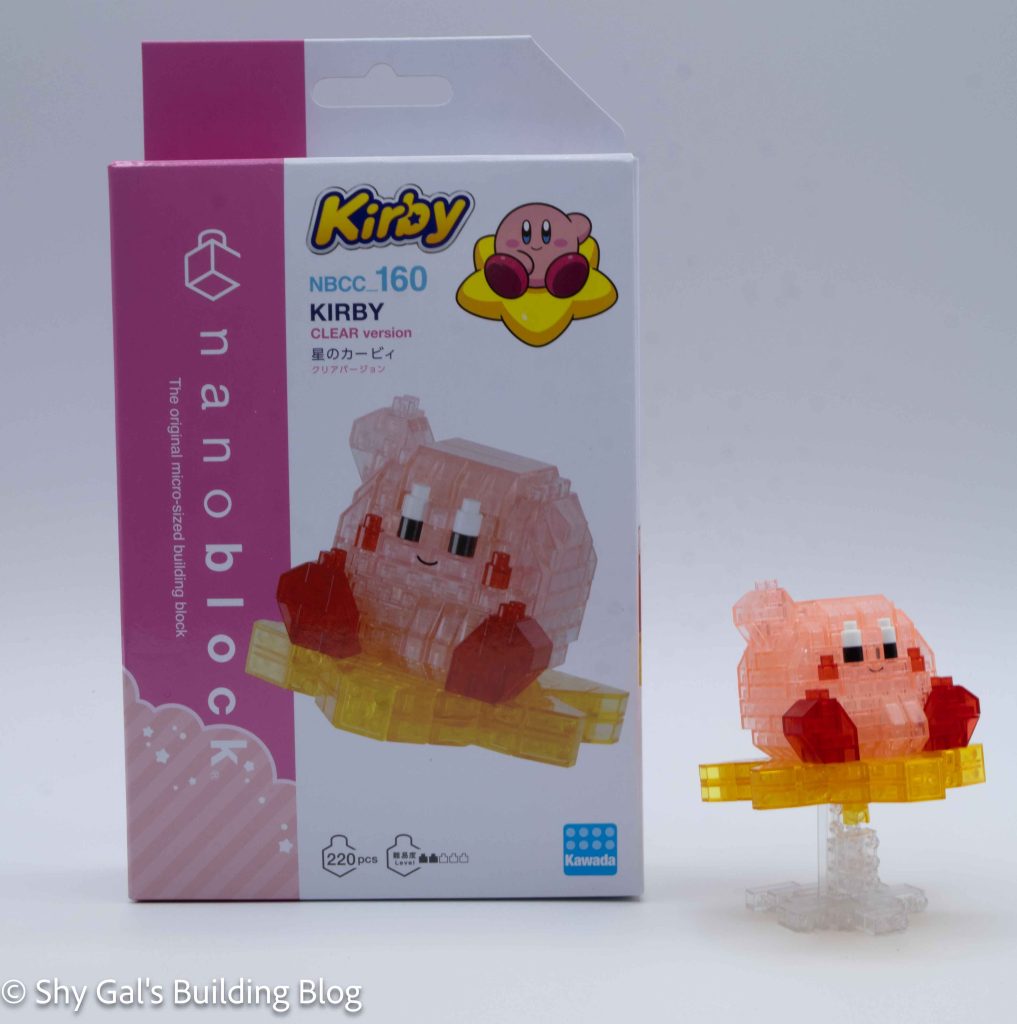
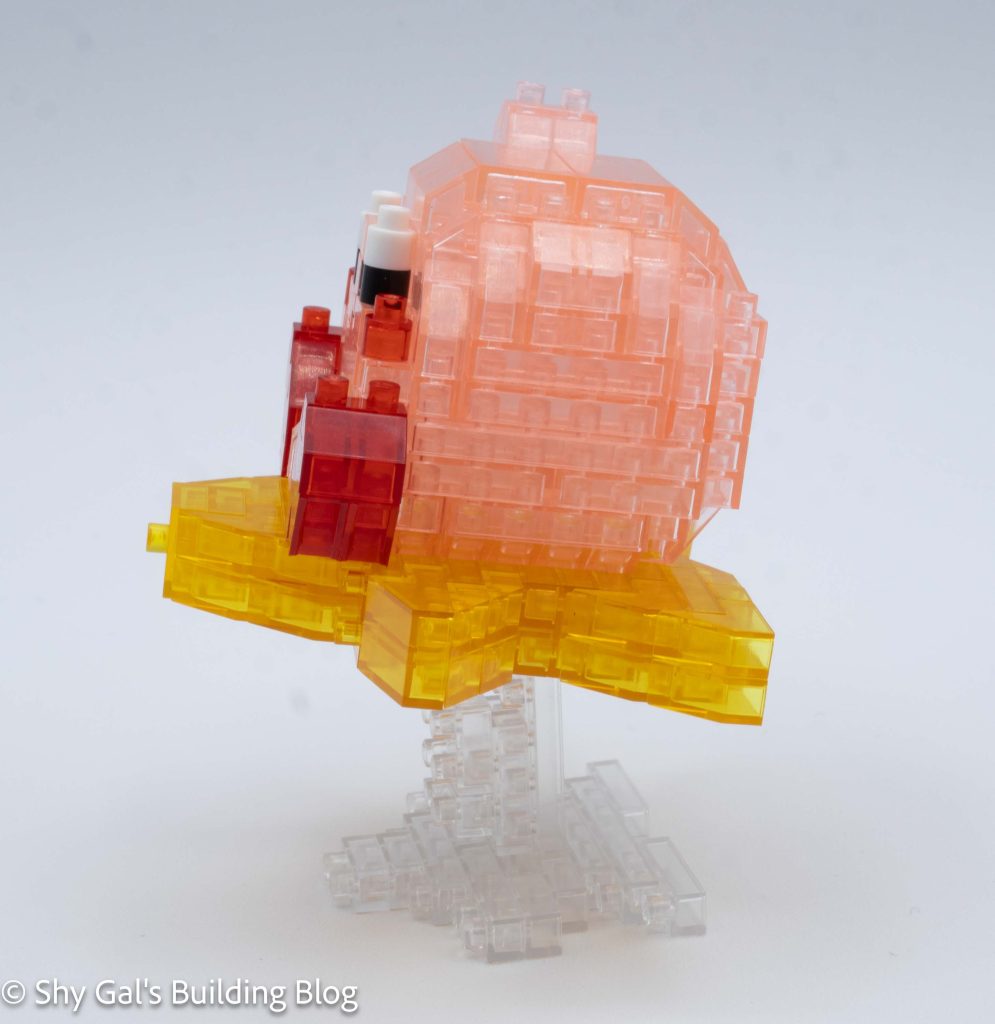
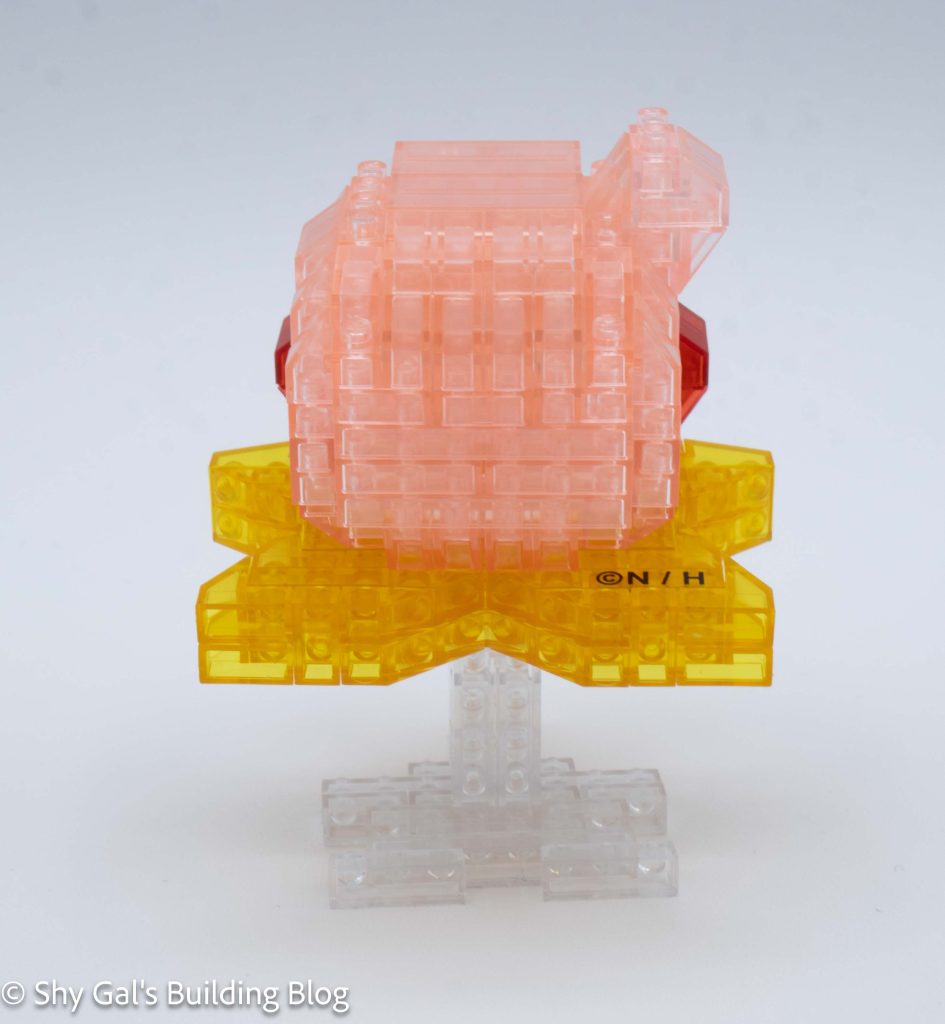
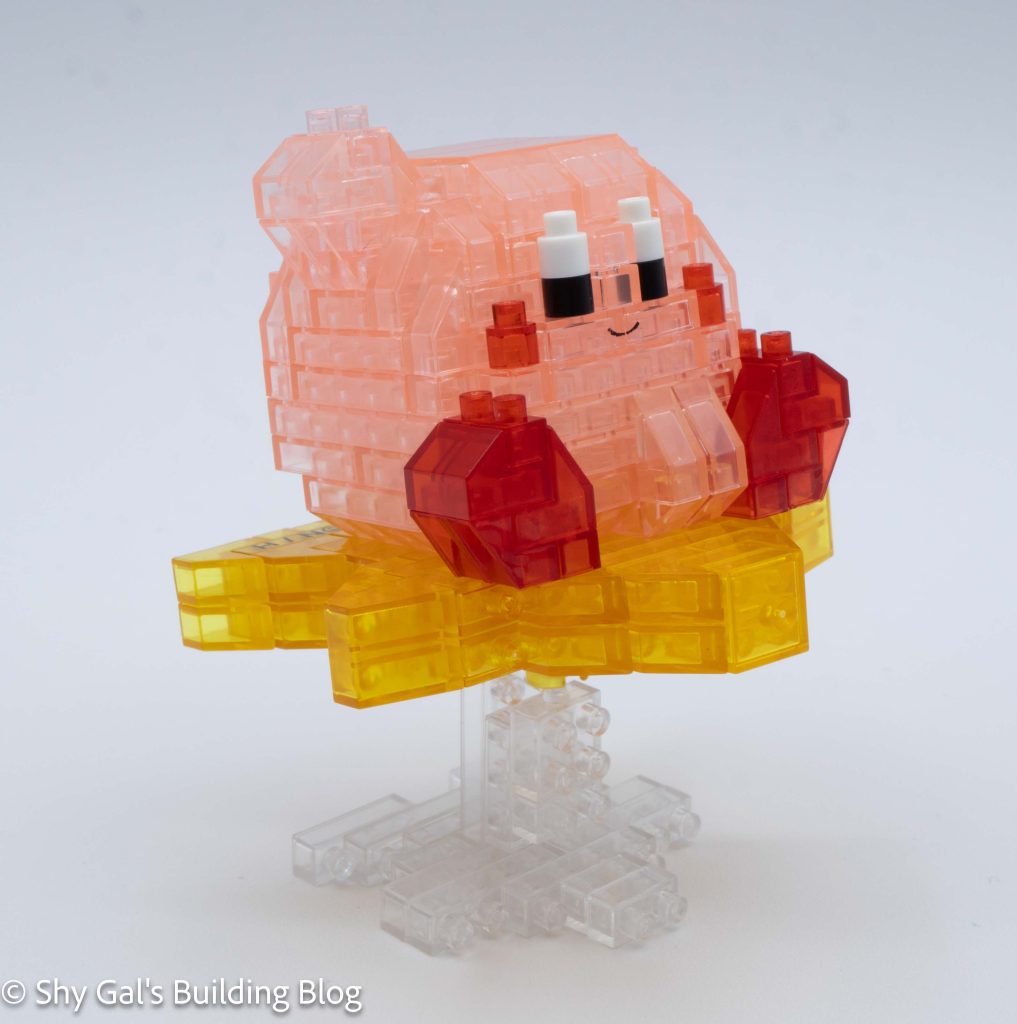
This post is a review of the nanoblock Kirby Clear Version build. Kirby Clear Version is part of the nanoblock Character collection. Wondering what else is part of the Character collection? Click here for a list.
Number: NBCC_160
Number of Pieces: 220
Difficulty Rating: 2/5
This kit is identical to NBCC_140, except it is made of clear bricks. Finding the correct bricks to use was a bit more difficult because the light pink and clear looked very similar, even on my white-backed tray.
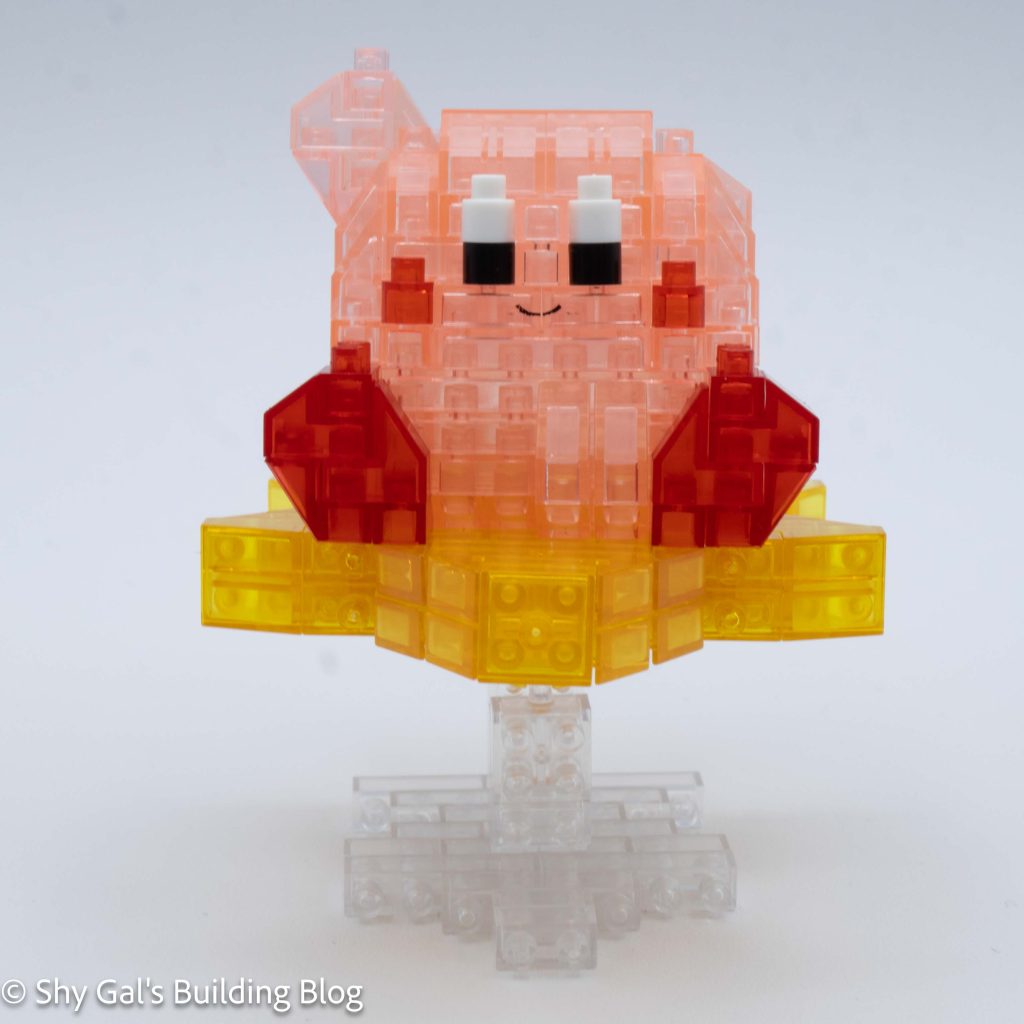
This build is made up of 3 sections. There is Kirby, the star, and the stand.
Kirby begins by making a base in pink bricks. Then, the feet are added to the base. After that, Kirby begins going up in layers. Overall, things are fairly straightforward. In the step that adds Kirby’s mouth, I didn’t understand from the instructions that there was a custom piece with the mouth printed. Once I found the piece, the only other concern was the slanted pieces.
Kirby has 2 different slanted pieces. I appreciated that the colors in the instructions were different enough that it was very clear when to use which slanted piece.
The final step to building Kirby is to finish his hand and smooth out the top of his head.
The star is created by several layers of yellow bricks with a width of 2, so the final build is 2 bricks tall. The first step creates a gap in the 2 depth. I wasn’t sure why there was a gap, but it became clear when I put the sections together. The second step adds the socket of the ball joint, which is needed to connect the star to the stand.
After adding the socket, the rest of the star is fairly straightforward until the final step. There are 2 notable things about the final step. First, there is a custom-printed brick. I think it is for copyright, but I’m not sure for what exactly. Secondly, it wasn’t clear that it mattered what order sections were added. It was pretty easy to fix when I realized the order did matter.
Kirby sits on studs that point out the star, so he is very stable.
The stand is fairly straightforward. It begins by building up several layers of clear bricks. After building the layers, some additional bricks are added to the bottom layer. The stand is then laid on its side so the ball joint is up in the air.
Kirby’s star attaches to the ball joint on the stand. The part sticking up above the joint goes into the hole in the star to allow the star to sit at an angle.
Things I liked:
I really like how the final build turned out, and it was worth all the work to find the bricks
Things I didn’t like:
I didn’t like how hard it was to tell pink from clear on my building tray and how much digging I had to find the right piece