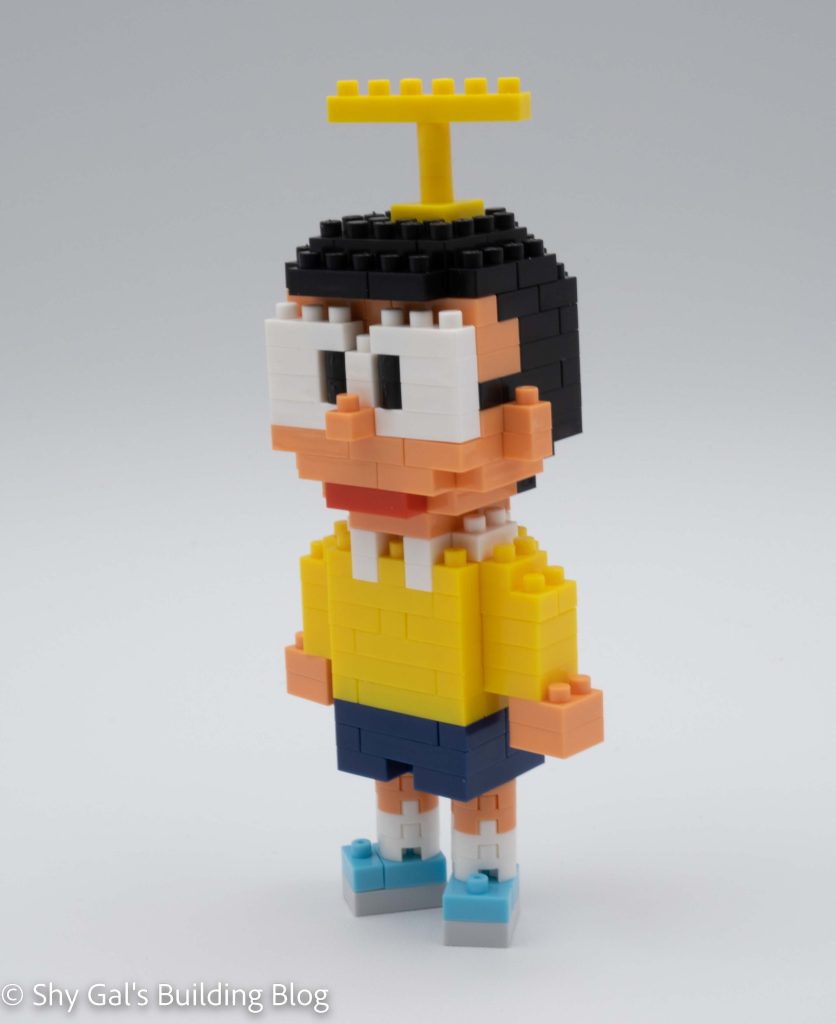
This post is a review of the nanoblock Brilliant Shining ver Pokemon builds. These builds are numbers NBPM_082 to NBPM_088. Each of these builds is part of the nanoblock Pokemon collection. Wondering what else is part of the Pokemon collection? Click here for a list.
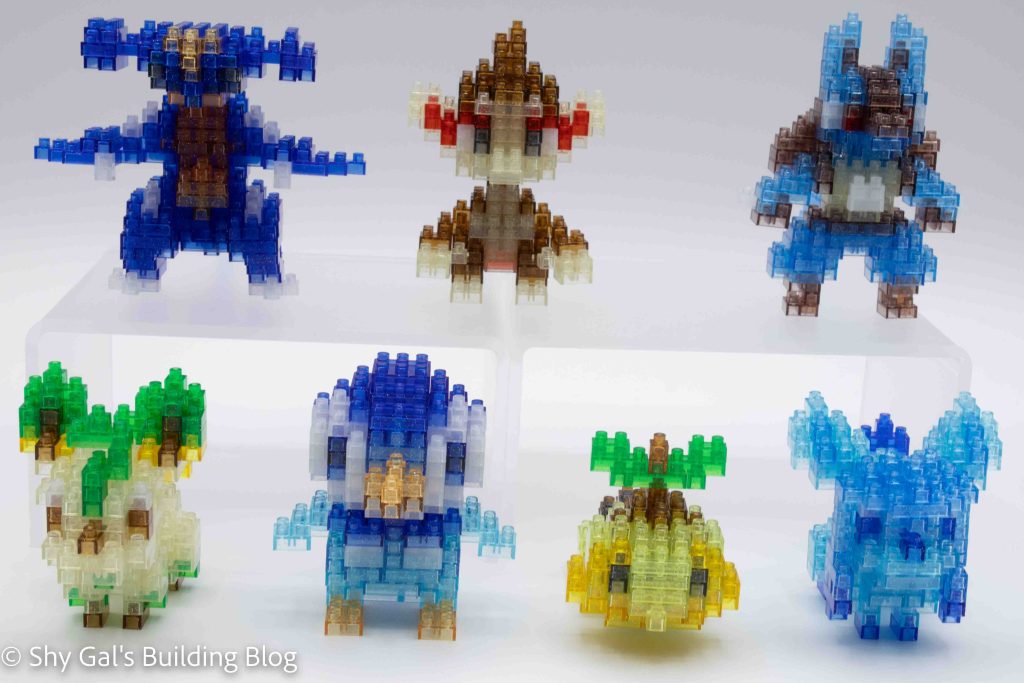
With the release of the Brillant Diamond and Shining Pearl video games, nanoblock released Pokemon from generation 4 as Brilliant Shining versions. These builds are identical to the original builds but are built using clear glitter bricks. The Pokemon in this rerelease are Lucario, Leafeon, Glaceon, Garchomp, Turtwig, Chimchar, and Piplup.
I’m reviewing the Brilliant Shining ver as a group because these builds are the same as the original builds, except each build is built with glitter bricks. Each build will have photos of the glitter builds and a link to the review of the original builds.
Overall I really liked building these. The clear glitter bricks fit together very nicely and tightly. In general, I find clear bricks hard to use because they seem to be tighter fitting, so I had been avoiding building the Brilliant Shining ver builds. I didn’t have this problem with the glitter version of the clear bricks, which was a pleasant surprise.
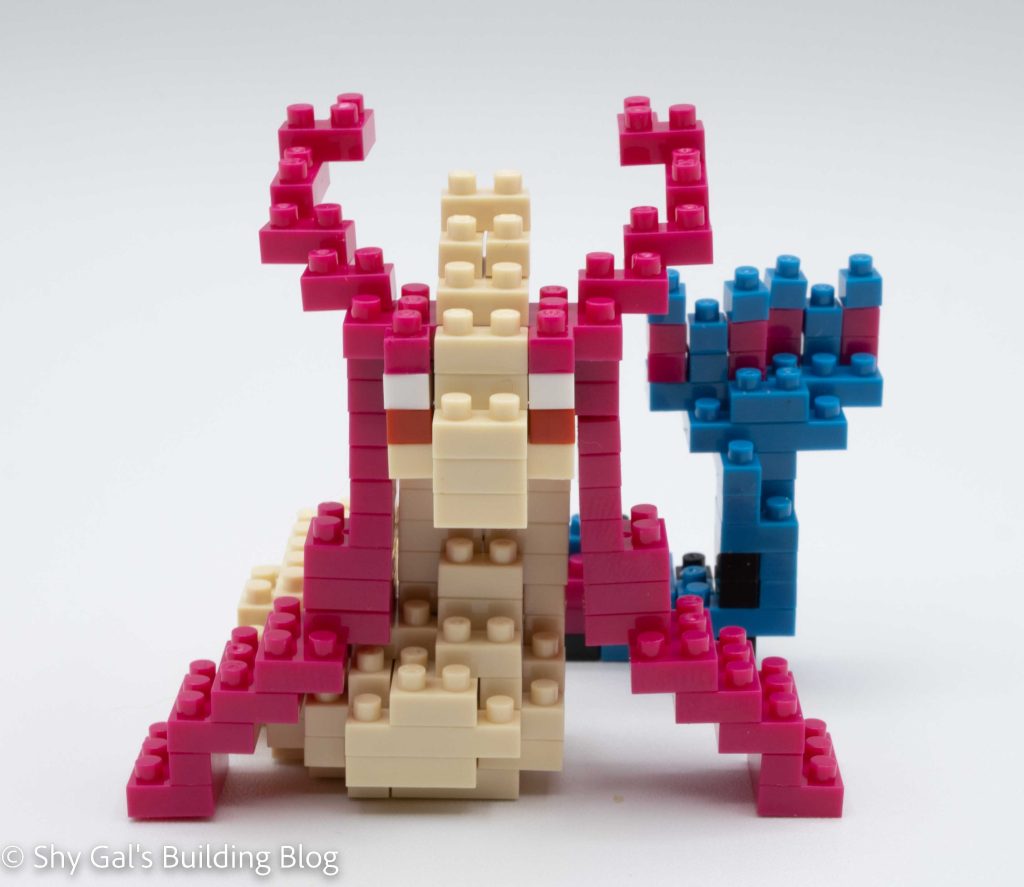
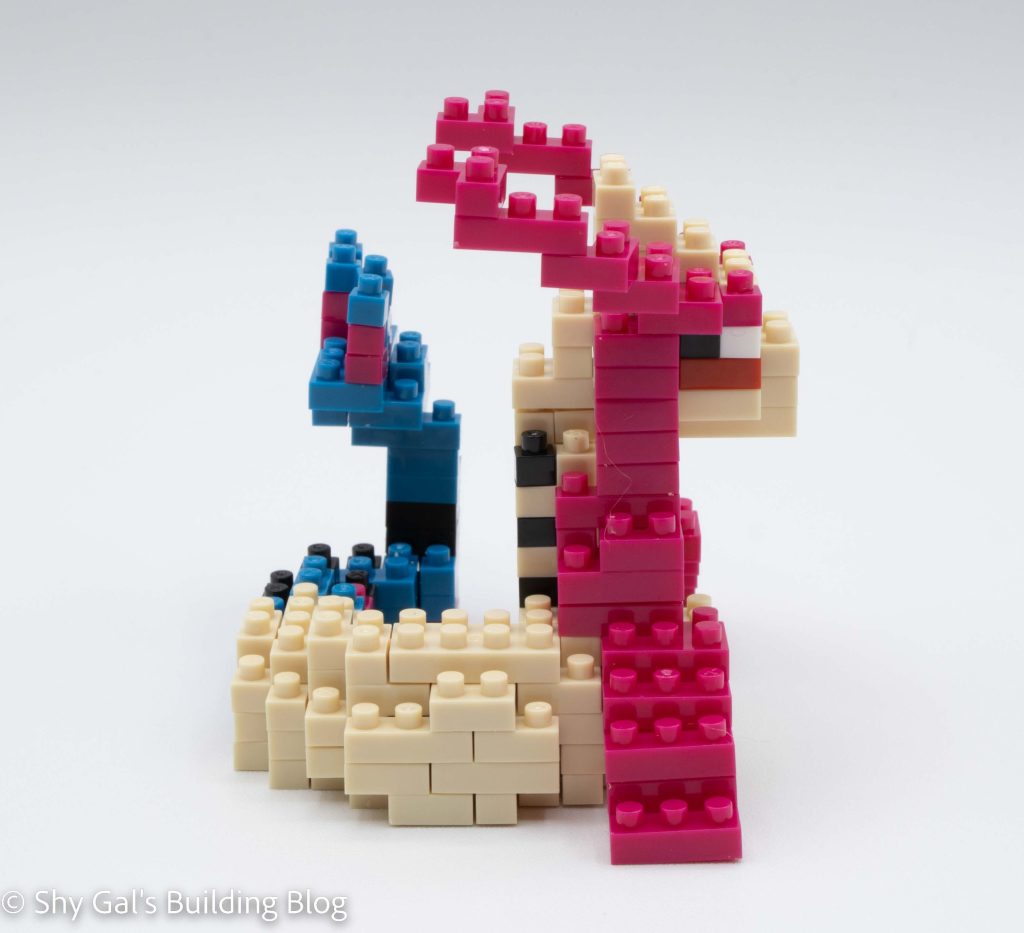
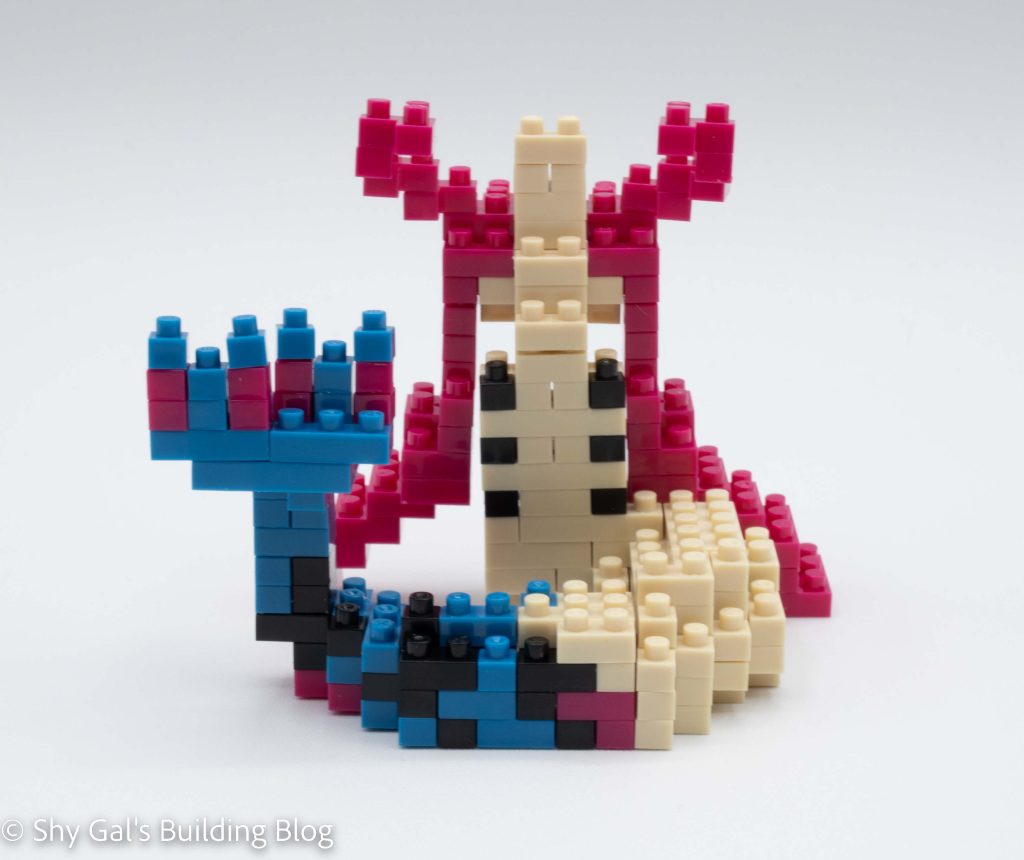
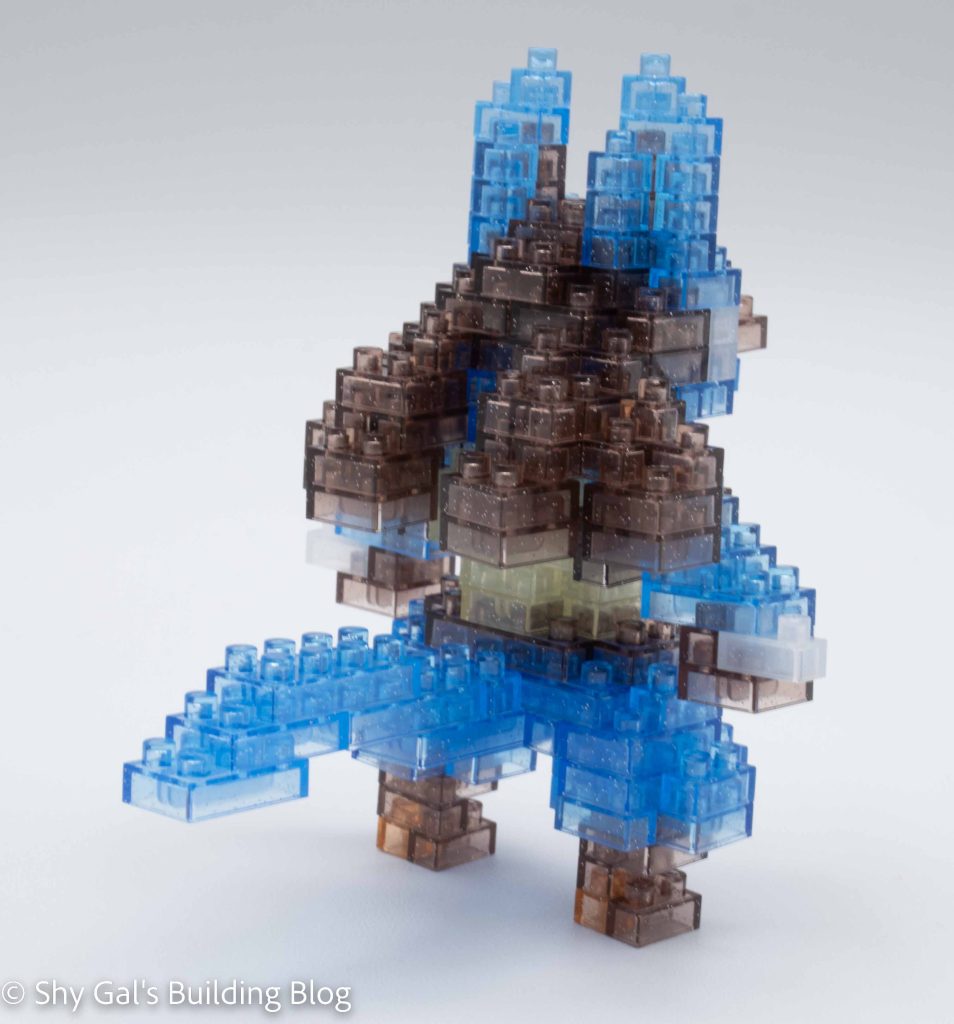
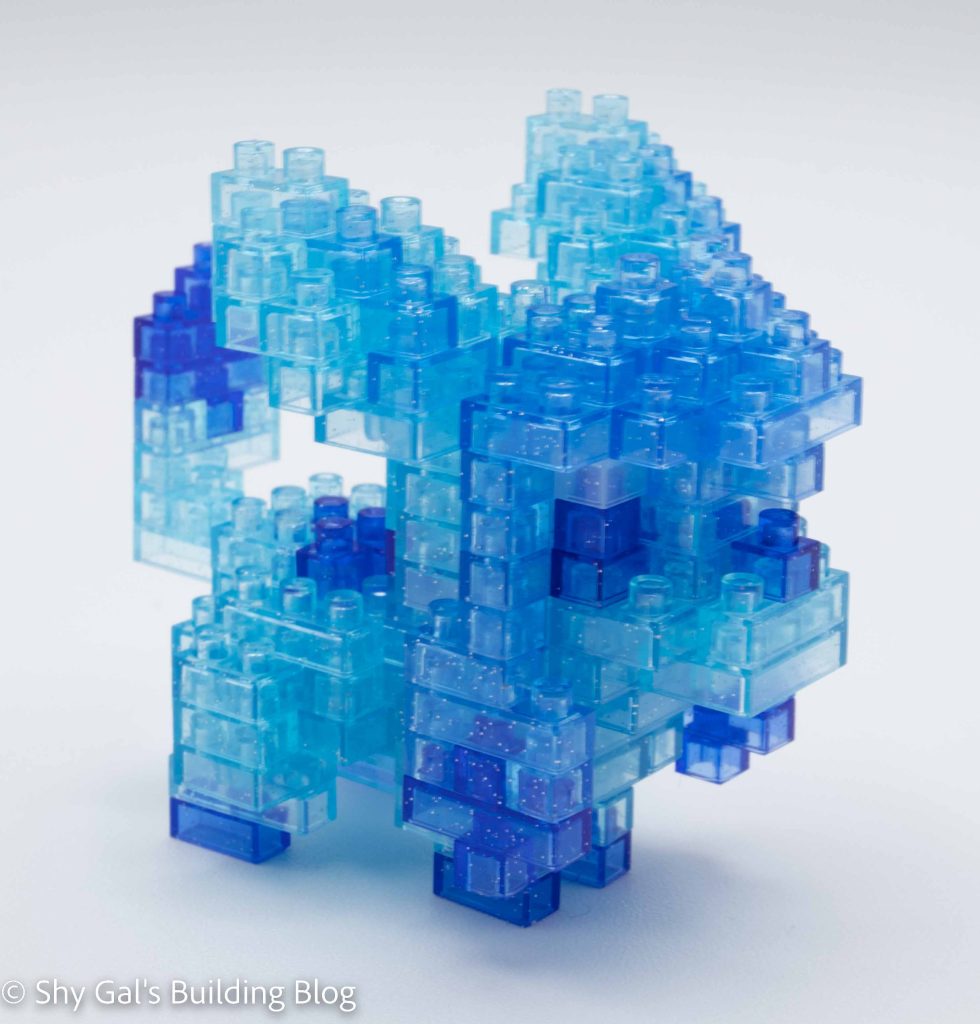
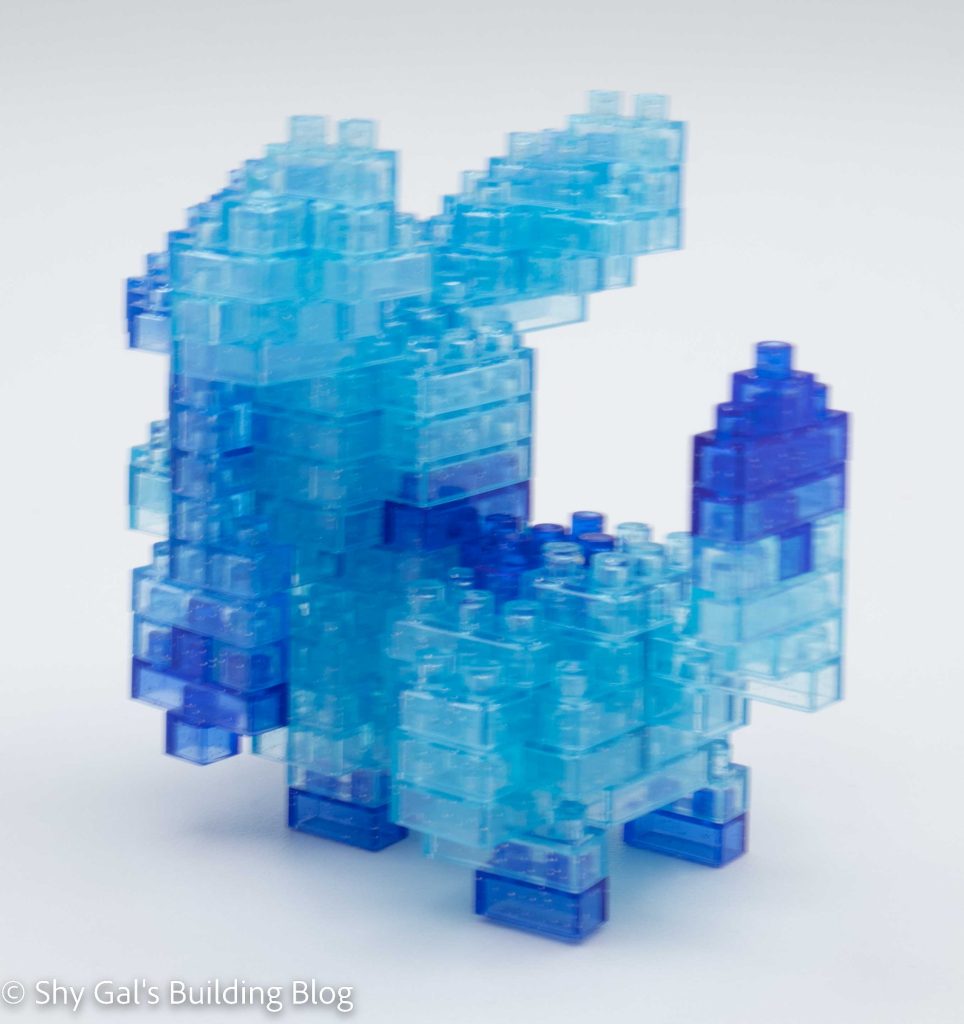
NBPM_082 – Lucario
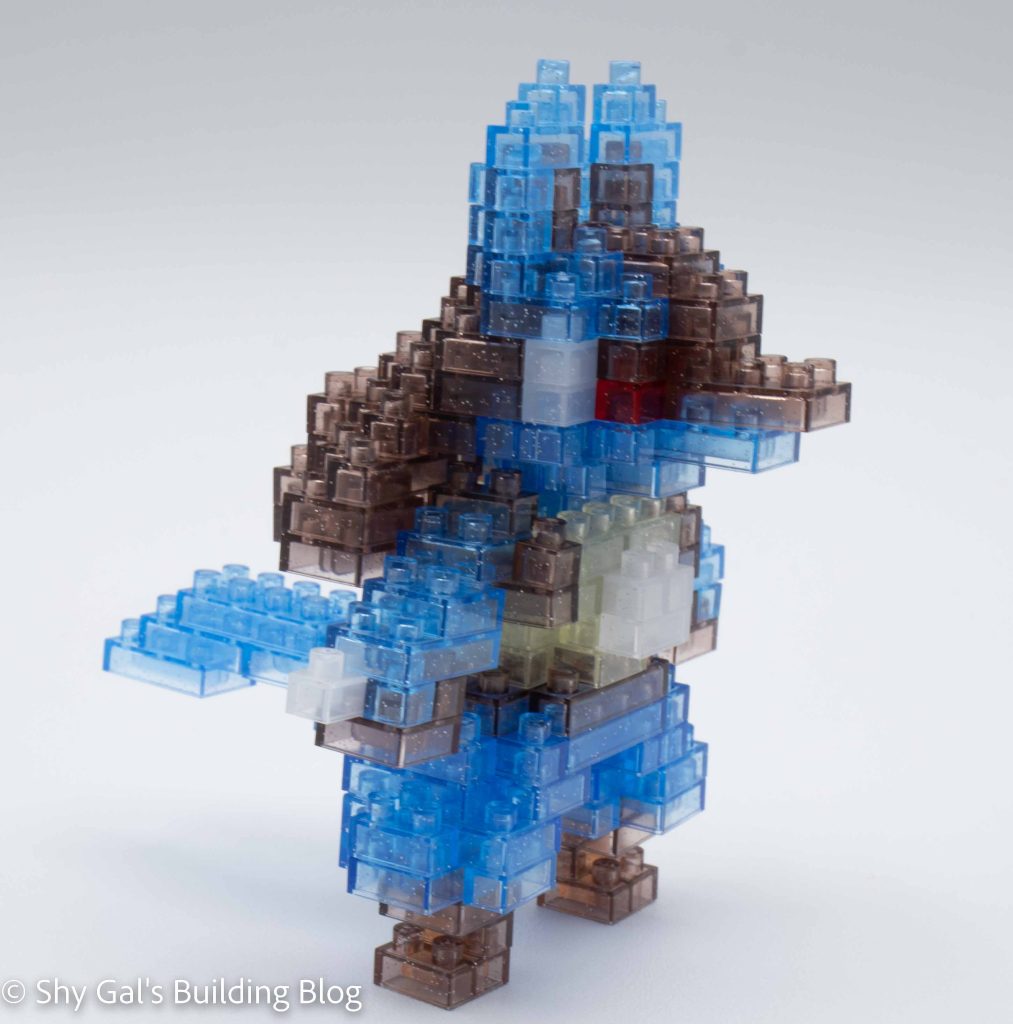
I really liked the cream bricks that were created for this build to make the main section of the body. It was also easy to tell the difference between the white and cream bricks. It was harder to tell which bricks were white in some of the later builds.
While building this build, I noticed some errors I had made in the original Lucario build, so I was able to fix my original build. I’m not sure what the difference is, but the glitter Lucario can stand on its own, while the original build isn’t able to even after making the corrections. The Brilliant Shining ver stands, but it is still a little tippy, so you want to ensure that the surface you put the finished build on is flat.
NBPM_083 – Leafeon

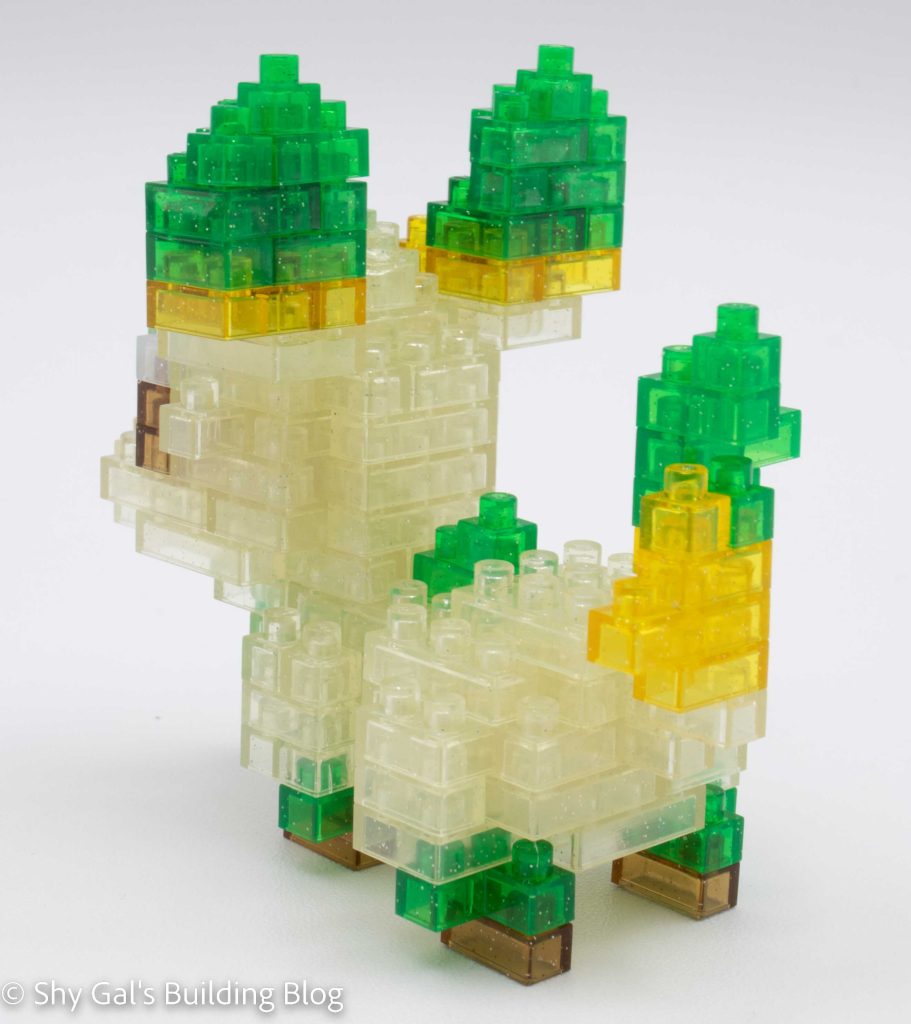
I found the Leafeon build super easy to put together. The only real difficulty I had building Leafeon was that the clear glitter white bricks got lost in all the clear glitter beige bricks.
I like the finished build, but many details are lost because of the clear bricks. I feel that the white in the eyes gets lost. It is also hard to see all the details in the ears because of how the light flows through the bricks.
NBPM_084 – Glaceon
Glaceon is very similar to Leafeon for a building process, so it was also easy to put together. However, it was really hard to tell the clear glitter blue and the clear glitter light blue apart, so I kept needing to recheck the color and take bits apart because I had picked the wrong color.
Overall I like the original build significantly more. This is because I can’t see the details in the build because the blues are similar.
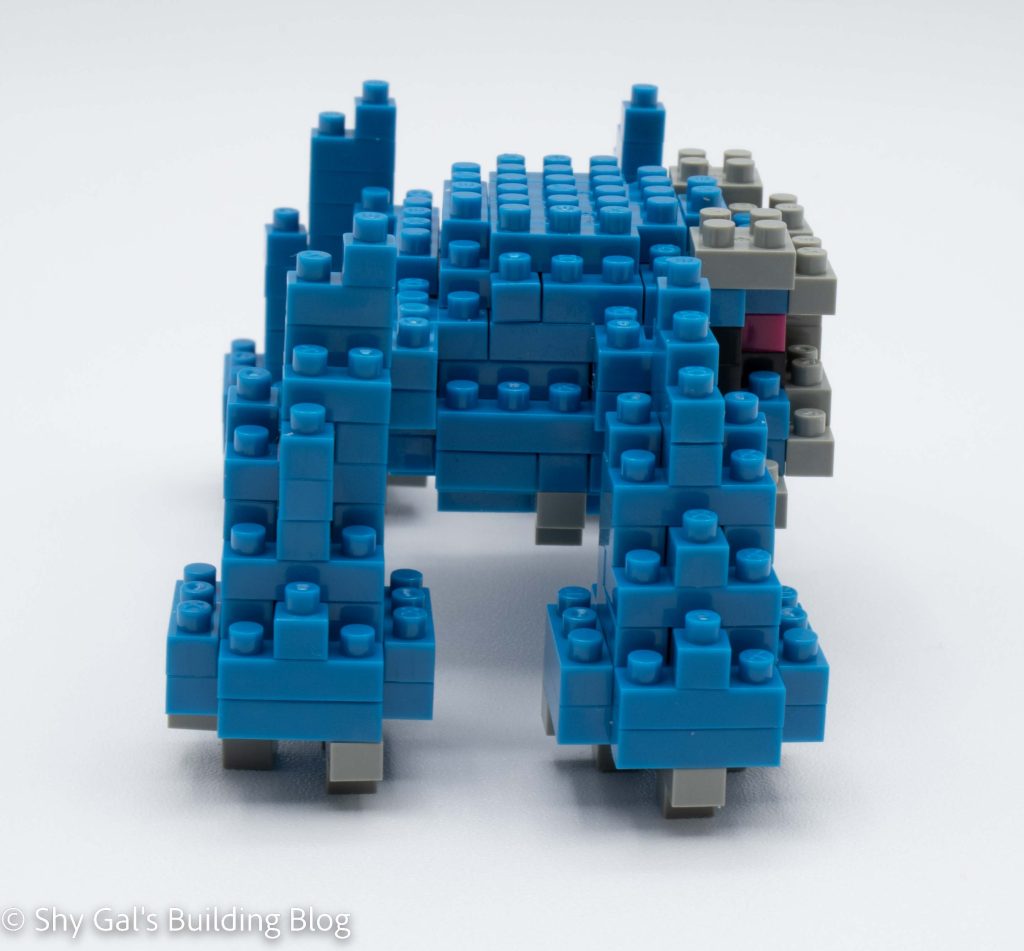
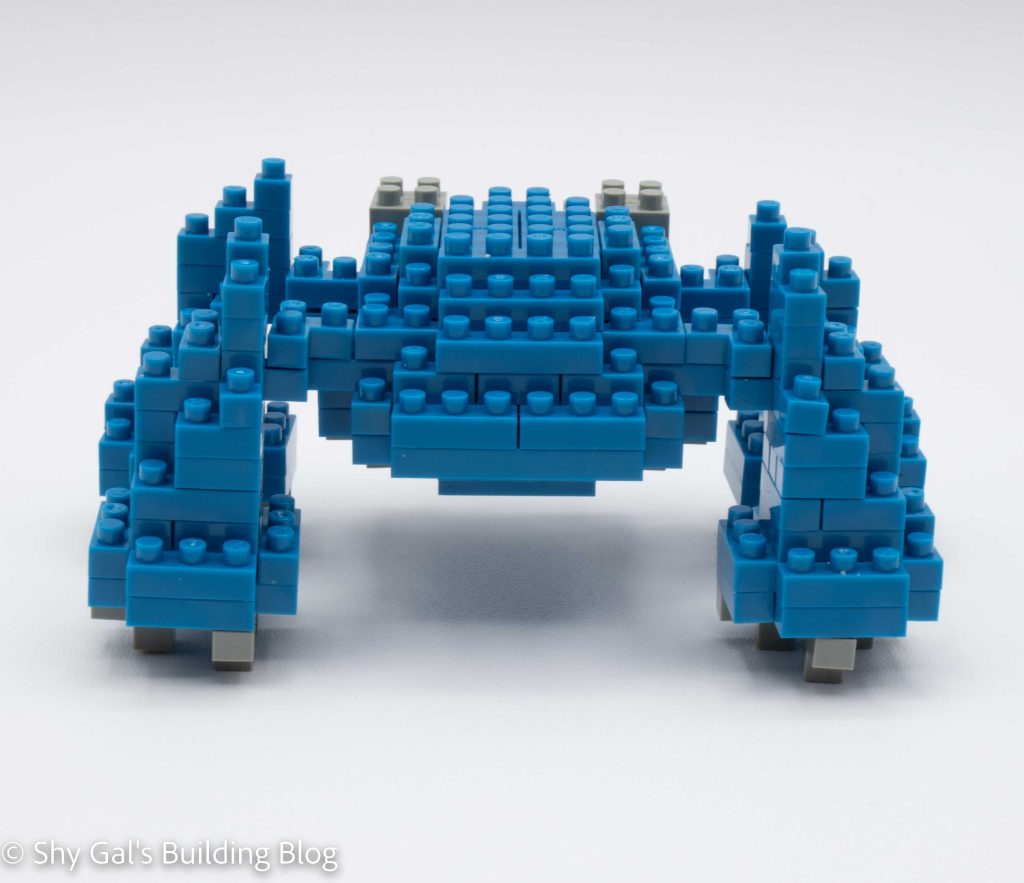
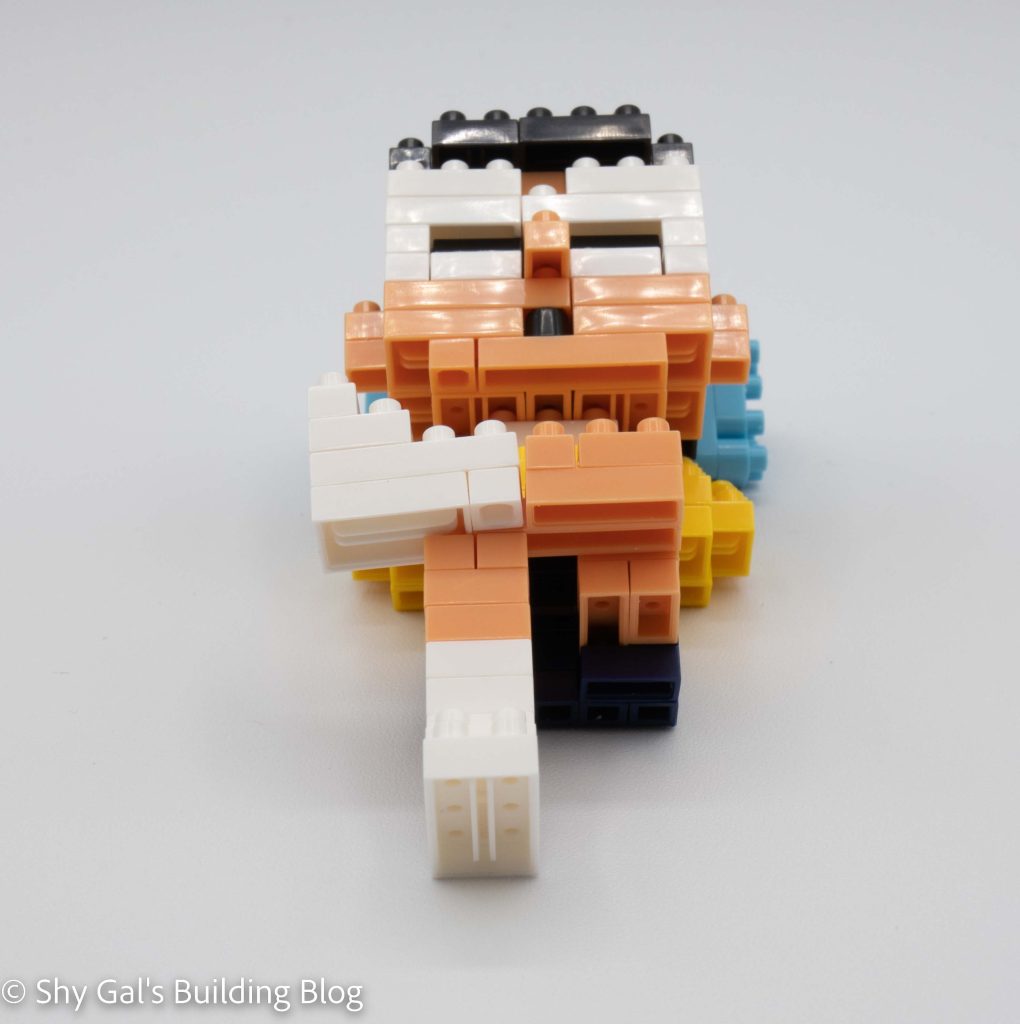
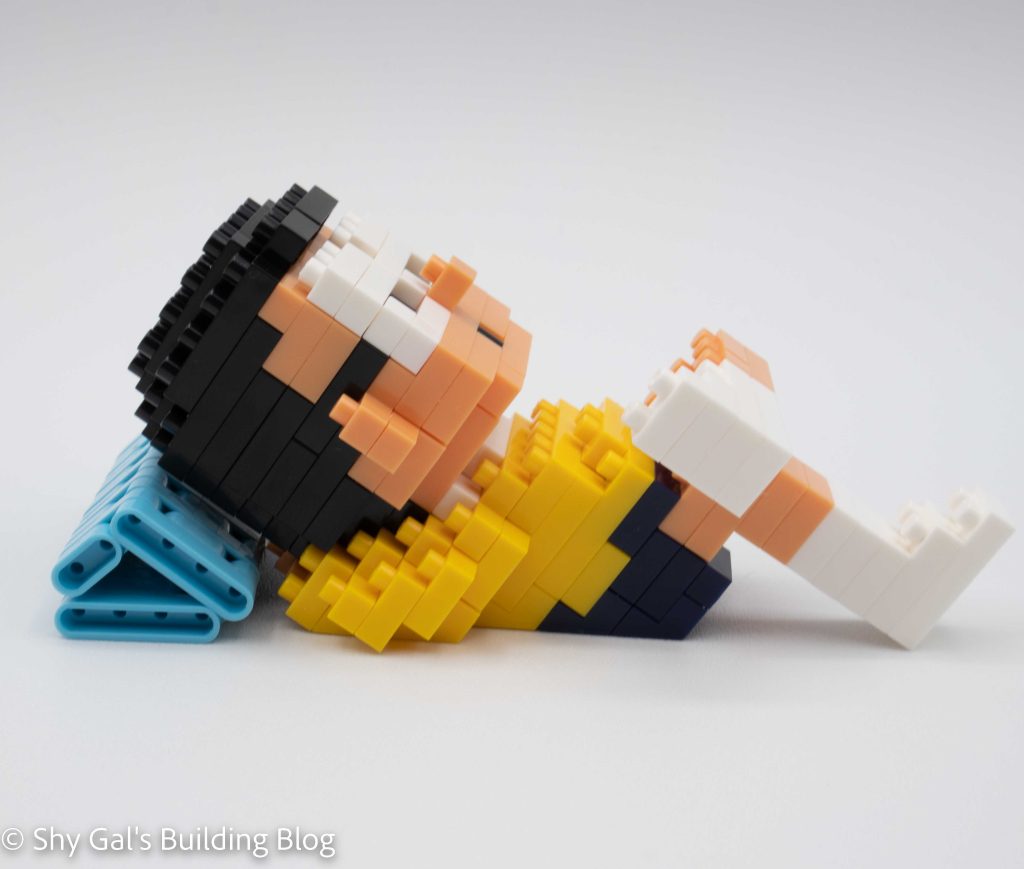
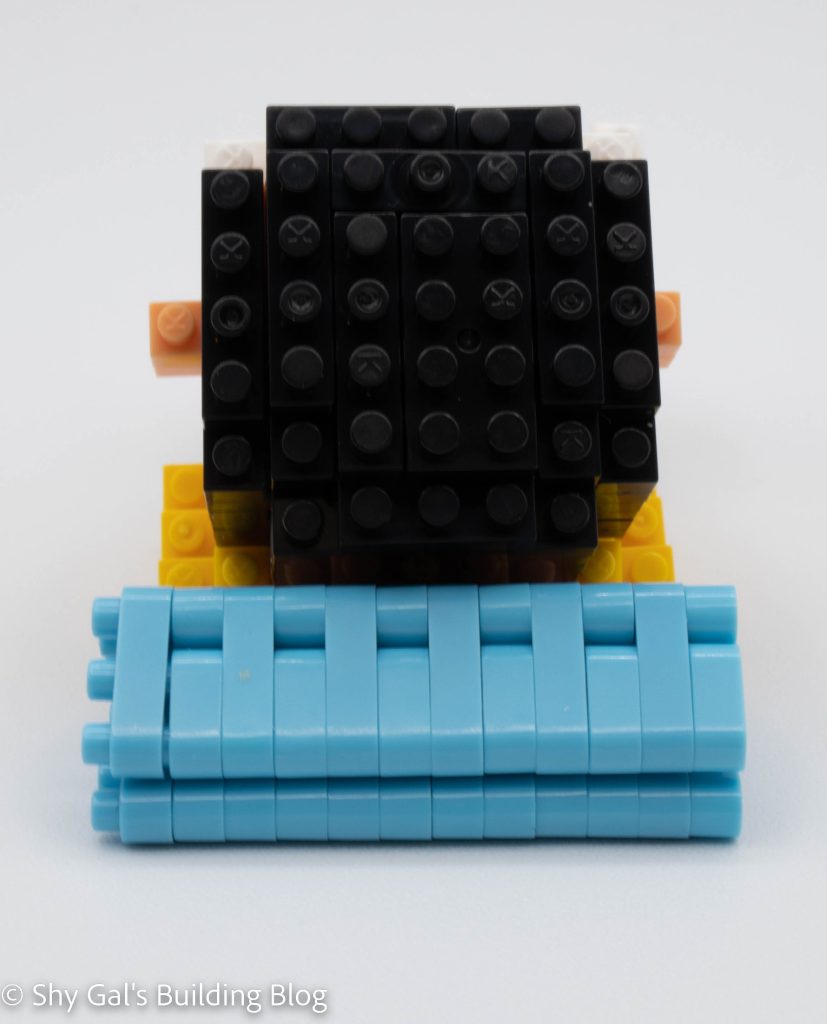
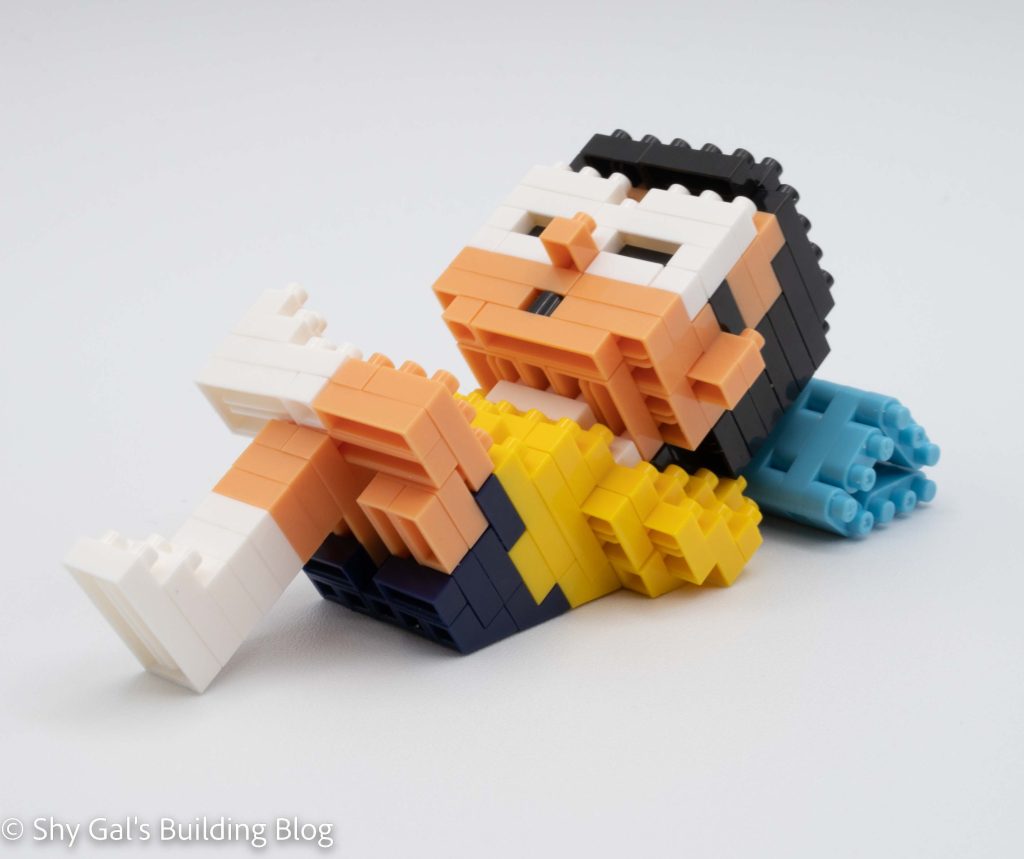
NBPM_085 – Garchomp
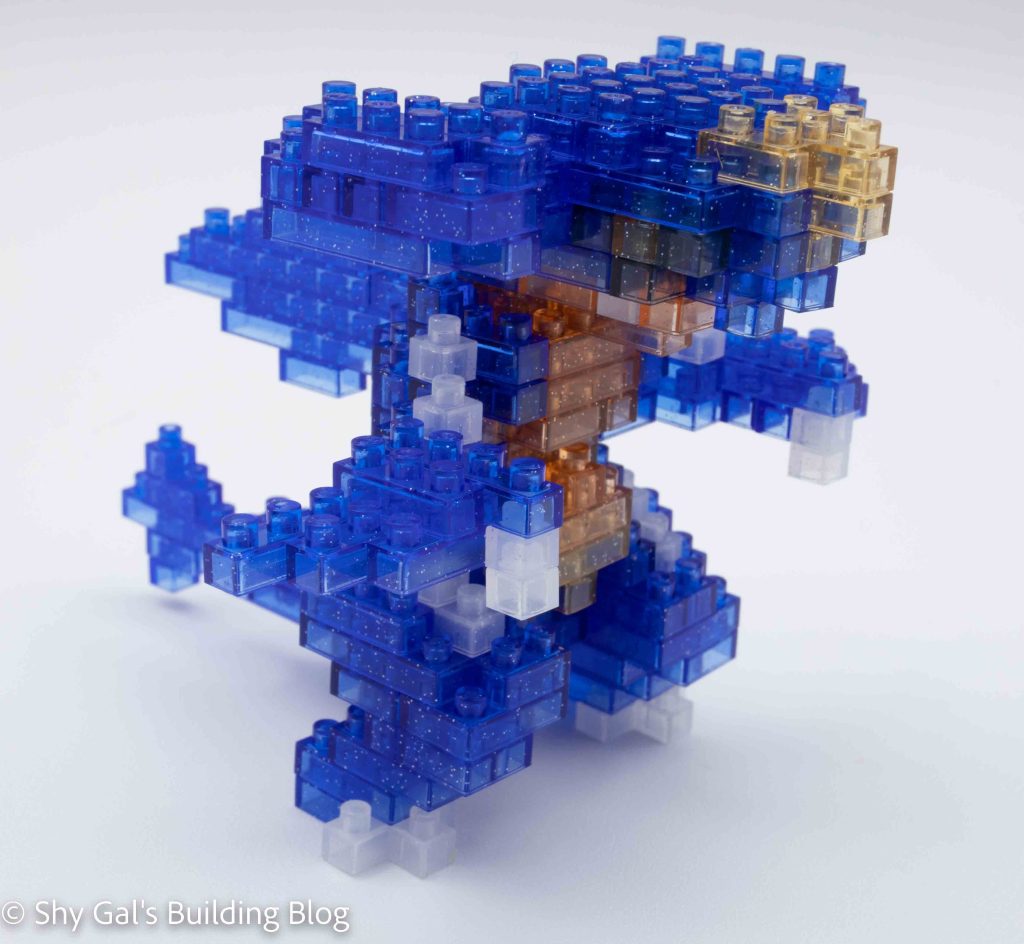
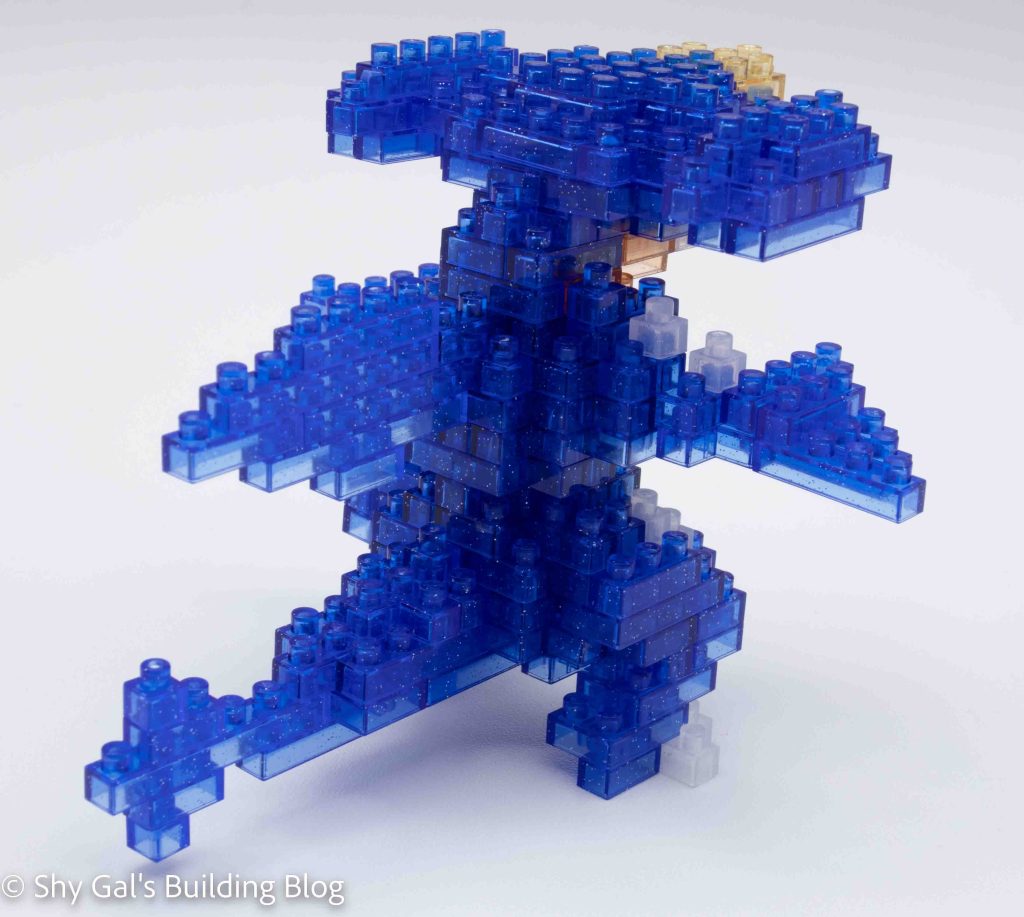
Garchomp is generally a tricky build. This is because so many sections are built unattached to the body and attached once the section is completed. The arms are also easy to pop off as the layers that create the head.
Overall I feel that most of the details of Garchomp are lost with the clear glitter blocks. This is because the body is so dark it seems that all the yellow bricks are much darker, so the color isn’t clear. It is even hard to tell the clear black glitter from the clear dark blue glitter bricks in the actual build.
NBPM_086 – Turtwig
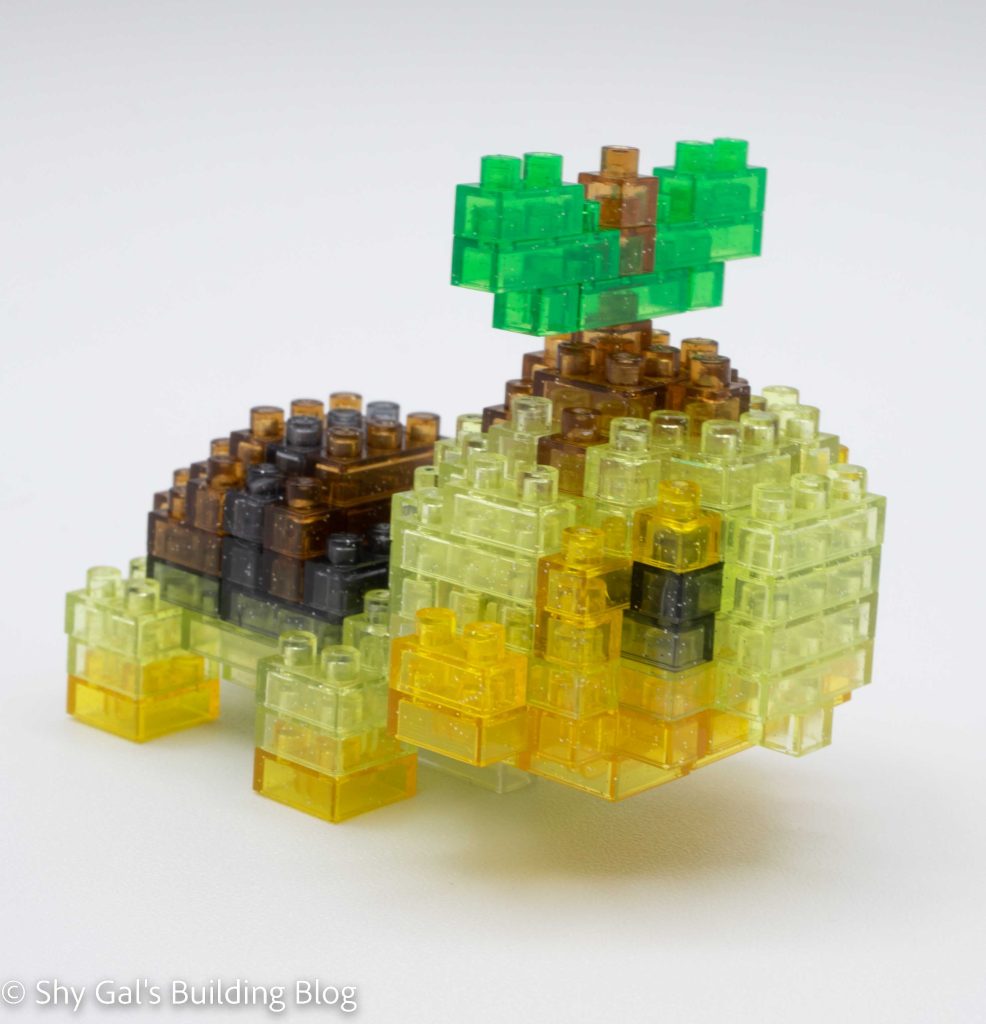
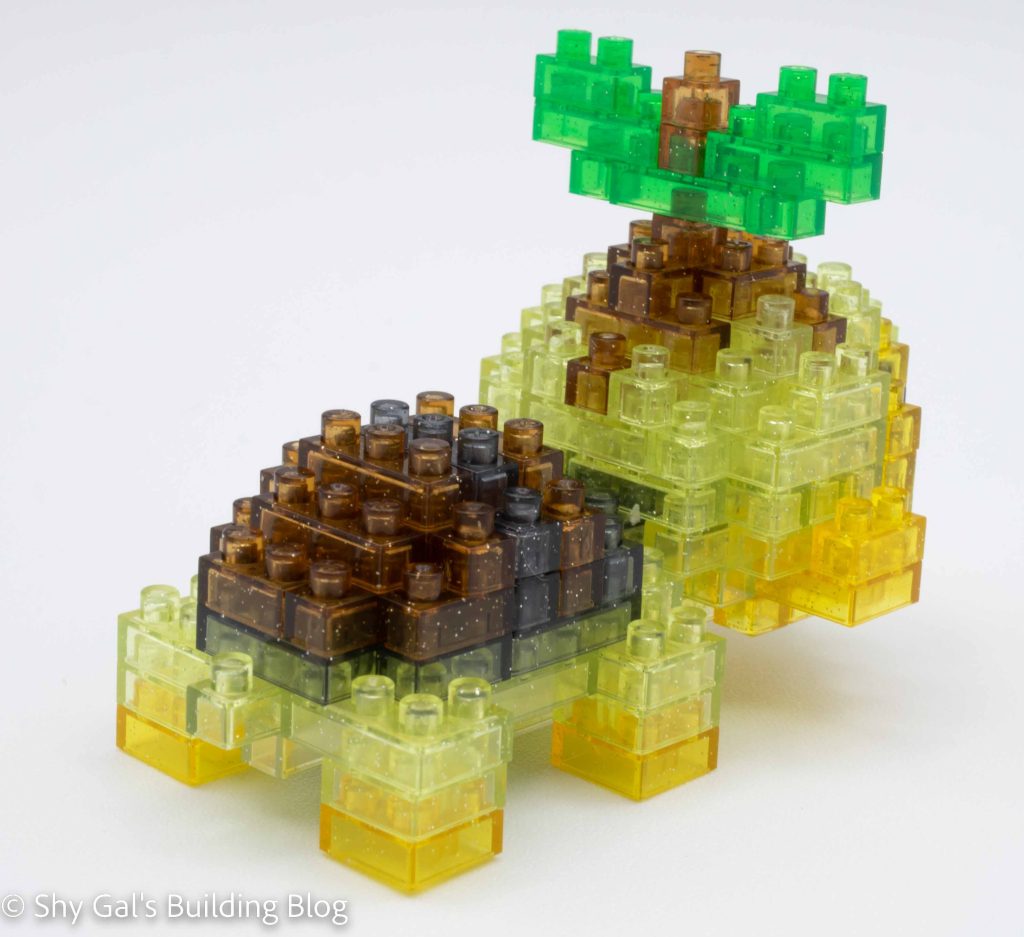
There was no real noticeable difference between building the original Turtwig and the Brilliant Shining ver.
I personally don’t really like the color of the Light Clear Green Glitter bricks. These bricks make up the main body of Turtwig. The color of the bricks is very close to the color from Leafeon, which is supposed to be more yellow.
NBPM_087 – Chimchar
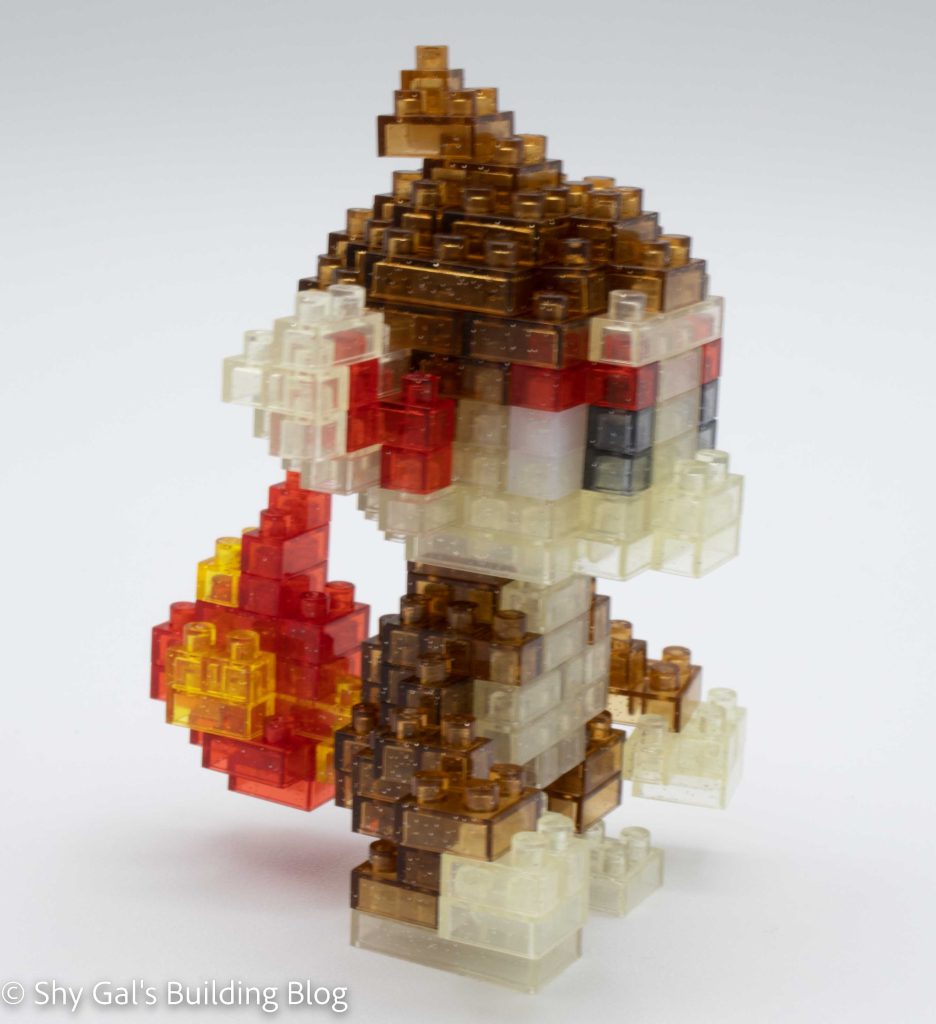
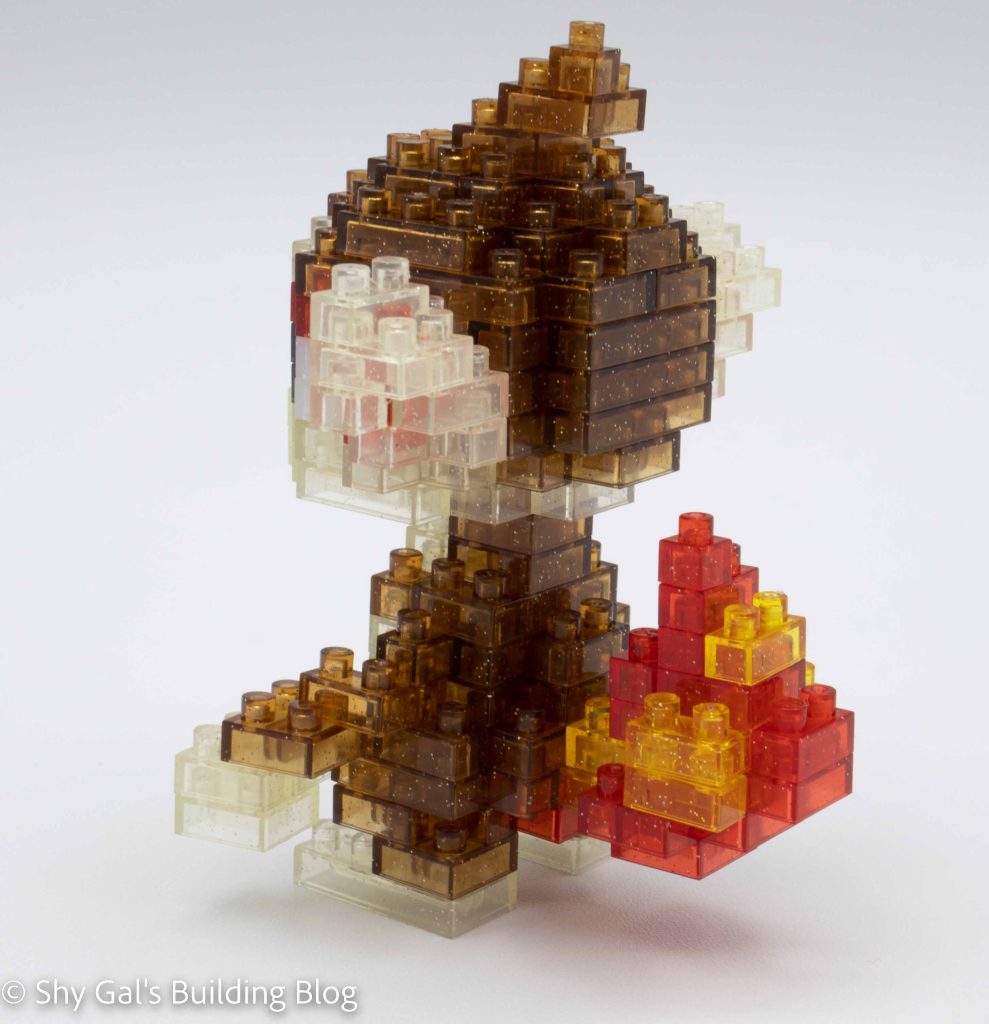
There was no real noticeable difference between building the original Chimchar and the Brilliant Shining ver. The hands are still very fragile.
I don’t really like how the final Chimchar looks. The only way I can describe the final build is fuzzy. There are few places where the clear bricks are backed by a dark color, making the edges and color changes unclear. This makes the entire build seem fuzzy and unclear, which is an effect I don’t care for.
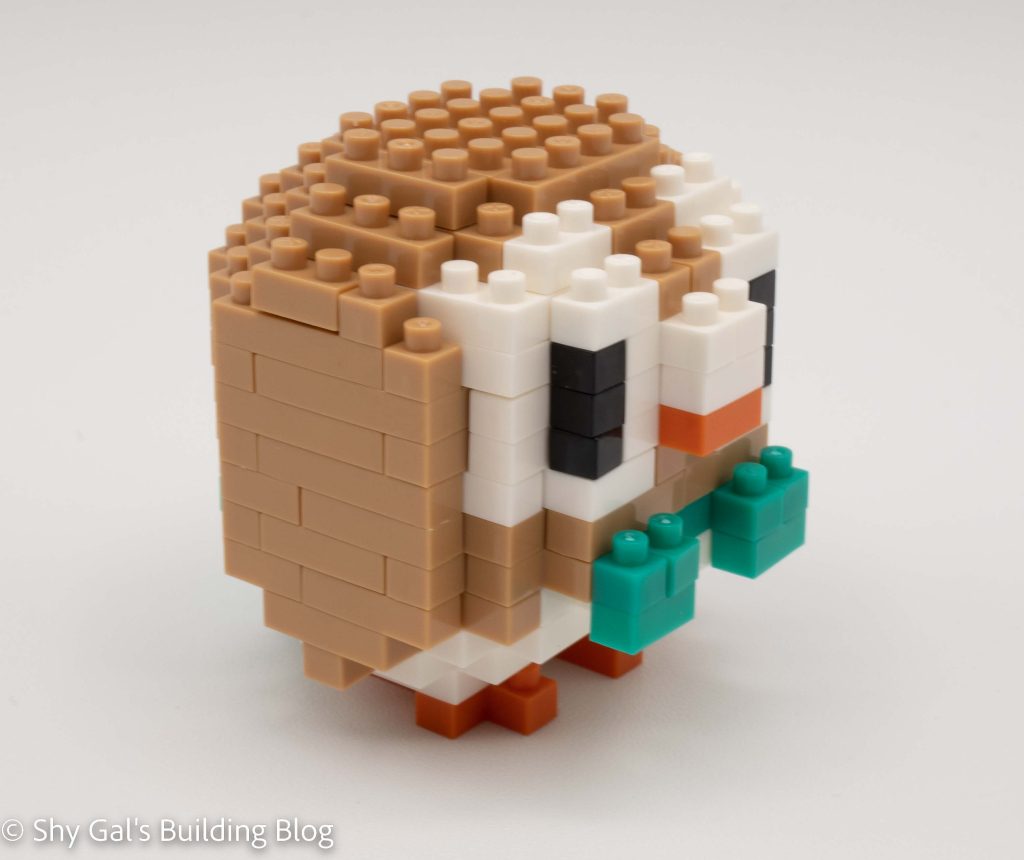
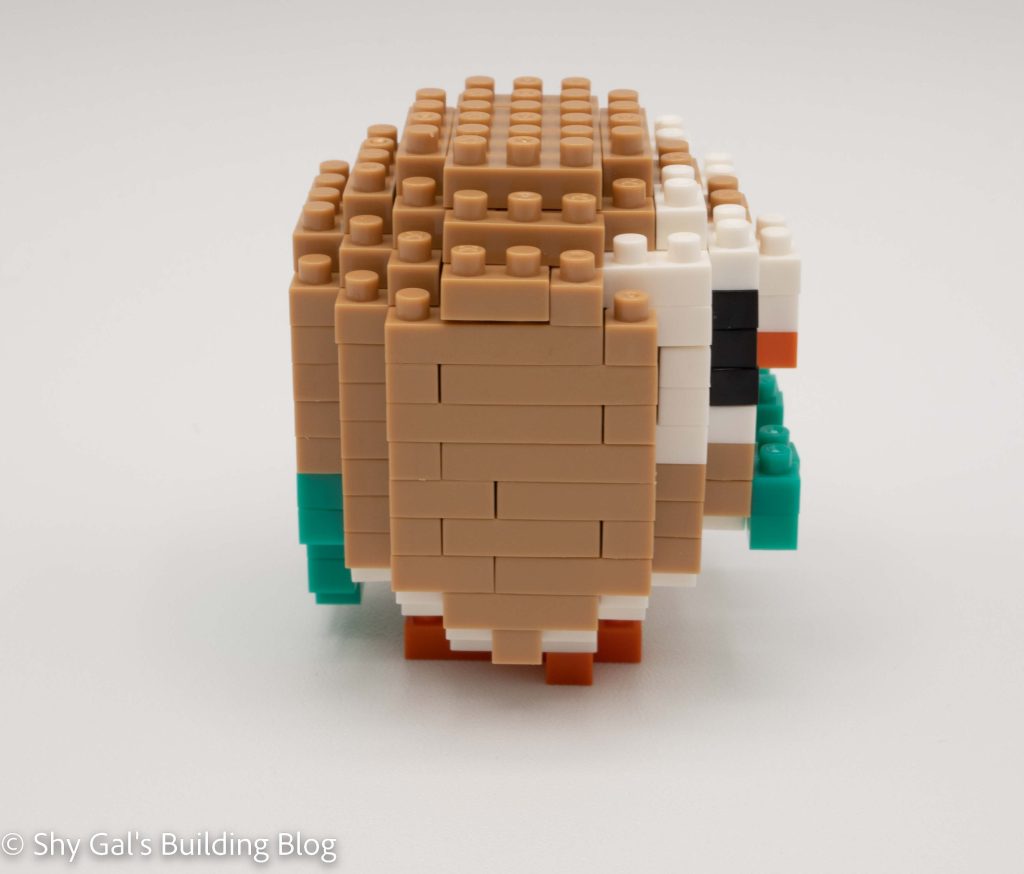
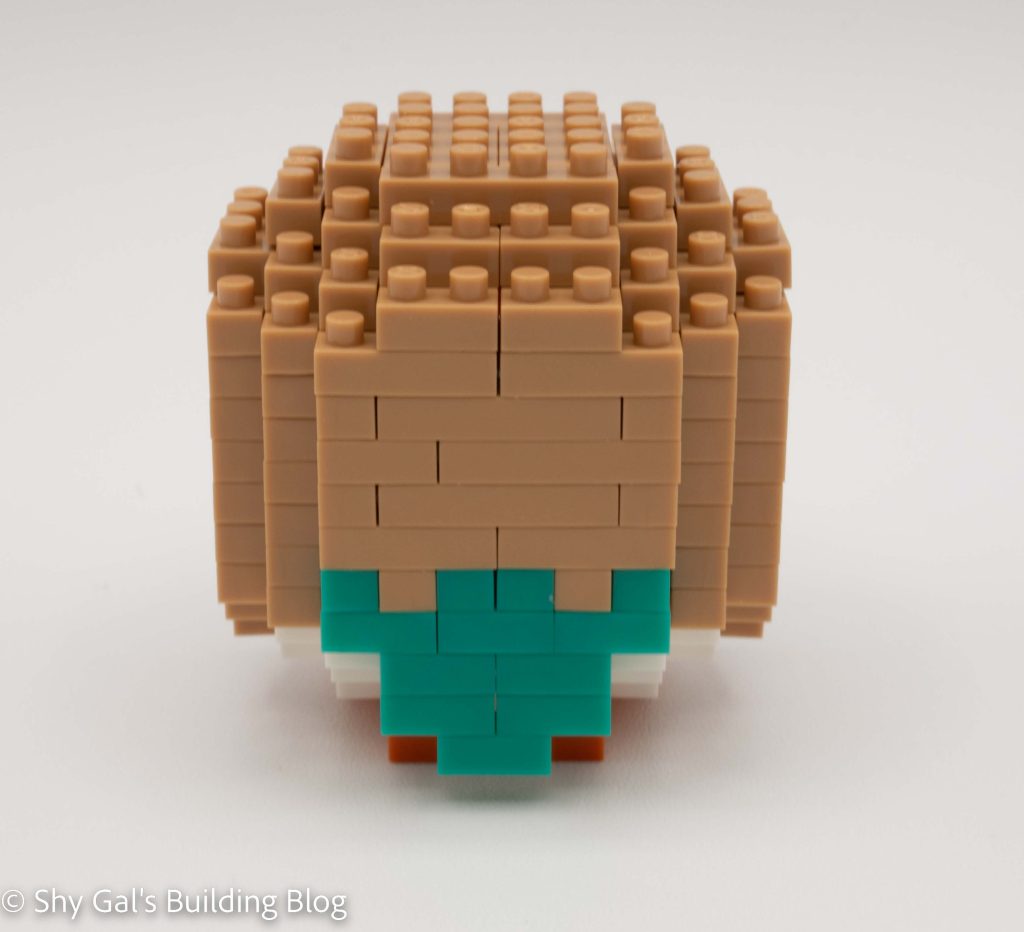
NBPM_088 – Piplup
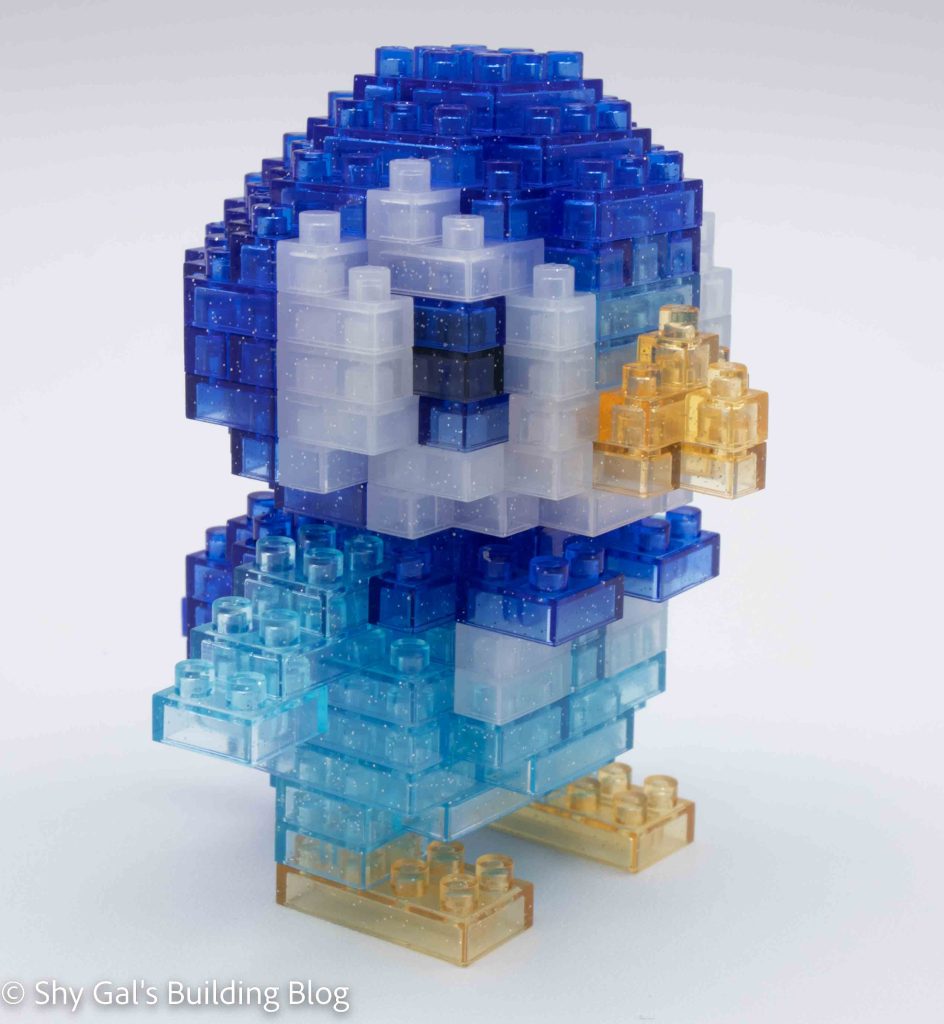
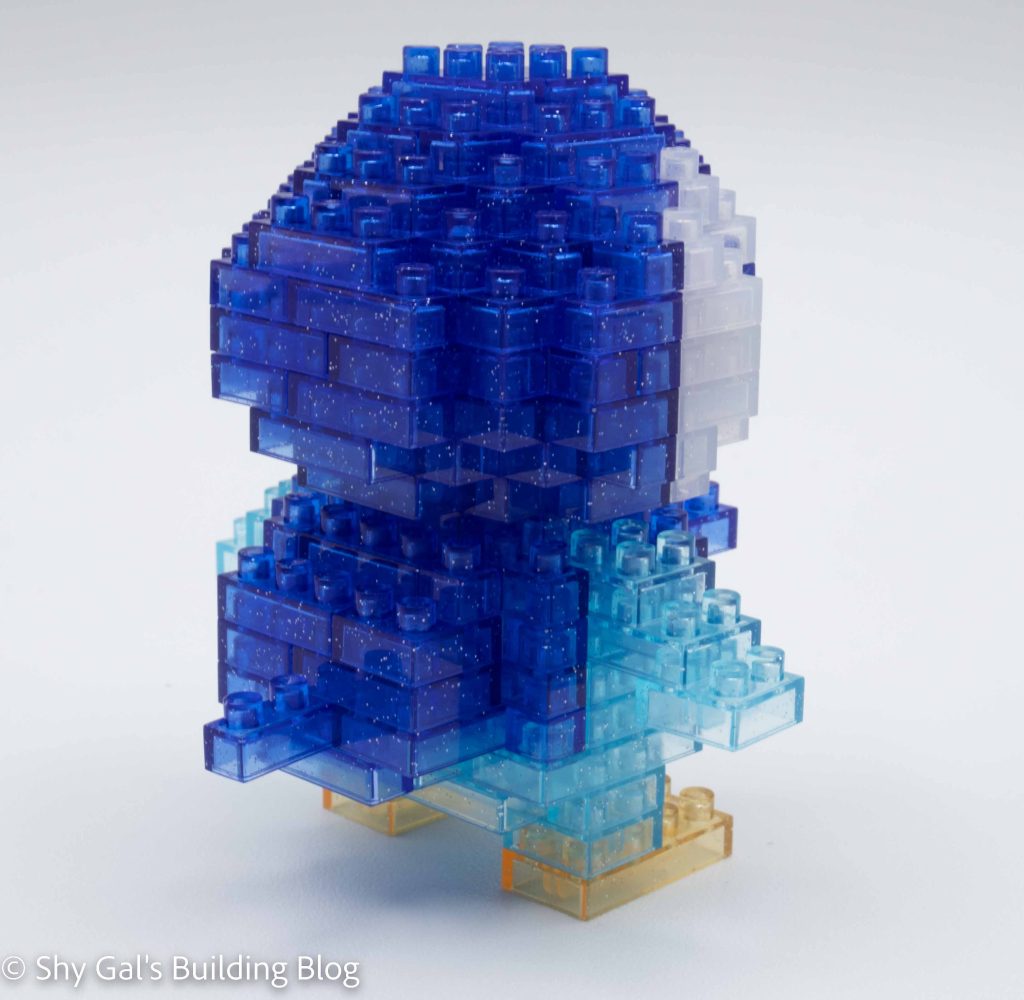
Like Chimchar, I can only really describe the finished Piplup build as fuzzy. This is because of the see-through nature of the bricks. I also think it’s a shame that Piplup’s eyes get lost in the dark blue that makes up most of the head.