Review of nanoblock Pacific White-Sided Dolphin NBC_191

Pacific White-Sided Dolphin build and packaging

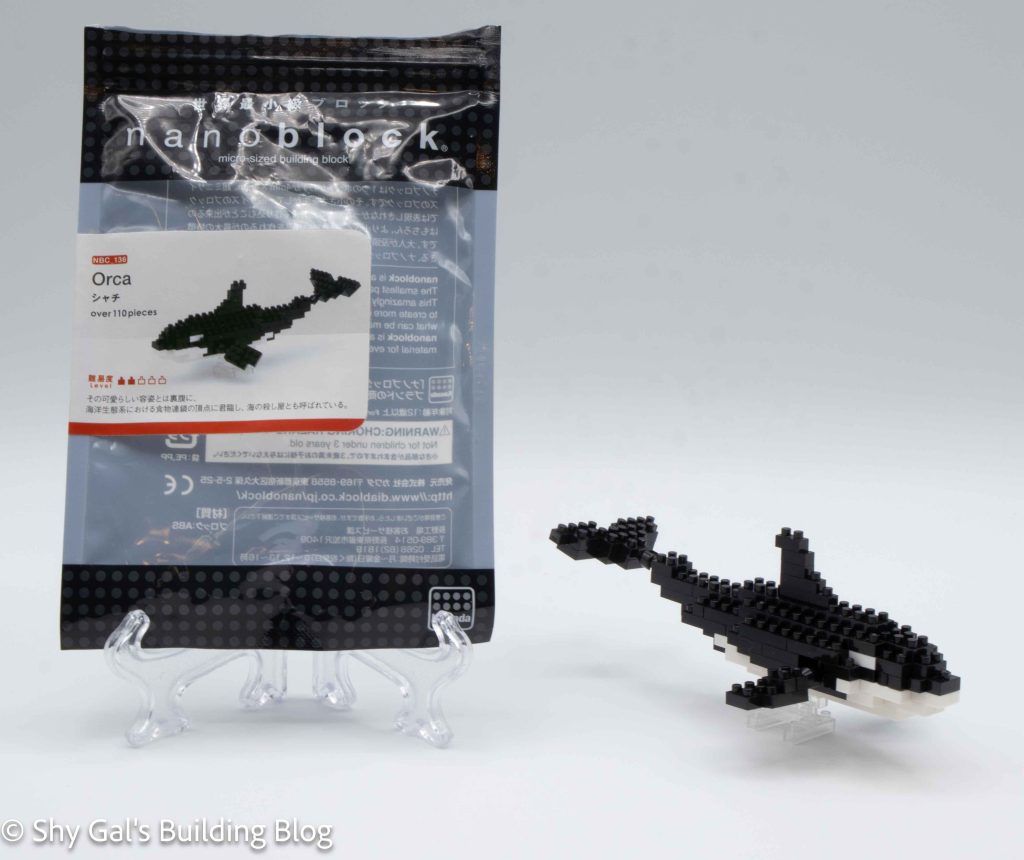
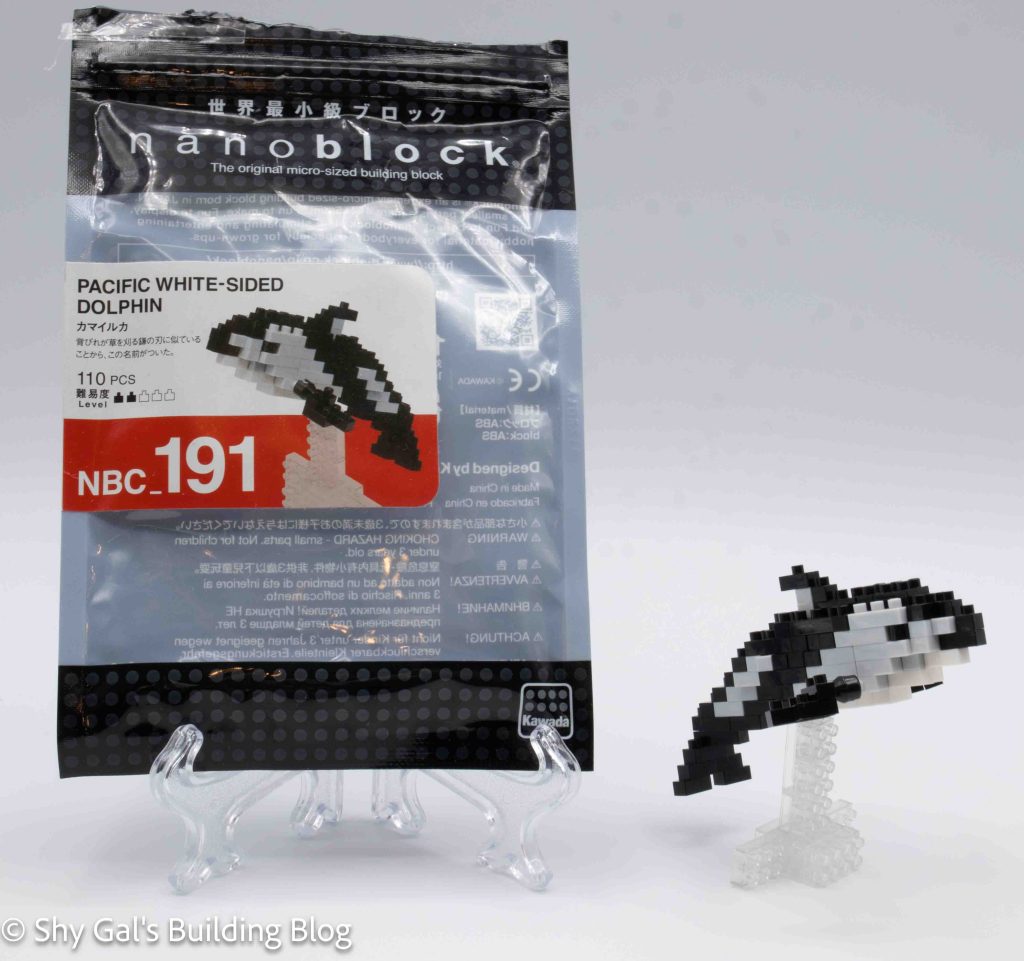
This post is a review of the nanoblock Pacific White-Sided Dolphin build. Pacific White-Sided Dolphin is part of the nanoblock Mini Collection series. Wondering what else is part of the Mini Collection? Click here for a list.

Number: NBC_191 

Number of Pieces: 110

Difficulty Rating: 2/5

Pacific White-Sided Dolphin build front view

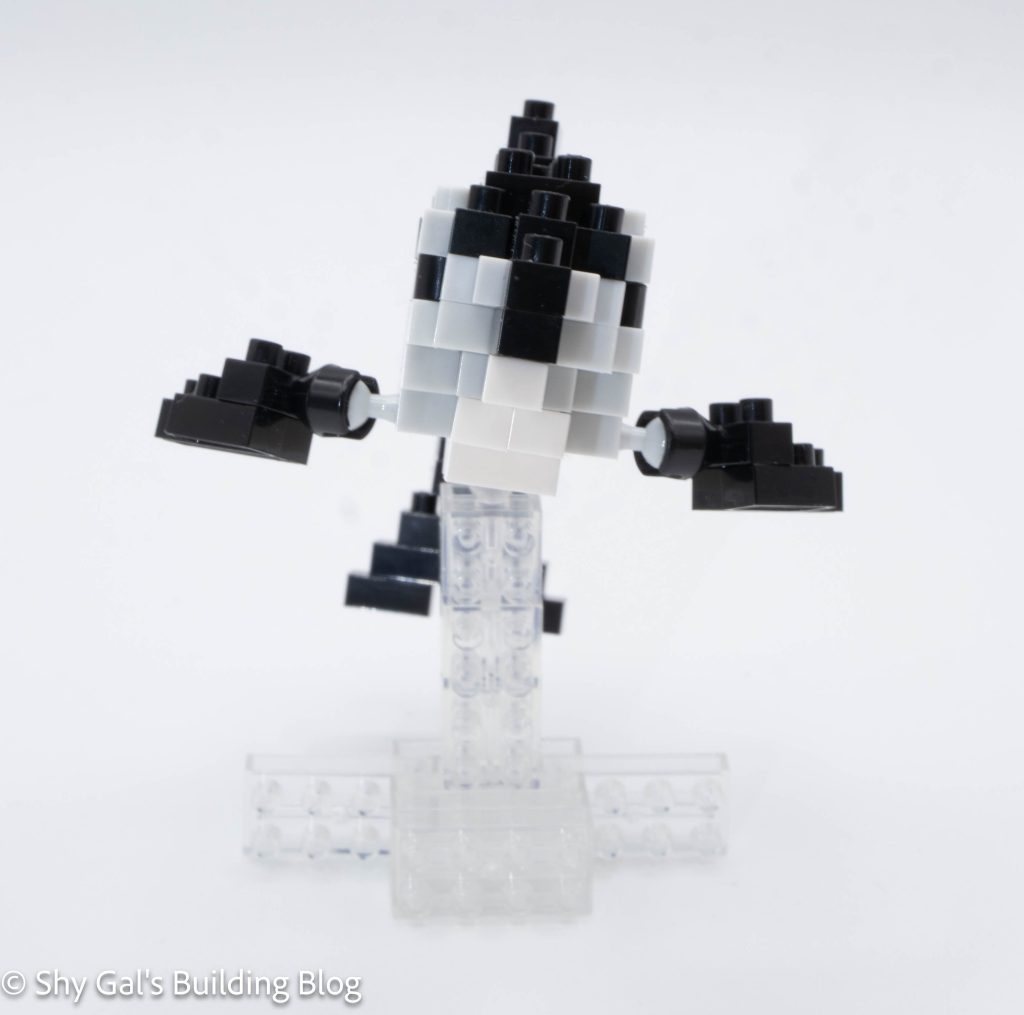
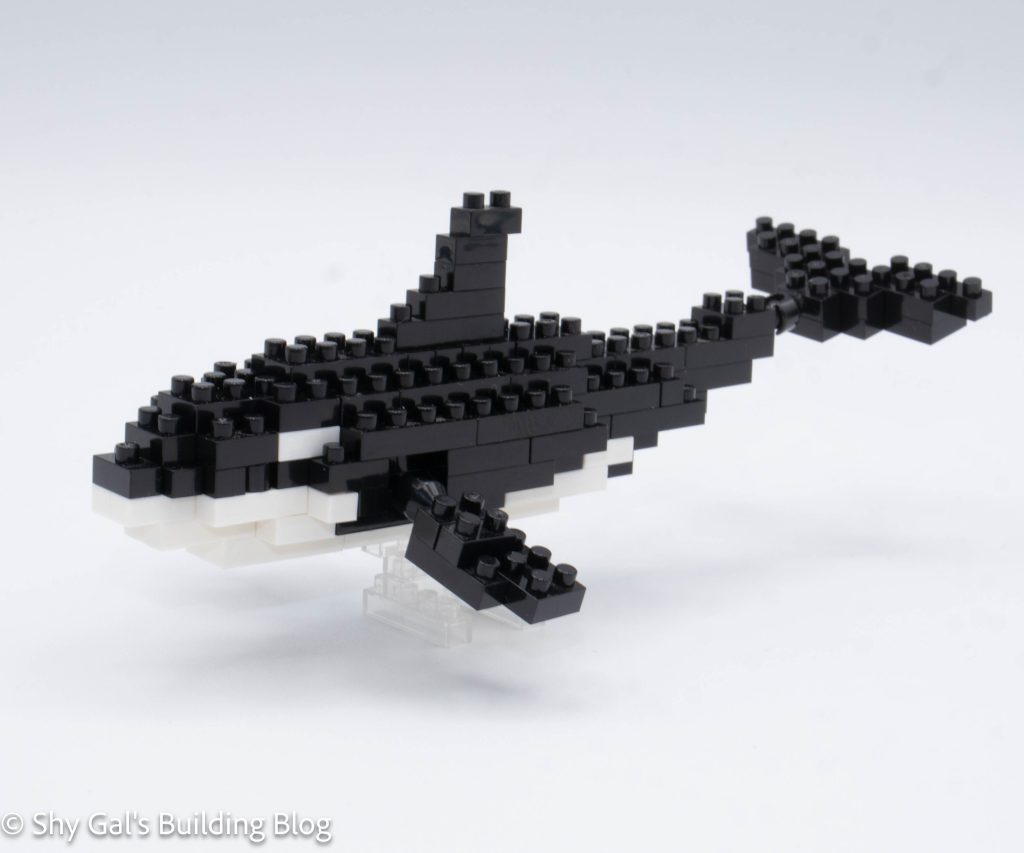
The dolphin is fairly straightforward. The hardest part is telling whether the bricks for the step are white or light grey. Each step in my directions listed what color was needed for each step, so it was easier to tell which color to use.

Pacific White-Sided Dolphin build side view

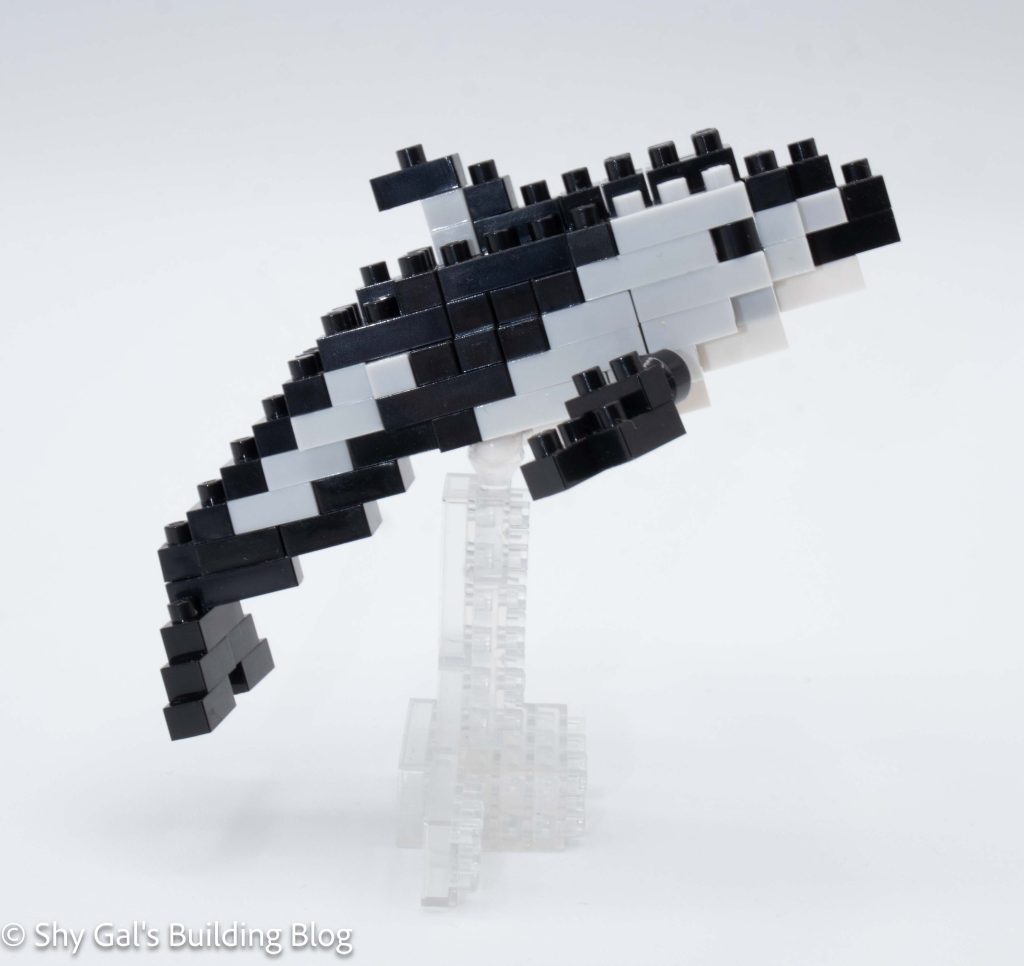
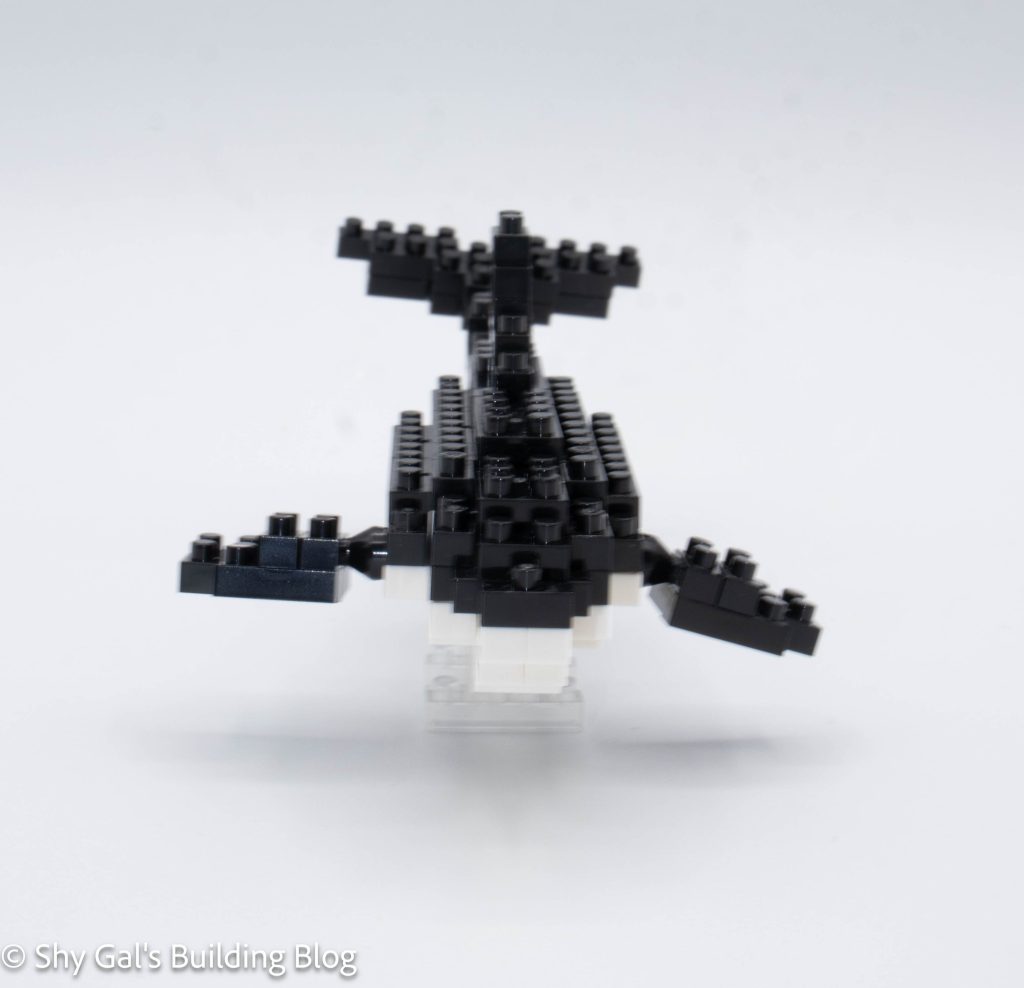
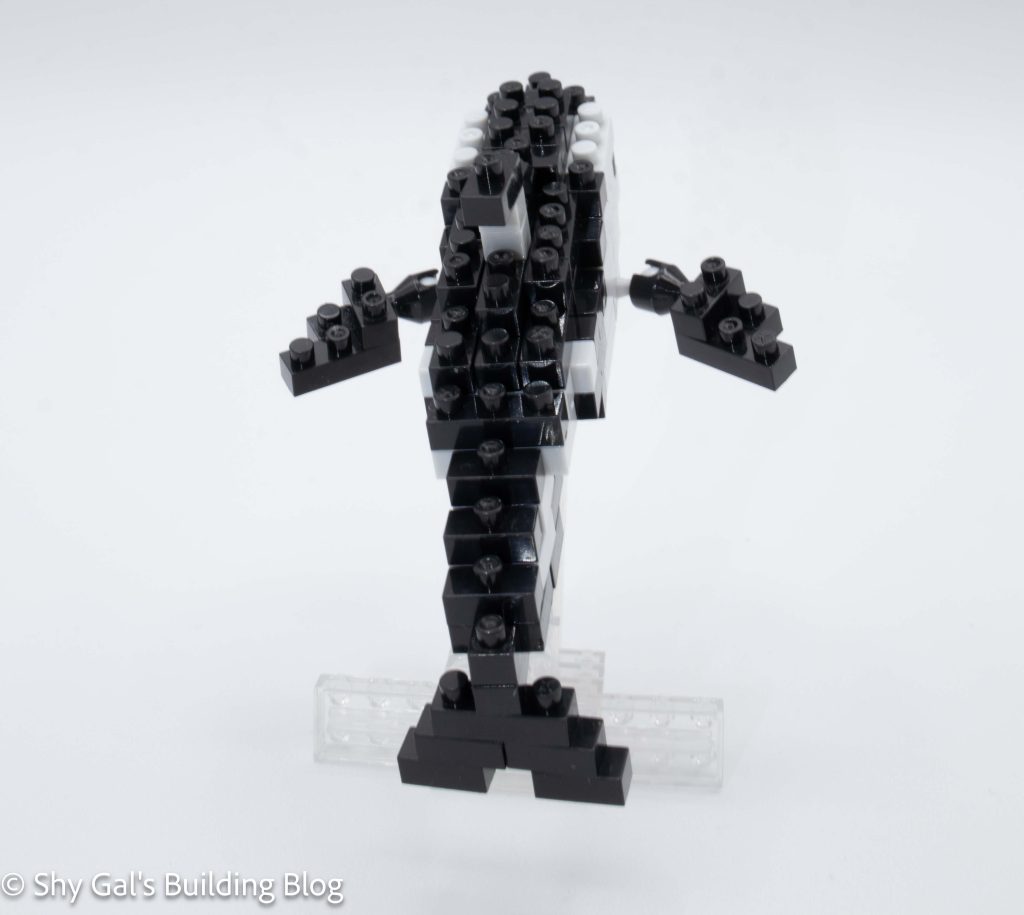
The main body is built in layers. I wasn’t able to build the kit on the nanoblock pad because the base layer has socket joints, so it won’t lay flat.

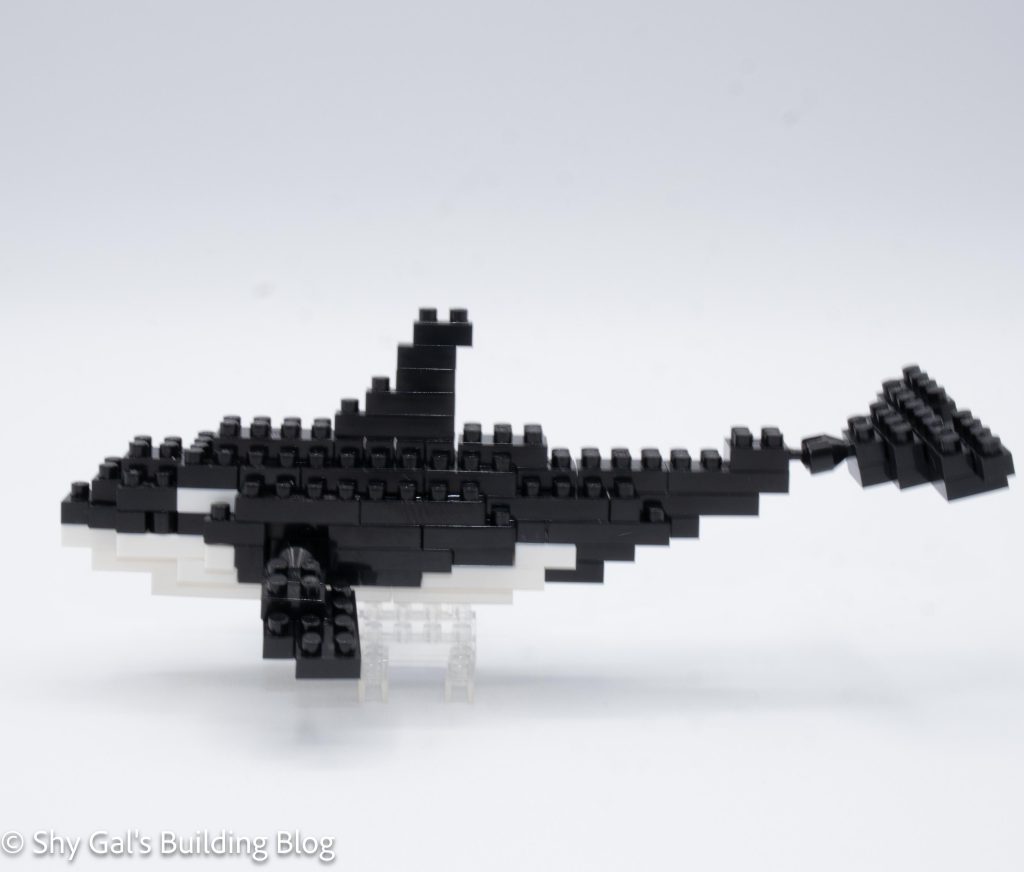
After building the main section, the nose section is built and added. After adding the nose, the back and dorsal fin are added.

Pacific White-Sided Dolphin build back view

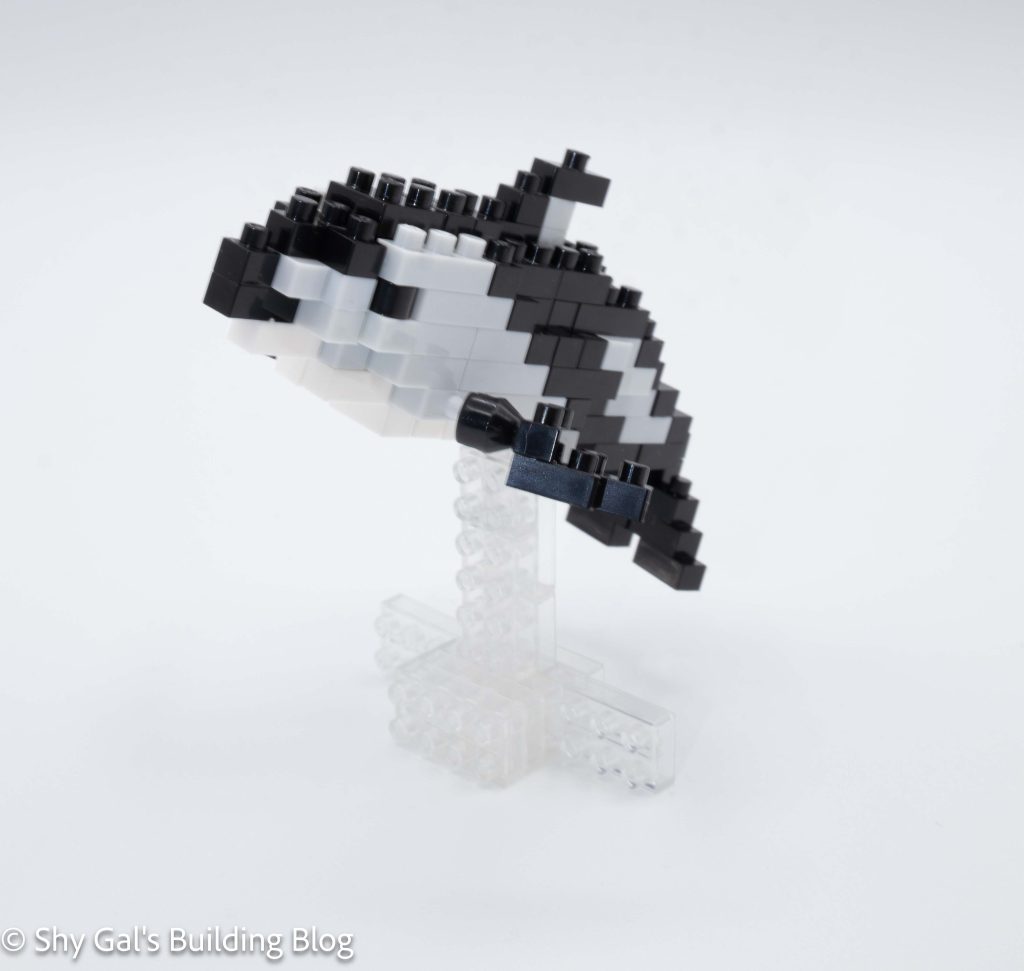
The next step is to add the tail. Getting the tail centered was a bit tricky because one section is much larger than the other section.

The final step is to build the stand and add the fins. The stand is clear and great because it allows the dolphin to be posed in various positions, which is great.

Pacific White-Sided Dolphin build font 3/4 view

Things I liked:

  • I really liked how posable the dolphin is because of the stand it is on

Things I didn’t like:

  • Telling the white versus the light grey was really difficult in the directions

Review of nanoblock Orca NBC_136

Orca build and package

This post is a review of the nanoblock Orca build. Orca is part of the nanoblock Mini Collection series. Wondering what else is part of the Mini Collection? Click here for a list.

Number: NBC_136

Number of Pieces: 110

Difficulty Rating: 2/5

Orca build front view

The build is mostly one large section building the main body of the Orca. It goes up in layers and can be built on the nanoblock pad. The layers create a hollow tube that is closed on the ends. The layers are pretty straightforward, but it is difficult to tell the eyes are rounded bricks, and I spent a lot of time looking for a square piece.

Orca build side view

After building the body, the next step is to build the fins and tail. These are all attached using ball joints.

Orca build 3/4 front view

Things I liked:

  • I like how posable the fins and tail are.
  • I like how there is a clear base, so it looks like the orca is floating

Things I didn’t like:

  • It was really hard to tell that the eyes were rounded bricks

Link to order:

Review of nanoblock Jurassic Park Pteranodon

Pteranodon build and pacakge

This post is a review of the nanoblock Jurassic Park Pteranodon build. Jurassic Park Pteranodon is part of the nanoblock Universal Studios Japan collection. Wondering what else is part of the Universal Studios Japan collection? Click here for a list.

Number of Pieces: 130

Difficulty Rating: 3/5

Pteranodon build

I bought this kit used, so I wasn’t sure if I would get all the parts. While building, I realized I was missing a 4×1 brick. I was able to switch the square 4×1 to a rounded 4×1 brick. The sign that is a stack of bricks with a sticker was also already built with the sticker attached, so I didn’t need to build that.

Pteranodon build head on

The first thing that you build is the body of the Pteranodon. It takes work to make sure everything is lined up and centered. This is because many sections combine even and odd bricks, with the center of the odd being between the studs of the even.

The next step is to build the head. The head is fairly straightforward, with long sections hanging off the head.

Pteranodon build side view

Next is to build the wings. Each wing is a stack of bricks that are only 1 brick thick. The wings are identical but mirrored. The wings are made of rounded bricks so they can move a bit. This is also where I traded out the 1×4 brick that I mentioned earlier.

The last step is to prepare the build for display. First, a tower of clear bricks is added to the bottom of the Pteranodon. Then the sign is built by building a stack of bricks and attaching a sticker. The Pteranodon is held in place by 2 bricks, allowing the dinosaur to be at an angle.

Pteranodon build back view

Things I liked:

  • I like the color of the Pteranodon. It is an unusual color that isn’t used very often.

Things I didn’t like:

  • I don’t like how there are a few random teal blocks that don’t match the rest of the build. The color change is completely random, and it doesn’t add anything to the build

Review of nanoblock Statue of Liberty NBM-003

Statue of Liberty build and box

This post is a review of the nanoblock Statue of Liberty build. The Statue of Liberty is part of the nanoblock Advanced Hobby collection. Wondering what else is part of the Advanced Hobby Collection? Click Here for a list.

Number: NBM-003 

Country: USA

Number of Pieces: 620

Difficulty Rating: 4/5

Statue of Liberty build front view

This build is made up of 2 major parts. There is the base and the actual statue.

The base is extremely straightforward. There are several layers of brown. I like the details of the indents that are on the base.

Statue of Liberty build back view

Building the actual statue is a bit more tricky. Each layer builds the outside rings creating a hollow column. There are bricks hanging out to create the flowing robes. I think that the details on the front and back look really nice.

Statue of Liberty build side view

Then you connect the body of the state to the base. The final steps are to connect the arm and the head. The head looks ok but getting the arm lined up properly due to the directions.

The build also comes with several nanoids. I didn’t include them in my build because I don’t feel like they match the scale.

Statue of Liberty build front 3/4 view

Things I liked:

  • I like the green that they used for the statue

Things I didn’t like:

  • That the tablet the statue is holding is just a loose brick